Woodturning Mesquite Bowl – Back To Basics
 This video is also posted on YouTube, Vimeo, and FaceBook. But, you are already here.
Oh how I love to green turn a wood bowl. This is what attracted me to woodturning in the first place – I wanted to turn wood bowls. Other turning projects are great and interesting but I still love turning bowls.
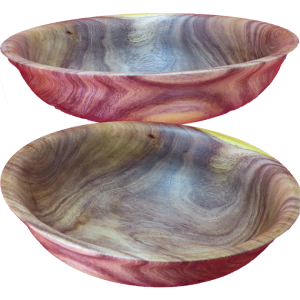
This wood is green or wet mesquite. Since I wanted this to be perfectly round, without any warp, I used a two step process.
First, rough turn the bowl.
- Mount the blank. Options include between centers, screw chuck, and pressing against a faceplate. I rarely screw a faceplate to the wood anymore.
- Get the wood round. This is the hardest turning since the blank is unbalanced. I don’t try to precisely cut a blank round because it limits where I can place the centers and I risk cutting away wood with a band saw that I would want later with the bowl.
- Form the exterior in whatever shape I see inside the wood. Critical features here are a mounting tenon; a clearly marked center usually from the live center but cut in if necessary; and a secondary ledge that visually helps me form the curve of the bowl excluding the tenon.
- Reverse the bowl onto the tenon and hollow ther interior leaving the walls uniform but about 1″ thick for this size bowl. (about an inch per 10 inches of diameter)
- Dry the bowl. I like to seal the bowl but this is optional. I’ve also used shavings, a paper bag amoung other techniques to moderate the speed of drying. I want the wood to dry uniformly through its thickness. If the surface wood dries too quickly, a crack is guaranteed. Still cracks are a risk.
Second, refine the bowl.
- Press the bowl against a faceplate sized to its exterior diameter or at least to its interior diameter. Either works. Refine the tenon and the exterior bottom.
- Mount the bowl into its refined tenon. Refine the exterior and again hollow the interior to its final shape.
- Refine the foot. There are many options to refine the foot: carving, jam chucks, or in this case using Cole jaws on a chuck to hold the bowl while the foot is refined.
- Sand. I always start sanding a medium to large with no greater than 80 grit. Then progress up through the grits. The first grit removes any final ridges, grooves, and other defects(if possible). Subsequent grits only remove scratches from the previous grit. It is false economy to start sanding with too fine grit sandpaper.
- Finish
The Christmas Ornament Challenge will open November 1. Please get your ornament ready for this year’s challenge. It does not have to be fancy or perfect – this bell is neither fancy or perfect. However, it is a nice addition to the Christmas Ornament Challenge.
To enter the challenge, please go to http://www.AsWoodTurns.com/Challenges
Enjoy!
Beautiful bowl – reminds me of Monkey Pod. Gorgeous grain.
But Mesquite is a domestic wood – not rain forest. 🙂
Alan