Woodturning Multi-Axis Pumpkin Box
This video is best viewed right above here. However, in case of difficulty, it is also posted on YouTube and FaceBook.
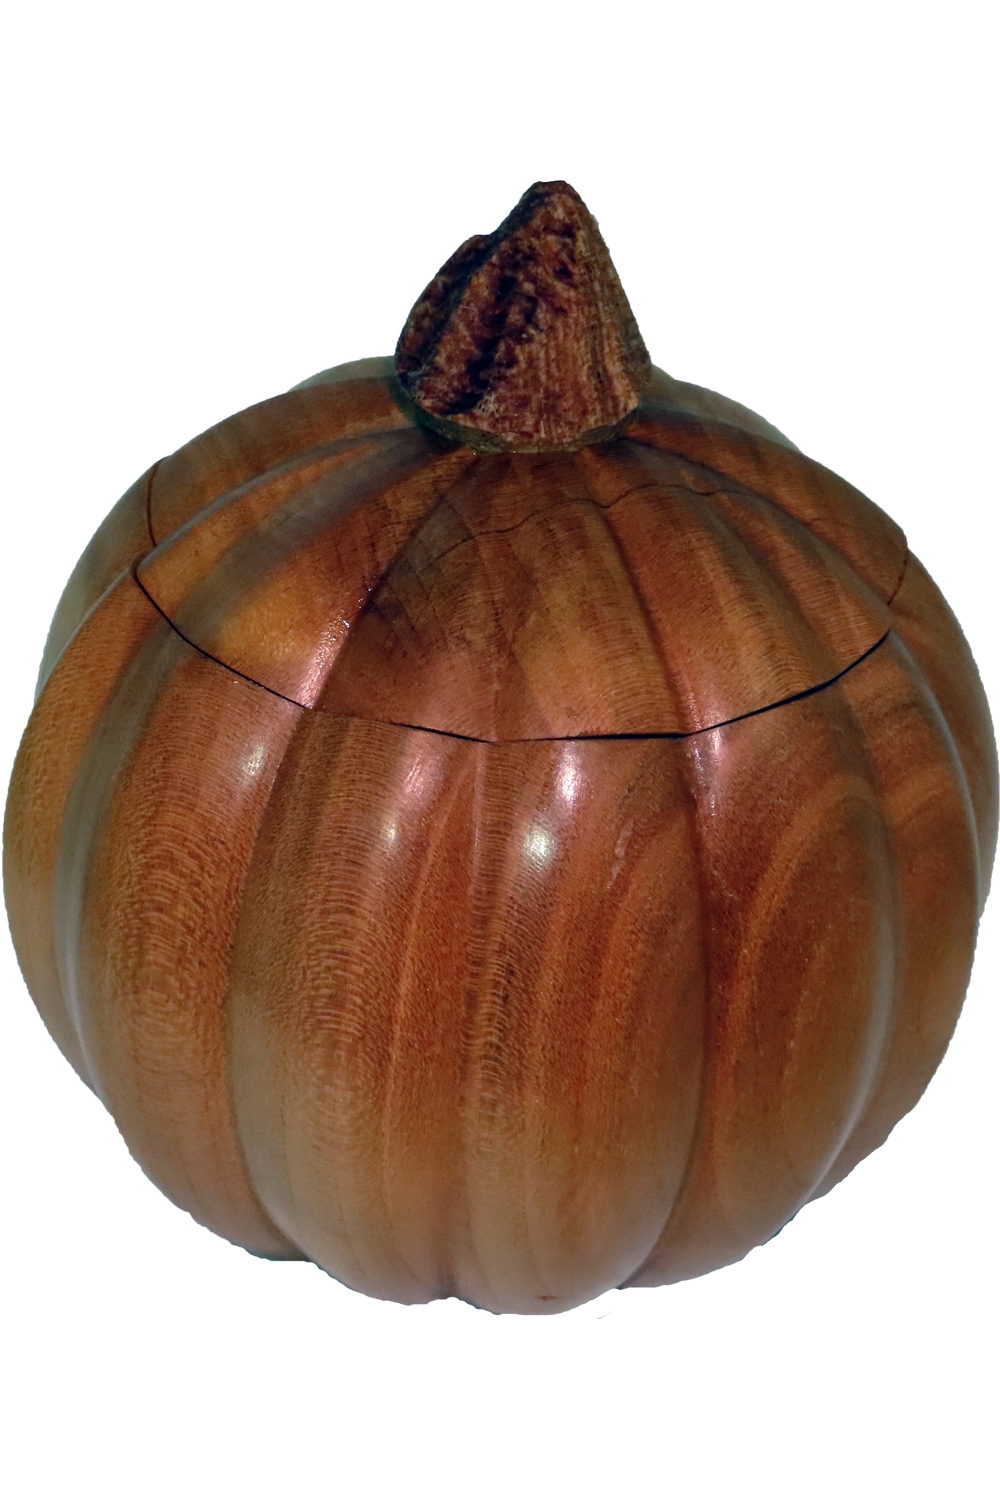
Last year, one of my video projects was a faux sea urchin Christmas ornament. Last week, Tom, a viewer, sent me a picture of a box shaped as a pumpkin that he said was based on my faux sea urchin. I was intrigued. The lid was intersected by the pumpkin ribs. Usually, this would result in fragile short grain tips on the lid or the lid would have to be very small. But no, the ribs were well supported. But how was it done. To save a lot of brain waves, I asked him what process he followed. He was willing to share and welcomed a video for this project.
There are two keys that are very different from most wood boxes:
1) the box joint is at 90 degrees to the tangent at the joint. Usually, box joints are aligned with the turning axis. However, with the joint location the joint is about 45 degrees from the typical.
2) the ribs are cut after the box is hollowed. But to do this, the lid is re-joined with the box using a dowel through the center. The dowel is glued in. Finally, the dowel is drilled out and replaced with the stem.
This pumpkin is about 4.5 inches diameter plus a little more for the stem. The cherry body is finished with shellac friction polish. The stem is mesquite finished with walnut oil.
For a video dedicated to sphere:
Woodturning Perfect Spheres – For Wise Turners
Enjoy!
This year’s Christmas Ornament Challenge opens November 1st. Be ready!