Woodturning The Vase That Refused To Be A Box
 This video is also posted to YouTube, Vimeo, and FaceBook. Best right here!
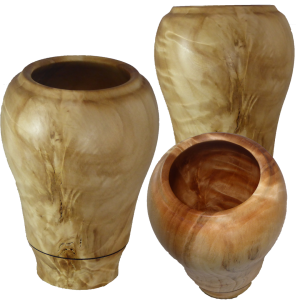
When I received this block of figured poplar at our club’s wood raffle, I immediately thought, Box based on its size and grain orientation.
However, as I started turning and seeing the amazing grain patterns, the wood talked then screamed at me, Vase.
Personally, I think it could have been a beautiful box. But, it is a beautiful vase. I hope you can see the grain patterns in the pictures.
The vase is about 4 inches in diameter and 5 inches tall finished with walnut oil.
The Christmas Ornament Challenge entry is open. Get yours in during the month of November 2018. All crafts are invited. No video required. See http://www.AsWoodTurns.com/Challenges for rules and entry procedures.
Enjoy!
Woodturning Christmas Hand Bell – Laminated and Segmented
 This video is also posted to YouTube, Vimeo, and FaceBook. But you’re already here.
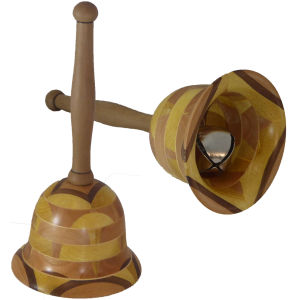
Preparing for this year’s Christmas Ornament Challenge, this hand bell was inspired by a presentation by Robin Costelle at the Segmented Woodturning Symposium.
However, it does deviate from his bell in that it has multiple layers or rings.
The wood in the bell is maple, cherry, walnut, yellow heart, and red oak. The handle is gum. The bell and handle are finished with shellac friction polish.
Strips of wood are first laminated into a solid block. In turn, this block was cut at 45 degree angles to make 2 rings with complementary patterns. After these rings were glued, they were re-sawn into thirds, making six layers. These layers were then stacked alternately and glued with maple veneer in between.
The bell is about 3 inches in diameter and 7 inches tall including the handle.
The Christmas Ornament Challenge entry period is the month of November 2018. All crafts are invited. No video required. See the Challenges page for rules and entry procedures.
Enjoy!
How To Turn Perfect Golden Mean Ellipse Christmas Ornament
 This video is also posted to YouTube, Vimeo, and FaceBook. But you’re already here!
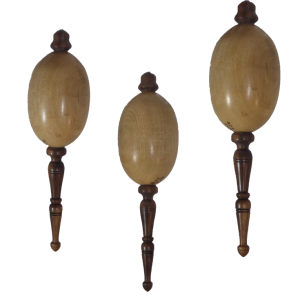
For my first entry to this year’s Christmas Ornament Challenge, I chose a traditional globe style ornament with bottom icicle finial. I wanted the globe to be a perfect ellipse similar to a perfect sphere. Of course, a perfect ellipse would express the Golden Mean.
However, a perfect ellipse does not fit into a regular polygon. Instead, I used the math to graph an ellipse to define the diameter at the middle and three points between the middle and the end. These factors are multiplied by the length of the ellipse cylinder as follows:
00% 0.618 (Middle or maximum diameter)
25% 0.598
50% 0.535
75% 0.409
100% 0.0 (End or minimum diameter)
The finished ellipse persimmon globe is about 2″ x 3″. The top and bottom walnut finials bring the ornament to 8″. All are finished with shellac friction polish.
The Christmas Ornament Challenge entry period is the month of November 2018. All crafts are invited. No video required. See the Challenges Page for rules and entry procedures.
Enjoy!
Woodturning Cross Grain Bowl With Matching Lid
 This video is also posted on YouTube, Vimeo, and FaceBook. But, why go anywhere else?
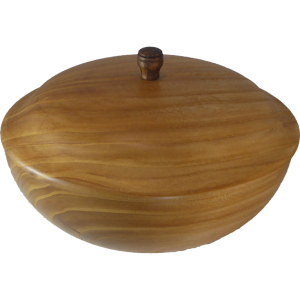
This piece of elm has been underfoot in my shop for several months. Another club member harvested it some unknown time ago and sealed the ends with latex paint. It feels dry.
After rounding, I parted off the top two inches of wood to serve as the lid. Making a lidded bowl is essentially two projects in one: the base bowl and the lid bowl plus a abbreviated finial aka a knob.
My lidded bowl set is about 5 inches in height and 9 inches in diameter finished with walnut oil. The knob is walnut.
Enjoy!
Christmas Ornament Challenge 2018 Announcement
This video is also posted to YouTube, Vimeo, and Facebook. Best right here at the source.
Announcing the Seventh Annual Christmas Ornament Challenge. The challenge is open to all crafts, all materials, collaborations, mixed media, whatever. All skill levels may also enter.
This year NO video is required. However, if you make a video, we’ll cross link to it.
In years past, our international craftspeople could not receive a prize due to the prohibitively high cost of international shipment. Therefore, we’ve discontinued prizes and sponsors. Winners will have bragging rights and international recognition. But the challenge is primarily an opportunity to show our best work and celebrate Christmas.
To enter, make your ornament, take a picture, and upload here to the Challenges page, complete the form. But sure you get a successful confirmation message. The challenge ends midnight November 30, 2018.
After the submission period ends, we’ll produce a video of all entries and ask viewers to select their top choices. After we tabulate your responses, we’ll announce winners in December.
Again. the challenge is open to ornaments from all crafts and combination of crafts.
How To Turn Perfect Hollow Sphere – No Jig
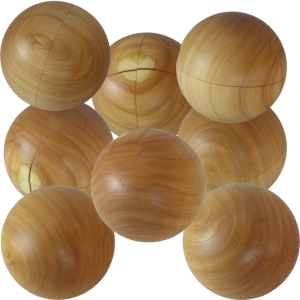 This video is also posted on YouTube, Vimeo, and FaceBook. Best right here!
I’ve turned many spheres and have combined two techniques to make them perfect without a jig. But at a club demo, I was challenged to turn a hollow sphere. My response – sure. But, here’s the proof.
Using the process, I’ve described in previous videos, the only difference is to stretch out the center of the sphere while still an octagon. In this case, I hollowed the sphere, then glued it back together again. Similarly, I could create friction slip joint or thread the joint. After gluing or joining the halves back together, continue the process from where it was interrupted.
My hollow cherry sphere is 3″ diameter. It weights 75 grams = about 63 grams less than a similar solid cherry sphere. The finish is beeswax and mineral oil.
For basic sphere turning, please see my video – Woodturning Essentials – Octagon Method For Perfect Spheres
Enjoy!
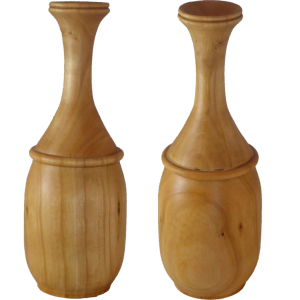
How To Hollow A Tall Thin Cherry Vase
 This video is also posted on YouTube, Vimeo, and Facebook. But you’re already here!
For this video, I wanted to combine two useful techniques. First, to rough turn a green wood project, seal it, and let it dry. The second, to split a project in half and hollow from the middle out to both ends.
I became impatient with the locust wood I had selected. So, I substituted some green cherry that I rough turned into a billet two years ago. So this is a modified first objective.
After roughing out the vase, I parted it in half. Then since it was already dry, I proceeded to hollow both the lower section and the upper section. Since it was now already dry, I then glued the two pieces back together. Then proceeded to finish my cherry vase. My vase is three inches diameter and seven inches tall finished with walnut oil.
Enjoy!
Poplar Dinner Plate For Club Challenge
 This video is also posted to YouTube, Vimeo, and FaceBook. Best right here!
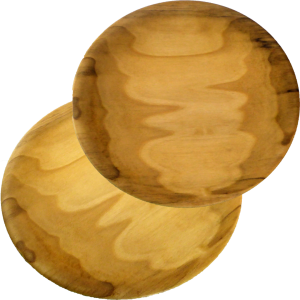
I turned this dinner plate for our club challenge. Although I thought I had selected rough sawn red oak, it is actually poplar when smoothed out.
My eight inch plate is finished with walnut oil so that it could be used for food. Walnut oil can also be renewed easily after use. I did my best to make a smooth bottom and a minimal mounting mortise. I do not appreciate turnings with a deep mortise on the bottom. To me, they seem heavy and clunky since the wall thickness is excessive.
Enjoy!
This “Columbus Egg” Stands Up When It Spins
 This video is also posted to YouTube, Vimeo, and Facebook. Best right here!
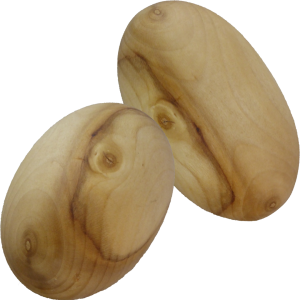
According to Wikipedia, “An egg of Columbus or Columbus’ egg refers to a brilliant idea or discovery that seems simple or easy after the fact. The expression refers to an apocryphal story in which Christopher Columbus, having been told that discovering the Americas was inevitable and no great accomplishment, challenges his critics to make an egg stand on its tip. After his challengers give up, Columbus does it himself by tapping the egg on the table to flatten its tip.
While that story describes many other discoveries, it definitely applies to this egg. I did not know that I could spin an egg and have it stand up. However, after having been introduced to the concept and told the simple formula… Well, duh! Anyone can do that.
For this woodturned egg, the secret is to apply the golden mean. Turn a cylinder and measure the diameter. Mark the length to be 1.618 times the diameter. Then gently round over the ends.
I chose walnut oil for a finish since it will take abuse and can be renewed after children have had their fun.
My egg is about 3 inches long of Linden wood. I’ll let you figure out the diameter. Duh!, anyone can turn this egg.
Enjoy!
DIY Flange Nut Alternative With Set Screw
 This video is also posted to YouTube, Vimeo, and FaceBook. Best right here!
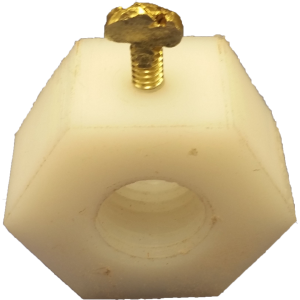
I asked other woodturners in my club how to solve a particular problem. Several had machining background. Their recommendation was to obtain a flange nut then drill and tap for a set screw in the side. Essentially, a flange nut incorporates a washer with a nut as one unit. The set screw locks it in place on the bolt. A brass or nylon set screw does the job without damaging the threads on the bolt.
The only problem was that 1″-8 tpi flange nuts are rare and expensive. I decided to make my own from HDPE, High Density PolyEthylene using a 1″ spindle tap. But instead of a round portion for the flange, just make the nut oversized in a hex nut shape.
I could not find a brass set screw locally. Instead I obtained a brass bolt and hammered the head into sort of a thumb screw shape.
As you’ll see in the video, this worked out well. Now I will used the flange nut to see if an experiment with my threading jig works. More on that later.
Enjoy!