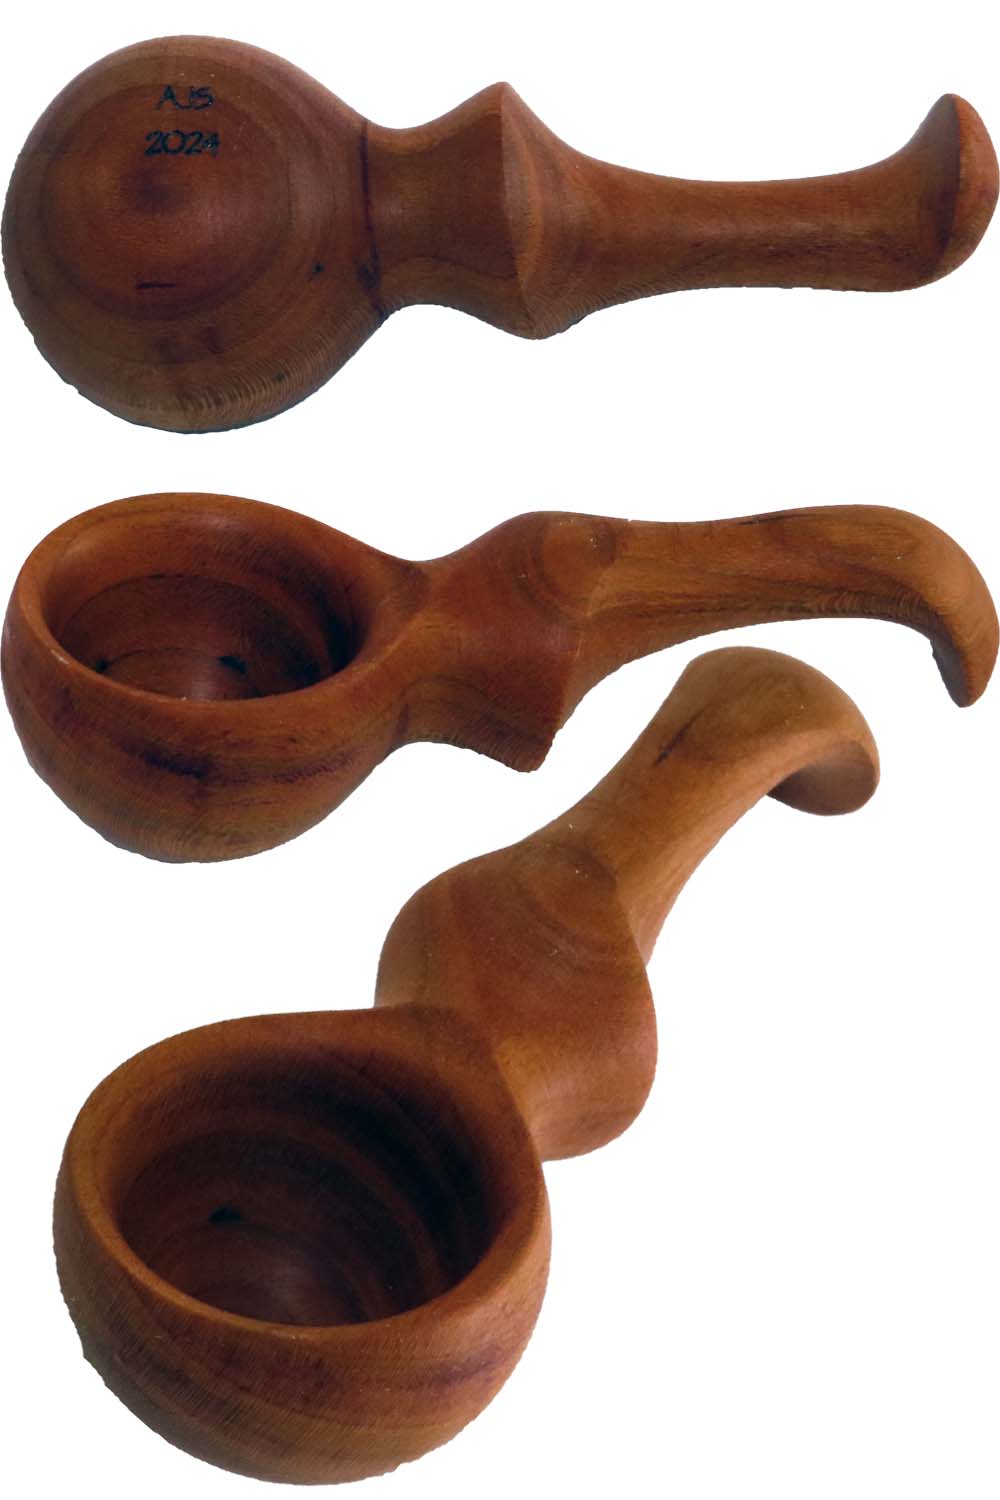
Woodturning Eccentric Single Piece Scoop
In case of video difficulties, this post is also posted on YouTube and FaceBook.
Inspired by a fantastic demonstration at the Portland American Woodturning Symposium by Eli Avisera.
This is an eccentric or multi-axis small scoop from a single piece of wood. It requires turning a sphere on the end of a spindle, then offsetting the axis to turn the main handle, then returning to the original axis to finish the handle. At long last, hollow the sphere to form the bowl of the scoop.
The octagon method for turning a sphere helped.
I also 3D printed a couple of accessories: a cup to receive the sphere while the handle was offset; and, a bushing or sleeve to hold the sphere while being hollowed.
3d Prints shared on www.Printables.com
Sleeve bushing – https://www.printables.com/model/904340-woodturning-bushing-to-make-scoops
Live Center cup faceplate – https://www.printables.com/model/904599-cup-center-for-live-center
Size: about 3.5″ x 1.5″. Finished with beeswax and mineral oil.
Enjoy.
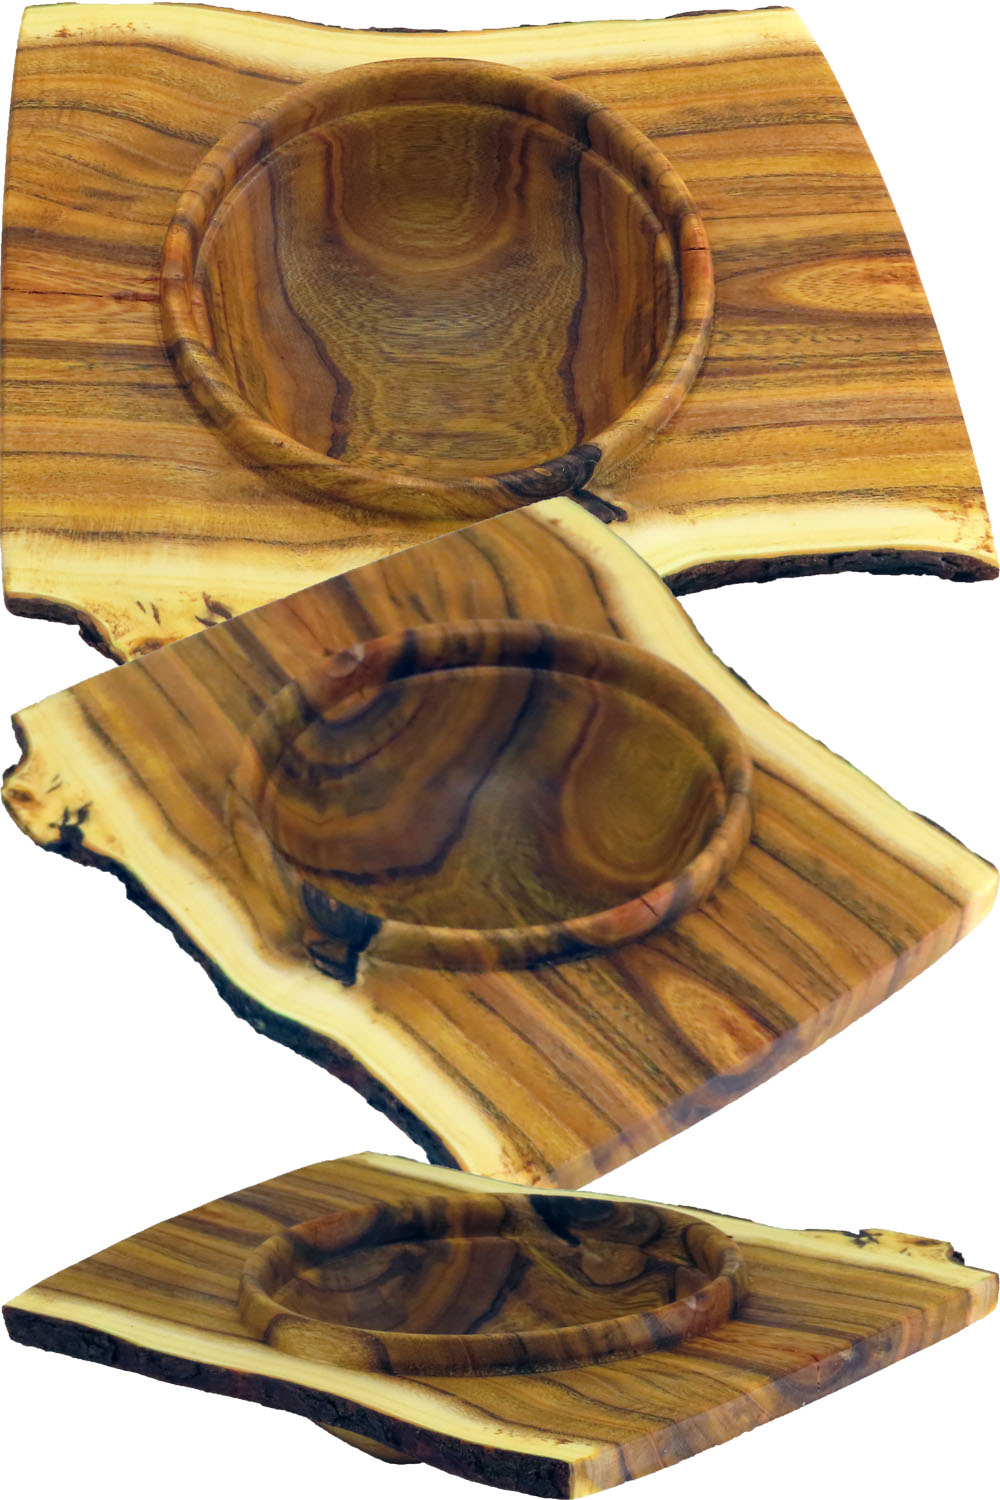
Woodturning Mystery Bowl In A Board
This post is best viewed right here on this page. But, if you have difficulties, it is also posted on YouTube and FaceBook.
I wish I knew what species of this this bowl is turned from. It was a decorative tree in my back yard that I cut down. The wood is beautiful.
It is an interesting convergence of a square bowl and a bowl.
Size: about 7 x 2 and 2 High. Finished with walnut oil.
Enjoy.
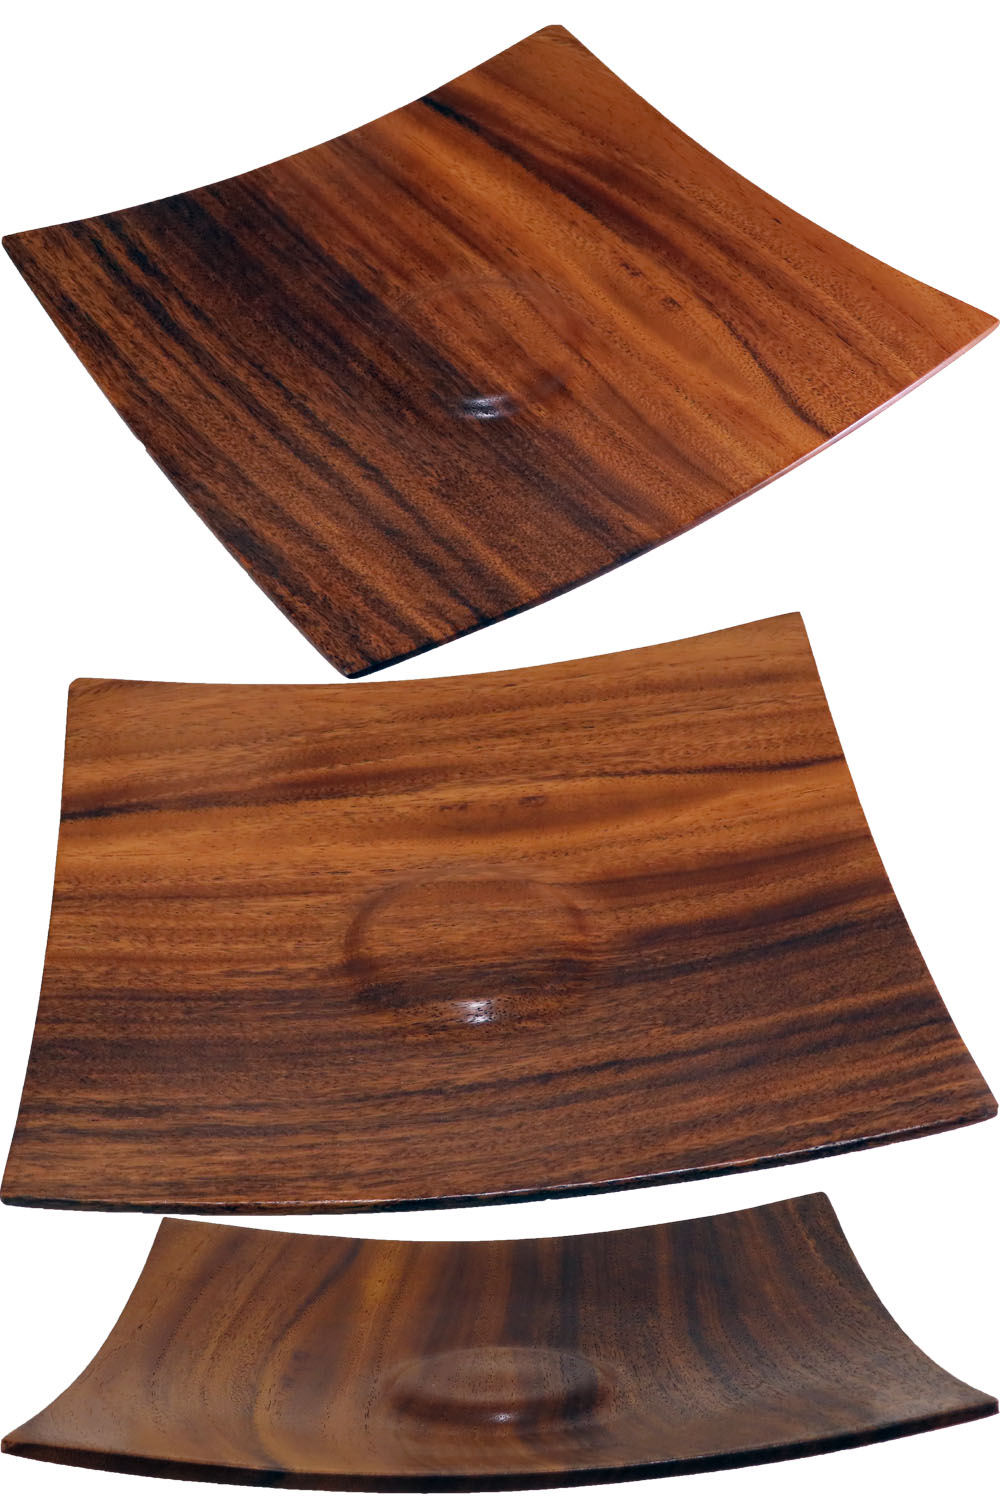
Woodturning Square Bowl From Venezuelan Saman
Just in case of technical difficulties, this post is also on YouTube and FaceBook.
I received this wood from a friend who had traveled and lived in Venezuela. He had returned with a “bookcase” of beautiful wood, saman. He was moving and need to find a new home for the wood. The wood was already 12″ square and 2″ thick. I trimmed it to remove dings in the edges.
Mounted with hot melt glue, I turned a mortise. But at the last minute, the hot melt glue failed. Why? too heavy, too little glue, operator error? I had other difficulties but continued until I now have a square bowl, almost a platter.
It is still almost 12″ square, finished with wipe-on poly.
Beautiful wood.
Enjoy.
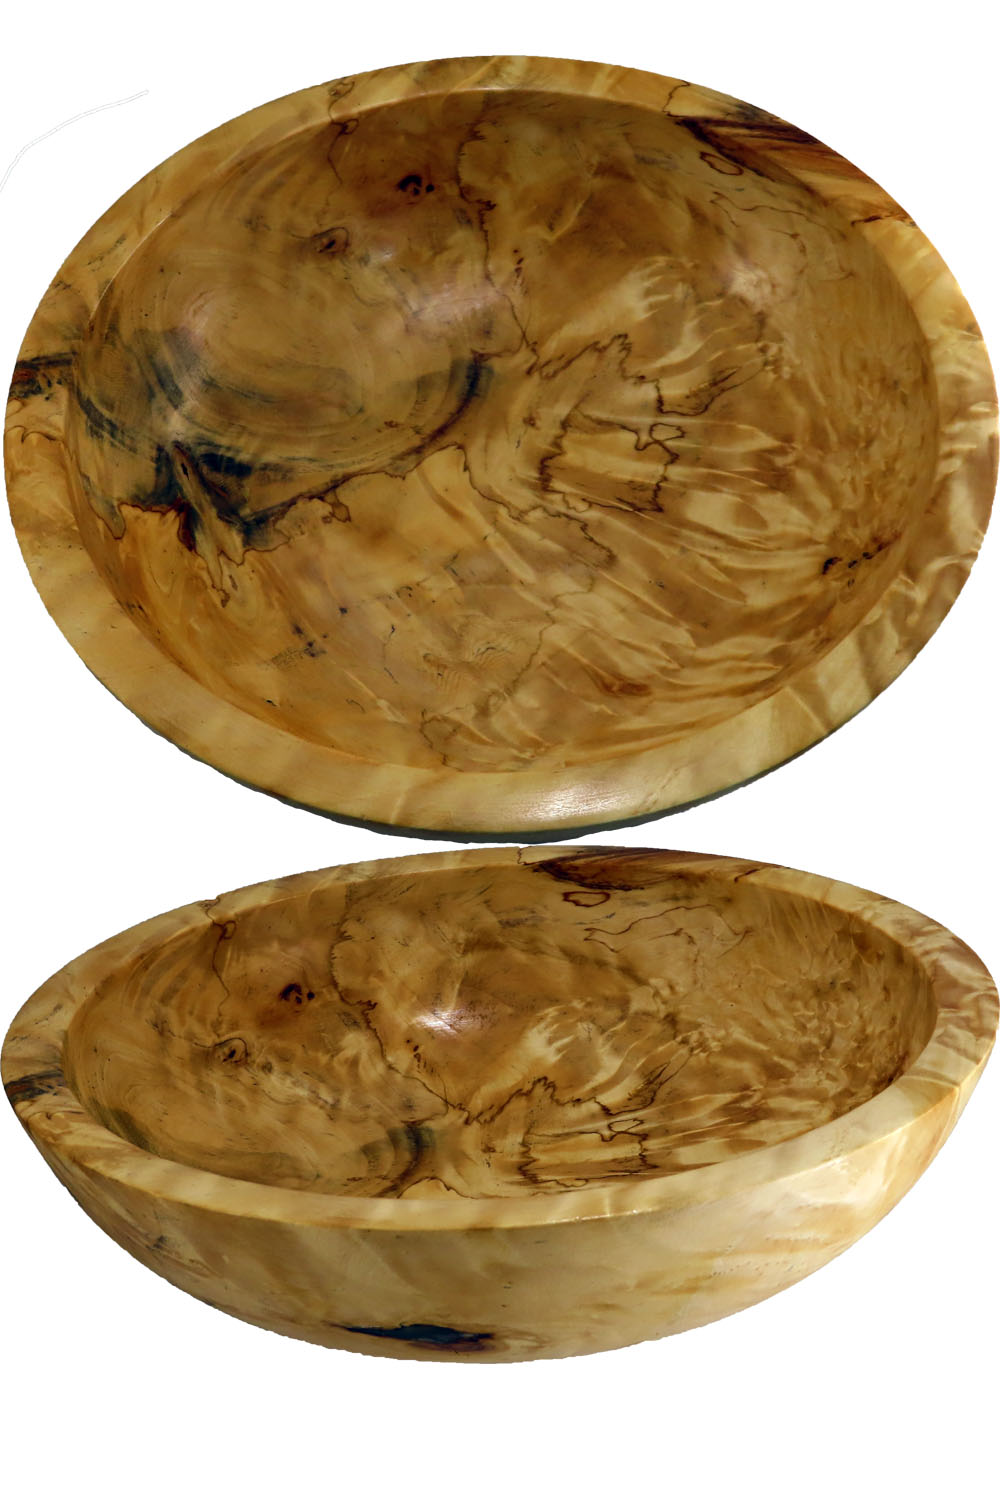
Cottonwood Burl Bowl – Required Three First Aid Treatments
Please view this post here on this page. But if there are technical difficulties, it is also available on YouTube and FaceBook.
Salvaged from a friend’s burn pile, this cottonwood burl took some TLC and a redesign but not that much TLC. It is well worth the UV resin and CA needed to bring out its beauty.
Size: about 11 diameter and 3 tall. Finished with wipe-on poly.
UV resin: Amazon SANAAA UV Resin Clear Hard Type 500g Transparent UV Solar Curing Resin
CA glue: Almost anywhere
Enjoy.
Woodturner’s Band Saw Sled – Essential for Advanced Projects
In the remote possibility of technical difficulties, this post is also available at YouTube and FaceBook.
Best Right Here!
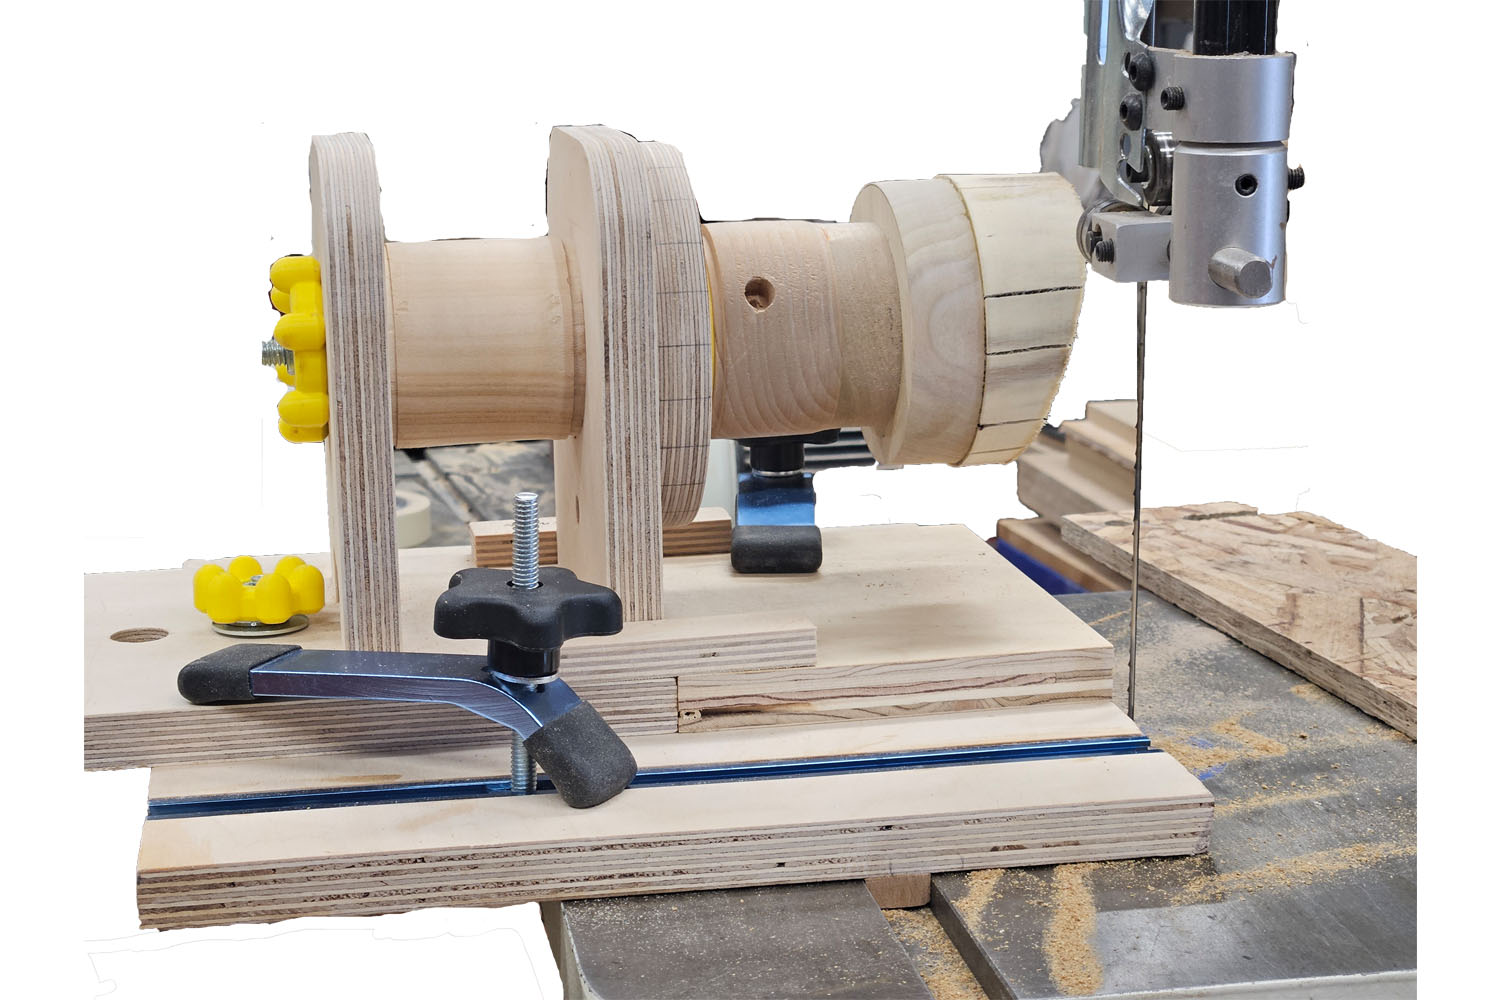
While making last week’s project, it was an appropriate time to upgrade my band saw sled incorporating inspiration from a demonstration at last year’s Rocky Mountain Symposium in Colorado.
In that demonstration, he used a sled that had some features that I thought would be good to incorporate into the sled I have been using and upgrading for several years. One problem – these features depended on a salvaged lathe spindle. The spindle provided a threaded mount and length for stability. My previous sled used a 3D printed knob that held a chuck or threaed faceplate to a 3/4″ plywood.
Then the idea hit. I had also designed and 3D printed a chuck hub that could serve a similar purpose. And, in fact, would be even better and much less expensive.
My new design will cut arc’, sloped cuts, straight cuts, and freehand cuts. For each cut the turning project is mounted to a chuck or threaded faceplate. Then, with the sled, it can be safely cut. This design also enables exact offset cuts by using a spacer inserted behind the plywood base holding the chuck hub. Therefore, all other settings are preserved – no dismantling required for the offset.
Projects that follow John Beaver require offset curve cuts. My Celtic knot vases require offset slant cuts at specific rotations.
Dimensions depend on the bandsaw capacity. I share my dimensions and their rationale in the video. Please adapt to your equipment. Please also share your enhancements.
Chuck hubs and knobs that match popular spindle sizes are available at by Etsy store at
https://www.etsy.com/shop/AsWoodTurnsTools
Universal T-Track hardware, I purchased from HomeDepot.com.
Enjoy.
p.s. If you would like a more in depth demonstration than my weekly videos, please contact me for an IRD (Zoom Demo) on this or other topics.
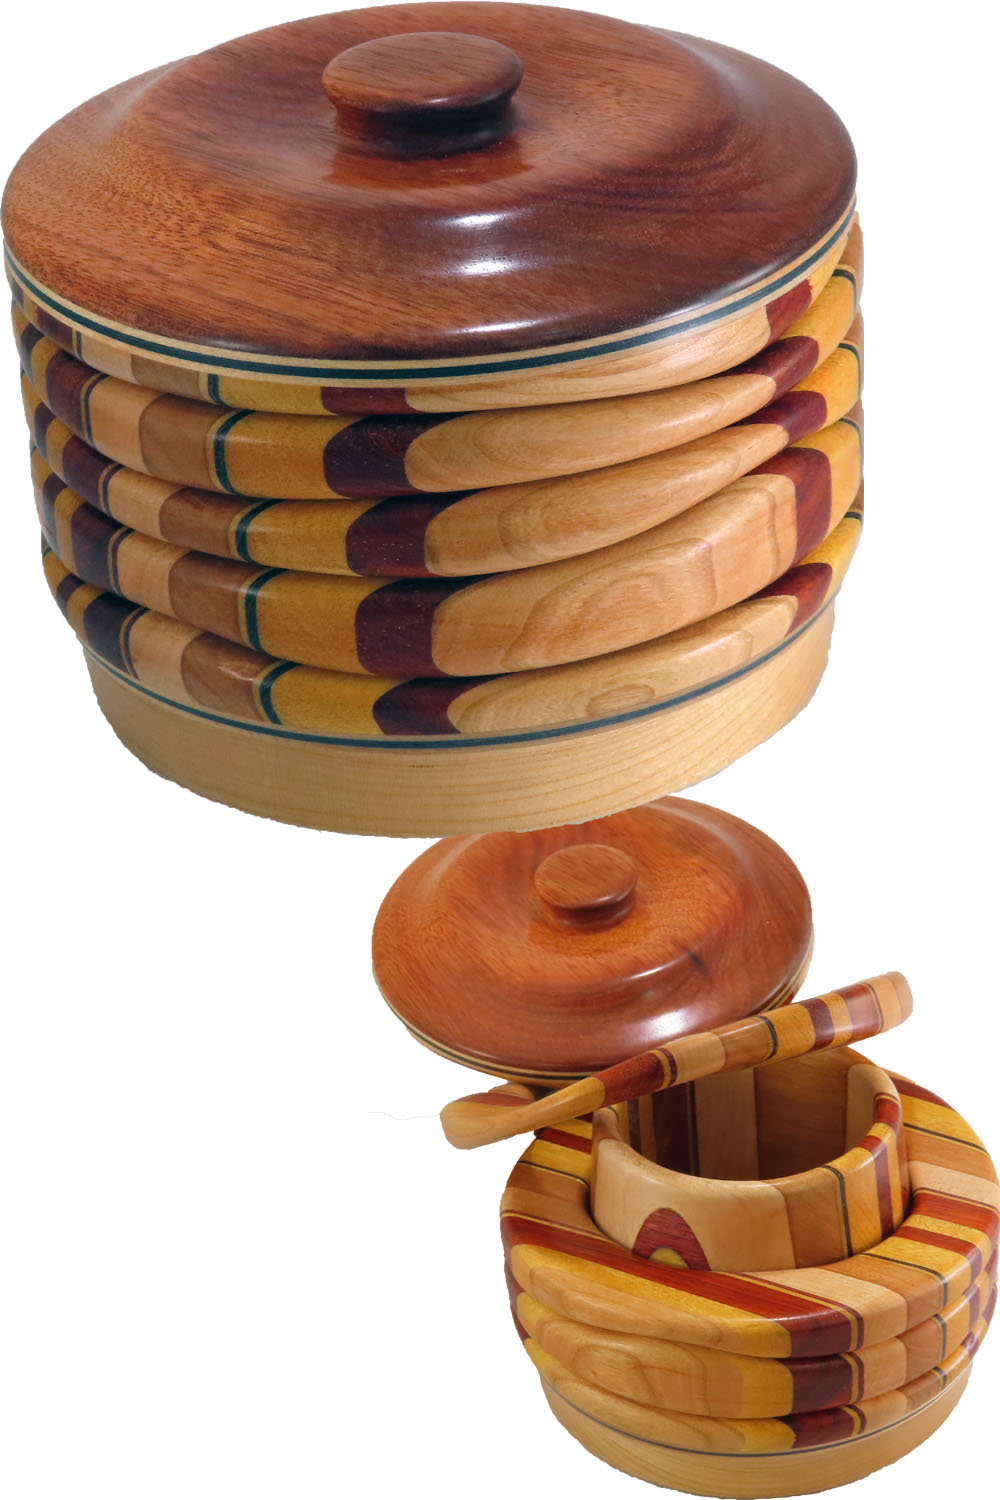
A Child’s Stacking Toy Grows Up – Now My Fancy Wood Box
Please view this post here on this page. However, if there are technical difficulties, it is also posted on YouTube and FaceBook.
A viewer, Steve, sent me a set of pictures and asked how to turn it. I had to scratch my head and recall presentations by Janice Levy and others. Then figure out how to cut an inner box out from the center of a larger box.
First conclusion. Don’t cut it out of the same block – well, almost. But first elongate the lamination so that the plies are identical. Then turn the two stacks to fit together as if they had be cut apart.
Second project. What is the order of operations? How to I mount the wood to do what is required. This led to a secondary question – How to switch mounting from one end to the other end to proceed.
While at it, I souped up by band saw sled to safely make the cuts. Well, I had previous band saw sleds for Celtic knots and straight cuts. This one did not require precision like those, but still needed to be safe while cutting a freehand curve. While I was at it, I found that the sled could also cut a smooth curve like John Beaver uses for his works.
Woods: Walnut, yellowheart, wenge, maple, cherry, bloodwood, and dyed veneer.
Finish: wipe-on poly
Size: about 6 diameter and 5 tall.
Enjoy.
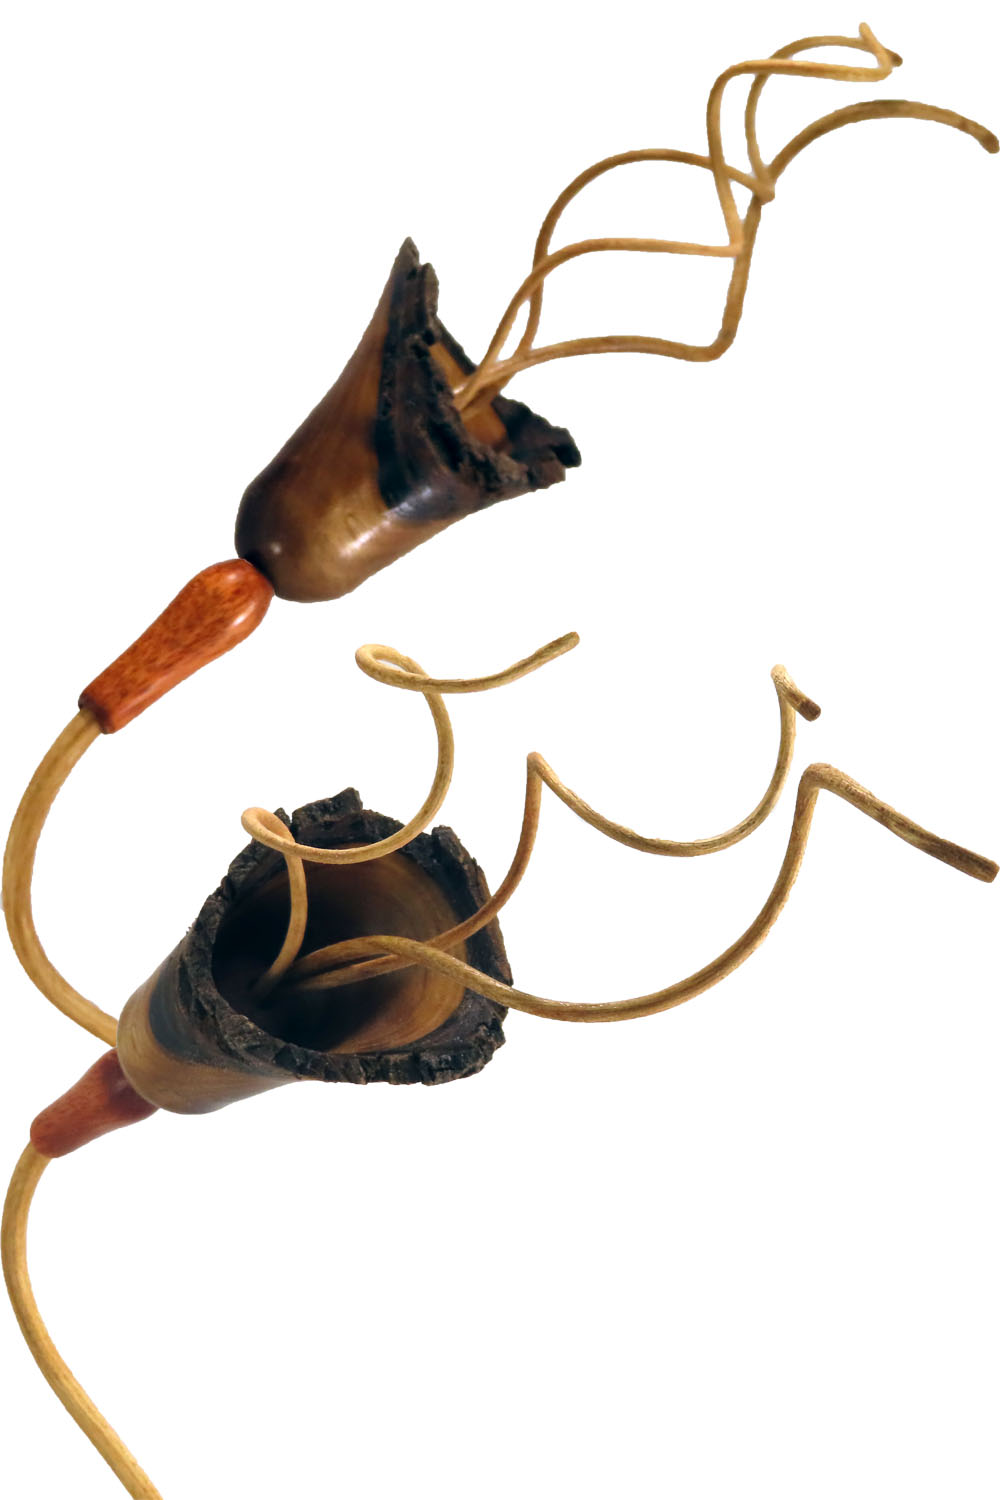
Enhanced Bark Edge Flower For Mother’s Day
Please view this post here on this page. But, in case of technical difficulties, call a 10 year old for help or view on YouTube or FaceBook.
I have turned this style of flower before. However, I had purchased some Cold-Bend Hardwood and thought to use it to enhance my flower.
Plus I stabilized the wood with Cactus Juice to stabilize the bark to assist it to stay attached.
The wood is walnut, sassafras, bloodwood finished with shellac or mineral oil.
The bendable hardwood is still wet and too flexible at this diameter to turn on my lathe. I shaped it with a rotary rasp tool.
A previous video with this style flower is:
Woodturning Spring Blossoms – This Year Spring Needs Help
Enjoy.
Peach Bowl To Preserve Precious Memories

This is not the best example of wood for bowl turning. However, it was essential to turn this bowl anyway as a return gift to the lady in whose yard this tree grew. I filled the major cracks with ultra violet activated resin which I am finding very convenient for small repairs. It is supposed to be longer lasting than CA glue.
The completed bowl will be returned to the lady to preserve her memories associated with her family and this peach tree.
The bowl is nine inches diameter and three inches high, finished with wipe-only poly.
Enjoy.
Rose Bowl From The Root
This video post is best viewed here on this page. However, if you have technical difficulties, it is also posted on YouTube and FaceBook.
After digging up an old rose bush from my yard, I attempt to turn the root ball to get a bowl.
At 8″ by 3″, this bowl warped dramatically making it too warped to finish turning and sanding it on the lathe. Still, I carved and sanded it before finishing with walnut oil.
It is unique.
Enjoy.
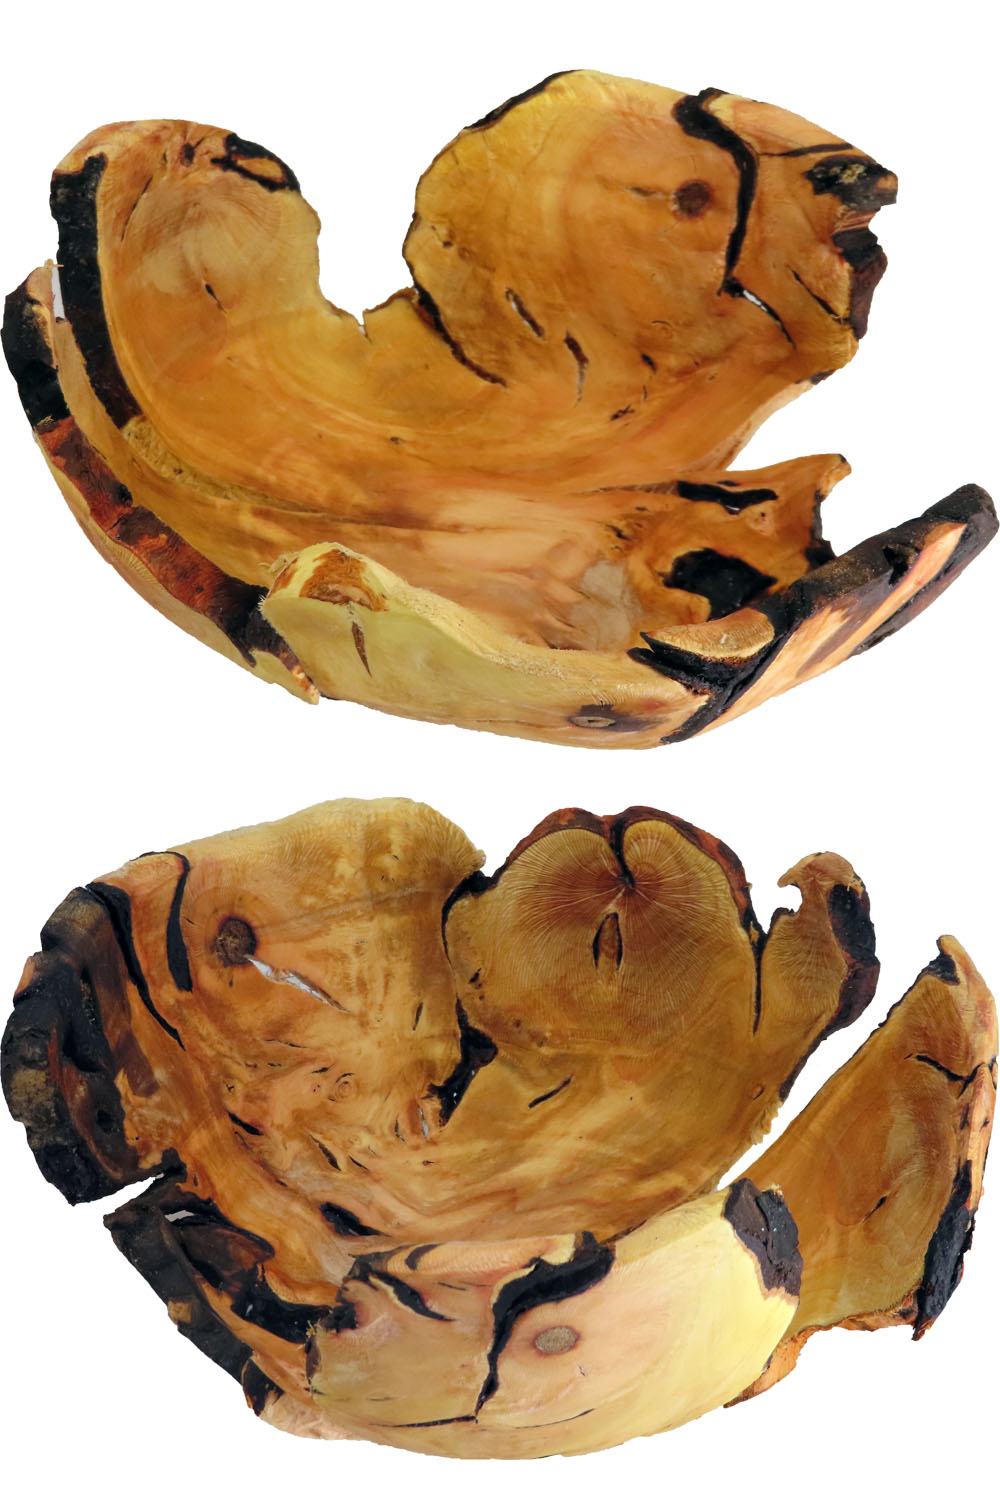
Rejected, Discarded But Beautiful Burl Bowl

This video is best viewed right here on this page. However, if you are experiencing technical difficulties, it is also posted on YouTube and FaceBook. Please return here.
This cottonwood was discarded at our club’s monthly Saturday gathering. Why discarded? The piece had a pair of smaller burl bumps. One had an accidental gash from a chain saw; the other had large obvious voids.
I picked it up anyway and decided to see if I could get anything from it. It yielded a 6″ diameter, 2″ tall bowl with amazing burl figure. Walnut oil brings out the beautiful color.
Enjoy.