Turning Multi-Axis Plumbing Fittings??
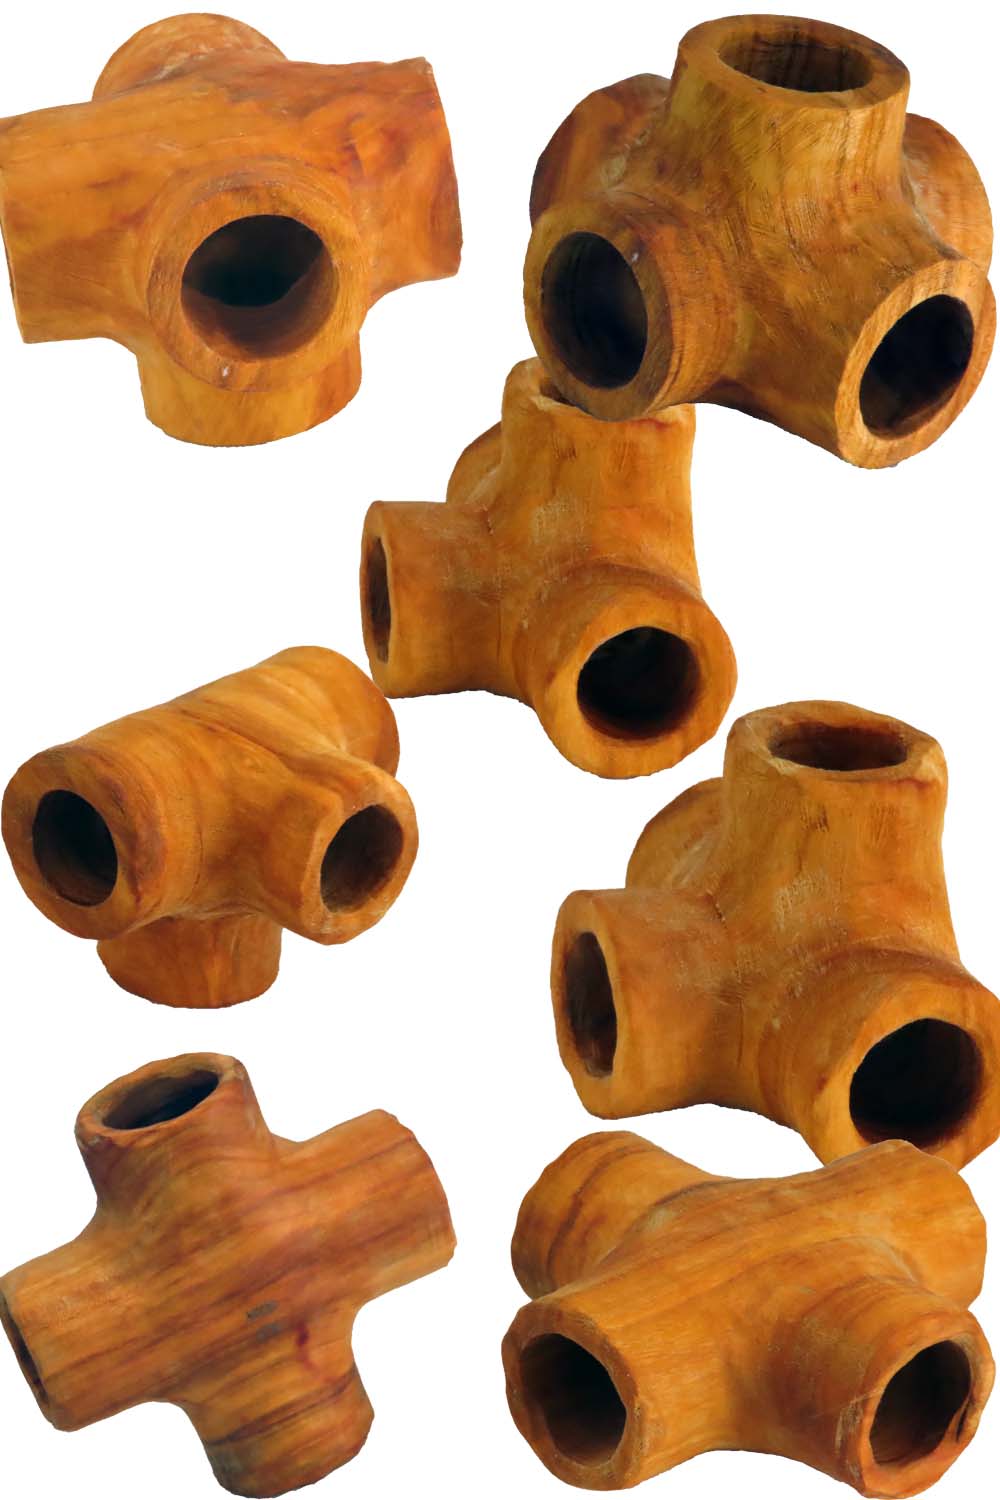
I love these octahedrons. They are one of the most simple multi-axis turnings.
They start with a sphere which I have been demonstrating for many years. I skipped quickly through the sphere portion in this video to focus more on the multi-axis turning.
The sphere is oriented on three axes. If you think of a cube, these are the perpendicular through the faces of the cube.
After boring out the holes along the axes, these are transformed into tubes. Finally, at the center, a smaller cube forms. This can be carved away into pleasing curves.
For a truncated octahedron, pick one or more axes before boring. Bore out only enough to form a solid tube instead of a hollow tube. Part off or carve away the solid tube.
BTW – I saw an original non-truncated octahedron demonstrated by Max Brosi at AAW – Raleigh. He deserves credit for confirming my octagon measures using drafting techniques instead of my use of algebra. Then showing an octahedron. A confirming demonstration.
Enjoy.
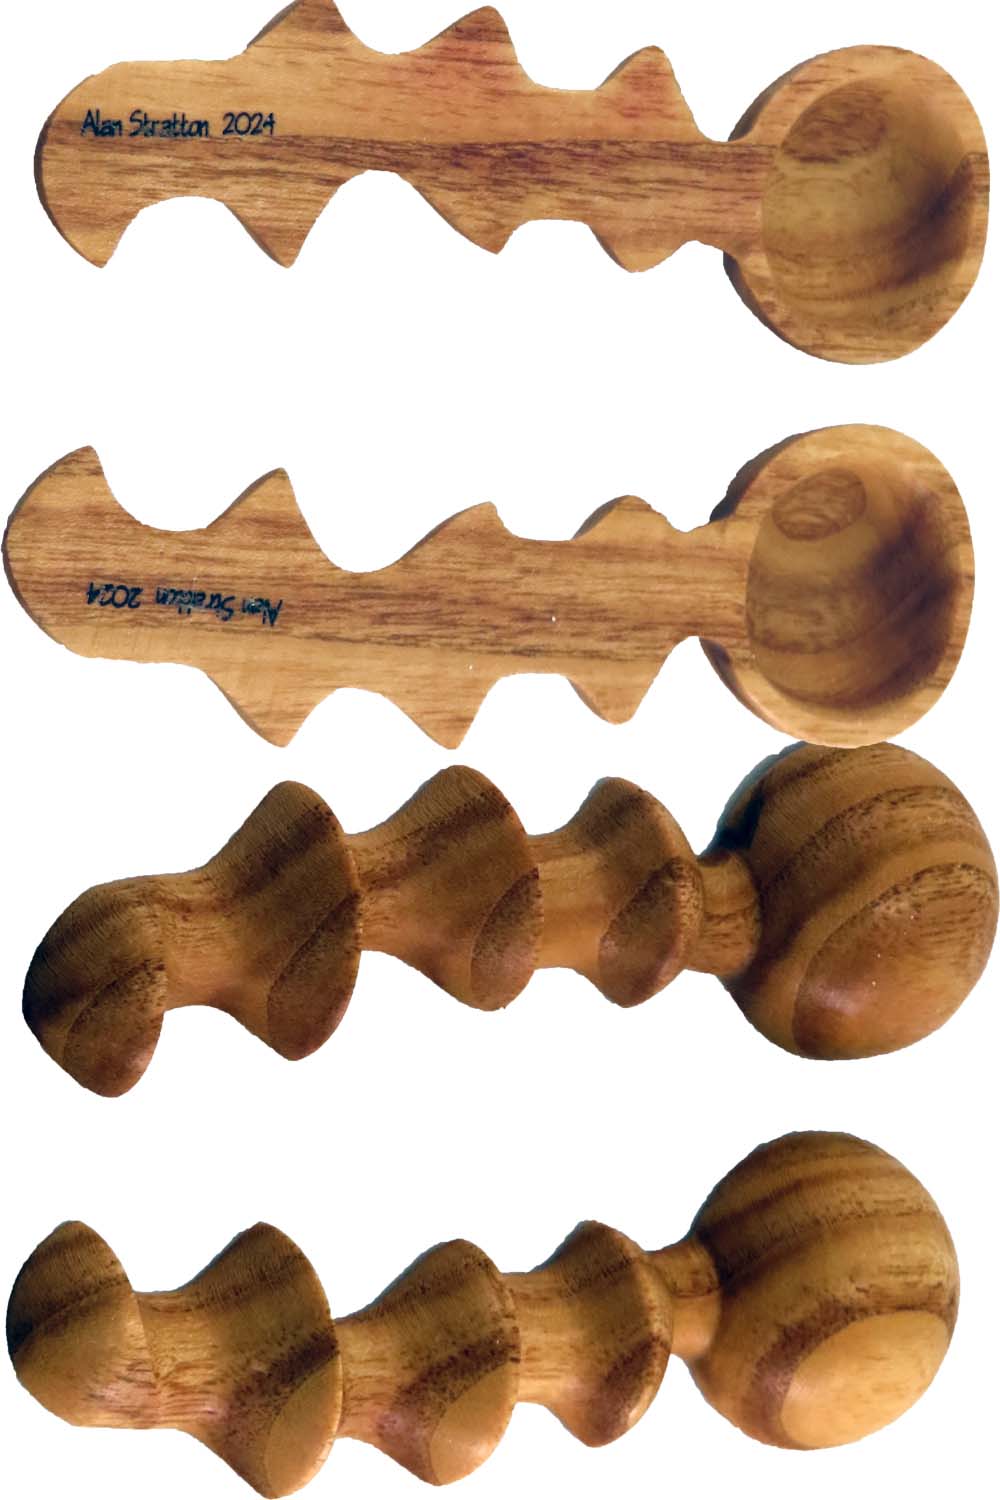
Improved Double Dip Turning – Twin Eccentric Scoops
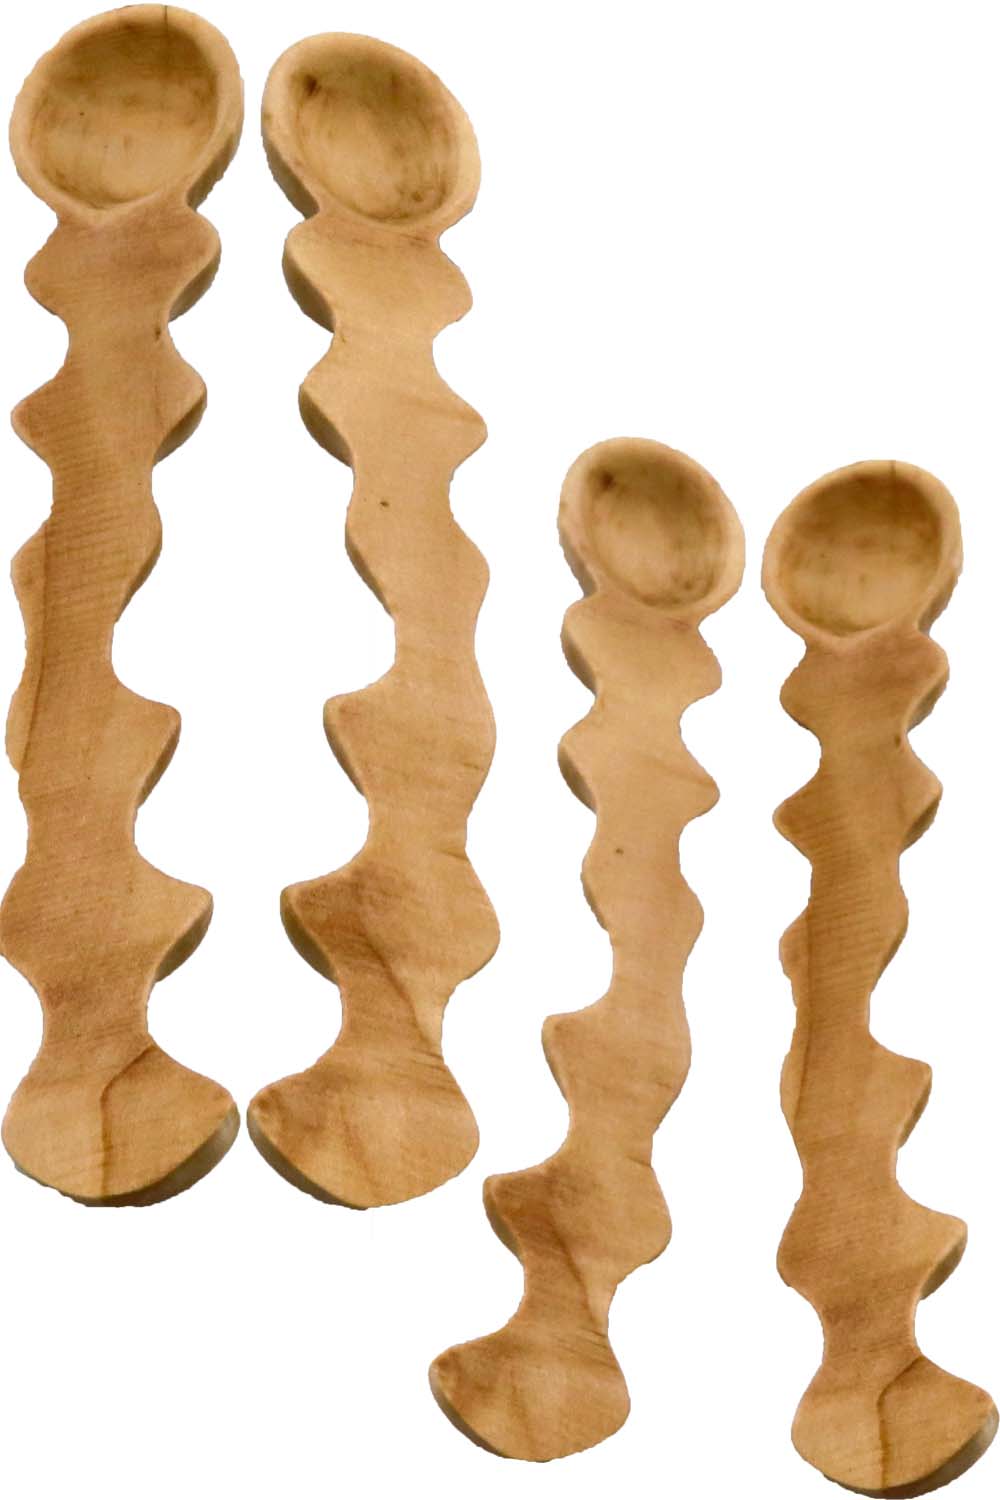
I know I turned eccentric scoops last week. However, I simply had to turn them again with some improvements.
This scoop is turned using three skew axes, 3/16″ apart and the handle end. The axes must be in a straight line to allow the turned blank to be sawn in half. Skew axes are not parallel. However, in this case, they must be shifted in the same plane. Otherwise, the two halves could not be sawn apart.
Instead of shifting points on the bowl end, this time I used a cup center on the live center.
As an additional benefit, this allowed turning the bowl portion as more of a sphere for more accuracy.
The axis shift was also slightly larger. This with the fixed bowl end, enabled more of an arc in the handle.
The cleanup was still tedious, using a round rotary burr to hollow out the bowl. Then hand sanded the bowl smooth.
The scoops are 1 inch by 6 inches long, finished with a utility mix of mineral oil and beeswax.
Enjoy.
Double Dip Turning – Twin Eccentric Scoops
This video is best viewed here on this page. However, if gremlins strike the technical area, it is also available on YouTube and FaceBook.
I saw these scoops by Eli Avisera at the Portland AAW symposium. I did not attend his demonstration – Actually, I’m not sure he demonstrated these. However, I was intrigued and felt that I had to make a set. I’m not sure how he turned his but here is how I turn them.
The scoop is turned using three parallel axes, 1/8″ apart. The axes must be parallel to have enought straight space for the turned blank to be sawn in half.
The cleanup, however, is tedious. I used a round rotary burr to hollow out the bowl. Then hand sanded the bowl smooth.
The scoops are 1.5 inches by 5 inches long, finished with a utility mix of mineral oil and beeswax.
Enjoy.
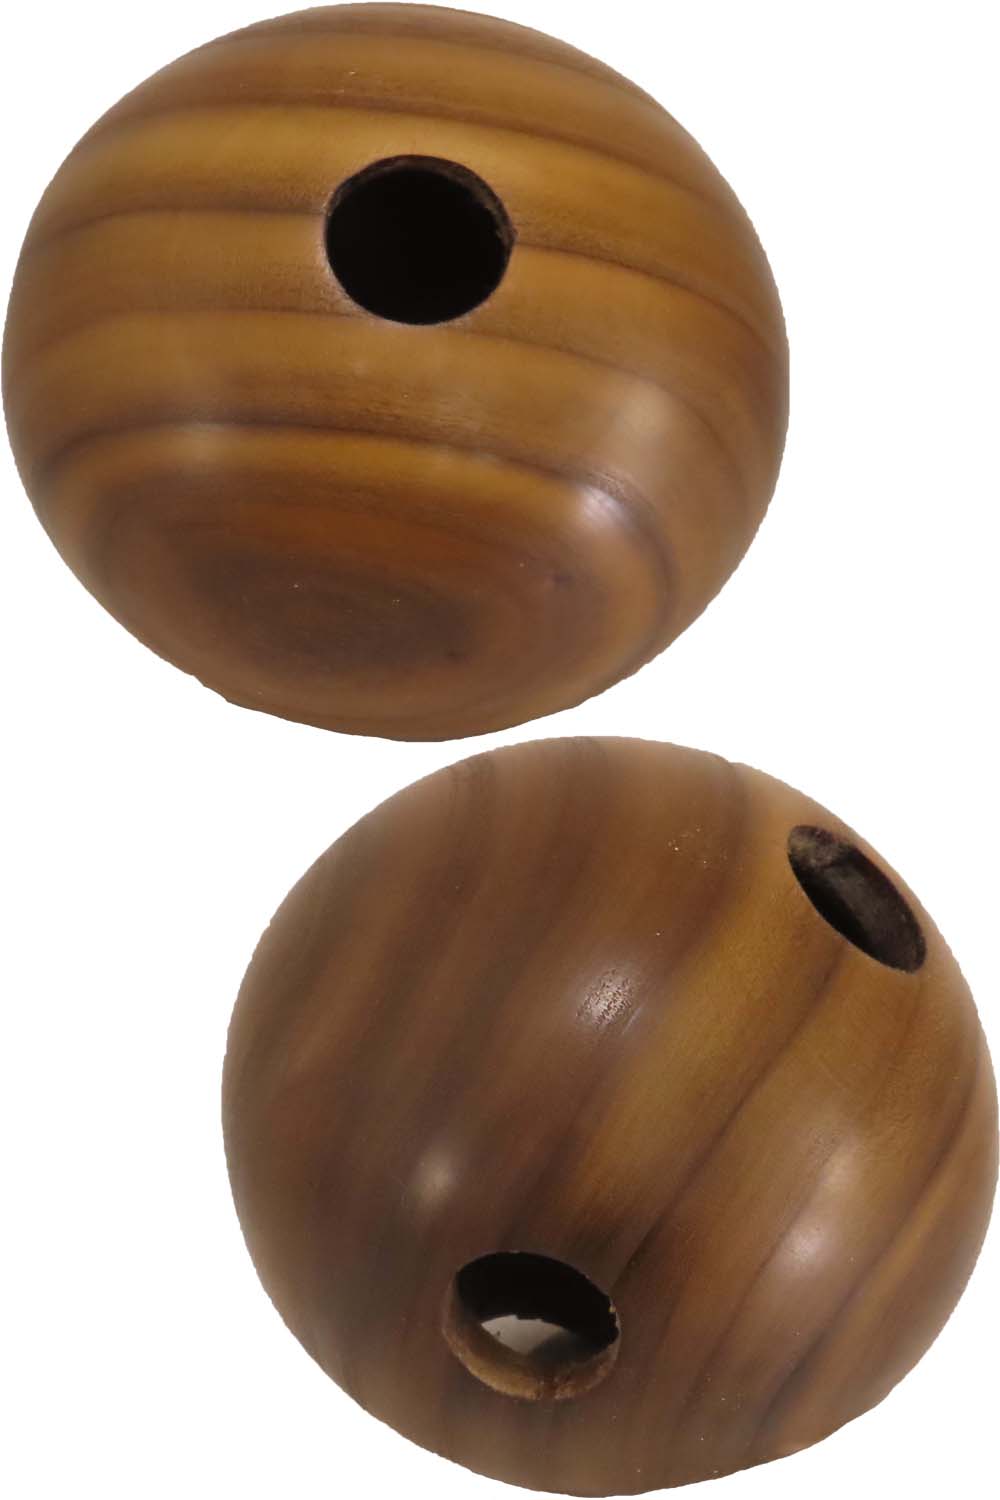
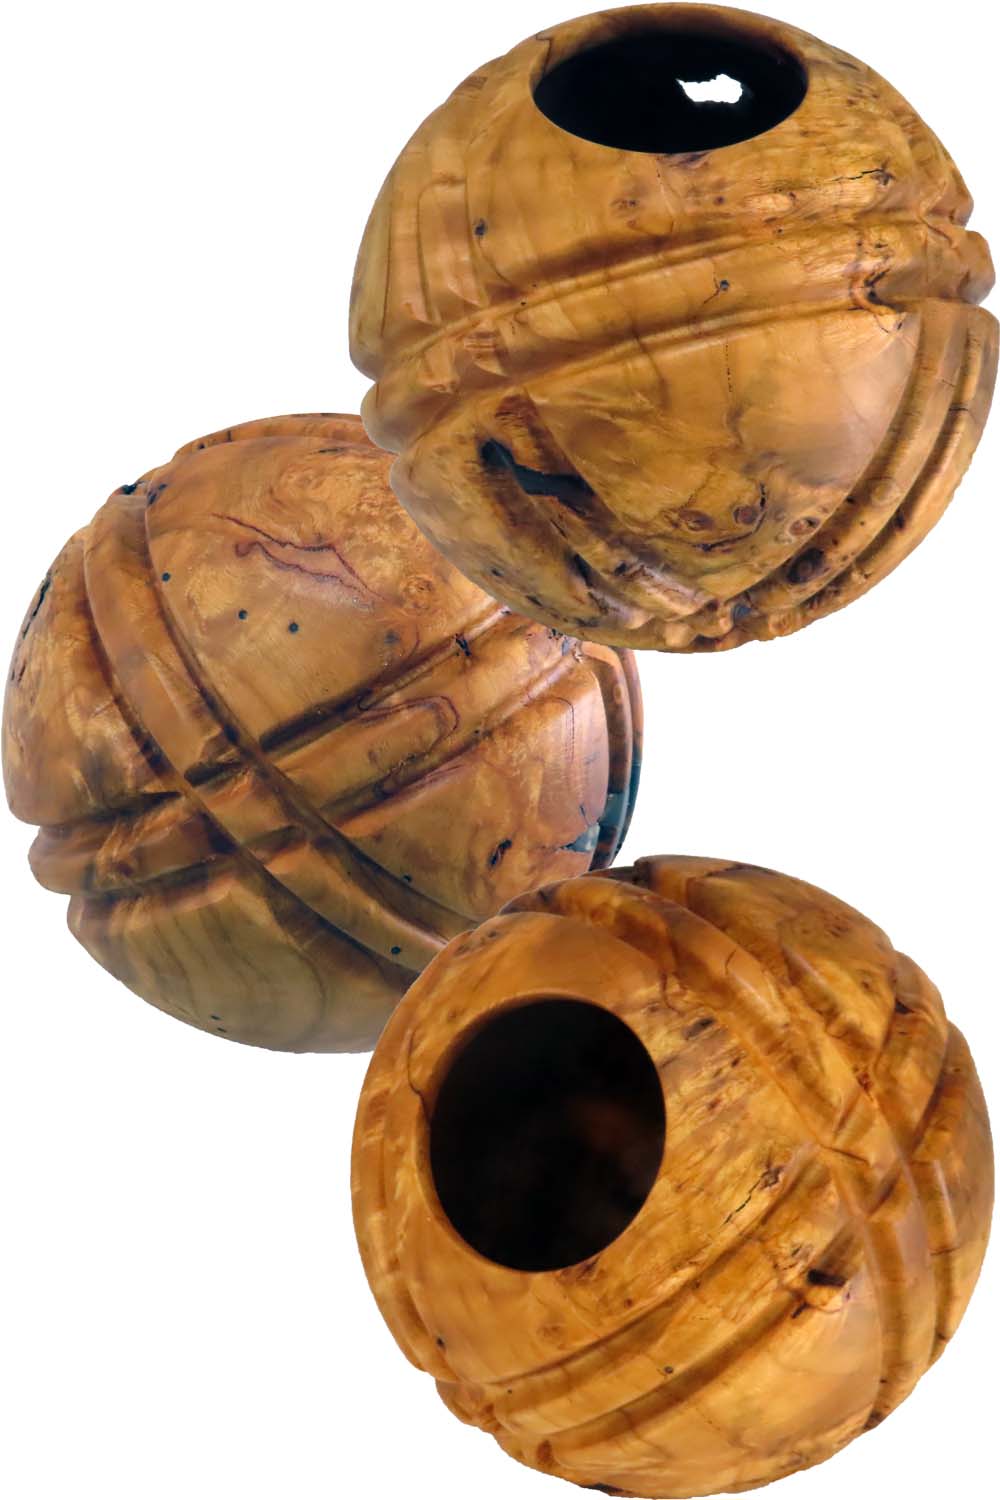
Turning A Multi Port Wet Hollow Sphere
This video post is best viewed here on this page. However, in case of technical difficulty, it is also posted on YouTube and FaceBook.
I did not always relish turning a sphere. But that was before I found an easy, reliable process to turn them.
Now the question is how to embellish them even more.
For this sphere, I wanted it hollow but holey – that is hollow through multiple holes.
However, one major issue came up. The Russian olive was very wet and warped. The result? It is not a perfectly shaped sphere. What should I have done given the wet wood? Simple. Rough turn the sphere, let it dry, then return to the process. The only problem is that I tend to be impatient. But, I also saved a lot of money by not purchasing a commercial jig.
The sphere is 3.25 inches finished with beeswax and mineral oil. Then buffed.
More Links:
Woodturning Perfect Spheres – For Wise Turners
Woodturning Essentials – Octagon Method For Perfect Spheres
How To Turn Perfect Hollow Sphere – No Jig
Enjoy.
Turning A Beautiful Bowl – Another Rescue

This video is best viewed right here on this page. But, in case of technical difficulty, it is also posted on YouTube and FaceBook.
I do love turning sapele wood – any way that I can get some. It is rather expensive. So, if I can use offcuts from someone else’s project, I jump at the opportunity. This wood is about 9 inches long and 5 inches wide and 2 inches thick, two pieces. I cleaned up one edge and glued them together. After turning, this yielded an eight by 2 inch bowl. This is a fairly standard bowl turning, a great exercise in disguising a mortise in the base. Turning a sphere is a basic skill that all turners should quickly master, especially since it is so easy and a foundation for so many projects. So, in this video, I take a four inch plus sphere, decorate it with an interesting pattern of grooves and hollow it to lighten it. My bowl is finished with wipe-on poly. Enjoy.Taking Sphere Turning To Next Level
Please view this video from this page. However, if gremlins attack, it is also posted on YouTube and FaceBook.
Turning a sphere is a basic skill that all turners should quickly master, especially since it is so easy and a foundation for so many projects.
So, in this video, I take a four inch plus sphere, decorate it with an interesting pattern of grooves and hollow it to lighten it.
My 4.4″ sphere is finished with walnut oil.
Have you mastered this basic skill?
Enjoy.
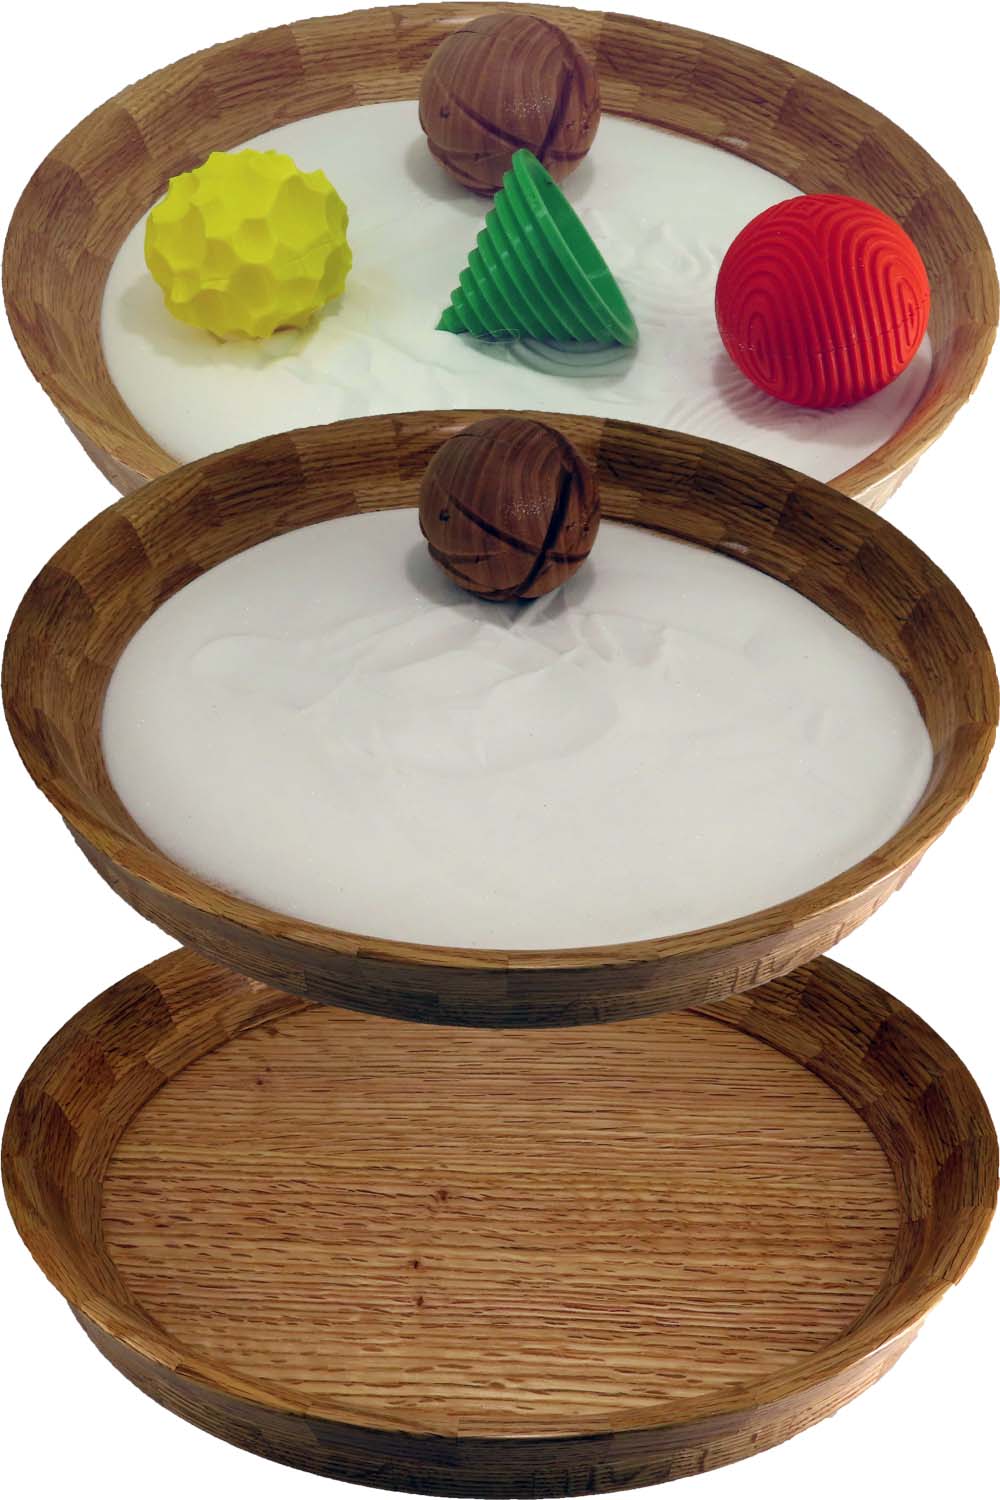
Turning Large Segmented Tray For Zen Garden
This post is best viewed here on this page. In case of gremlin attack, it is also posted on YouTube and FaceBook.
I first encountered a Zen garden when taking a slump glass workshop. It was intriguing. With an assortment of textured concrete balls, I could make designs in the white sand in the bottom of a large tray.
Immediately, I knew that I had to make my own. It would have to be a combination project: shop-made plywood for a light, strong bottom; segmented rings for the sides; and textured wood spheres.
All in all it is great therapy.
The tray is red oak, 13 x 2 inches, finished with wipe-on poly.
Enjoy.
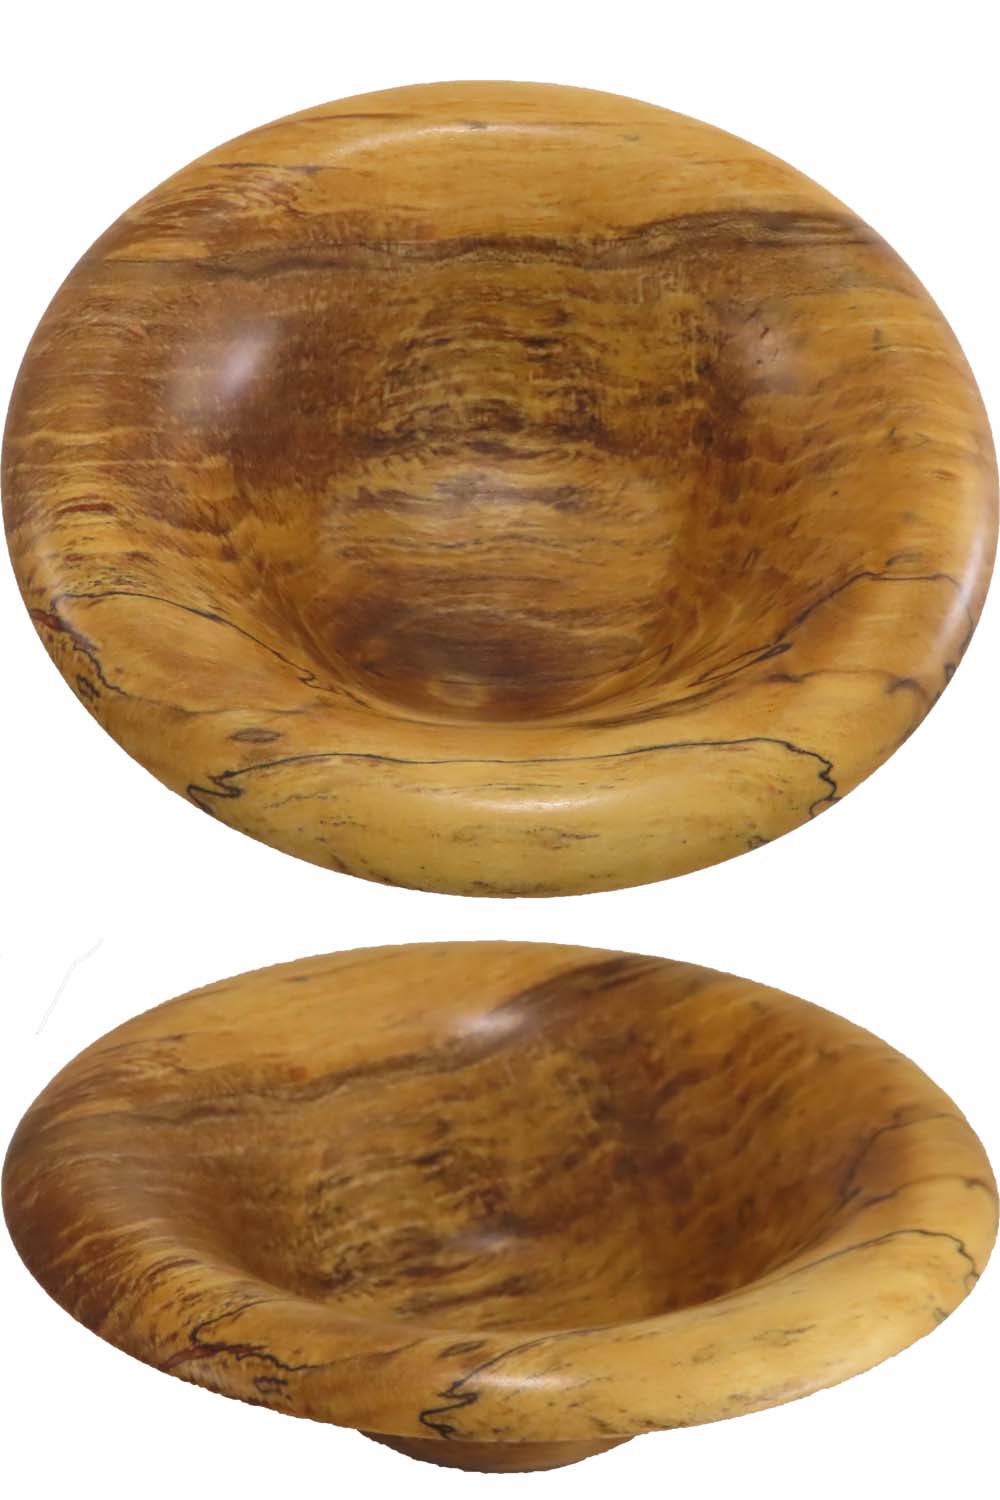
Stabilization To The Rescue For Severely Spalted Bowl
Please continue to view this post on this page. However, if technical difficulties occur, it is also posted on YouTube and FaceBook.
I received this wood in a club wood exchange. On examining it, I noted some great spalting color and figure. But also noted a lot of very soft punky wood. I can treat small amounts of punky wood with CA glue. But this had a lot.
I rough turned it. Dried it in an over. Then stabilized it by soaking it in Cactus Juice, a heat activated resin under vacuum for about two days. Then let it soak for another two days before hardening the resin in the oven.
Then I could finish turn the bowl much like a remounted green turning
My bowl is 6 by 2 inches finished with wipe-on poly.
Enjoy.
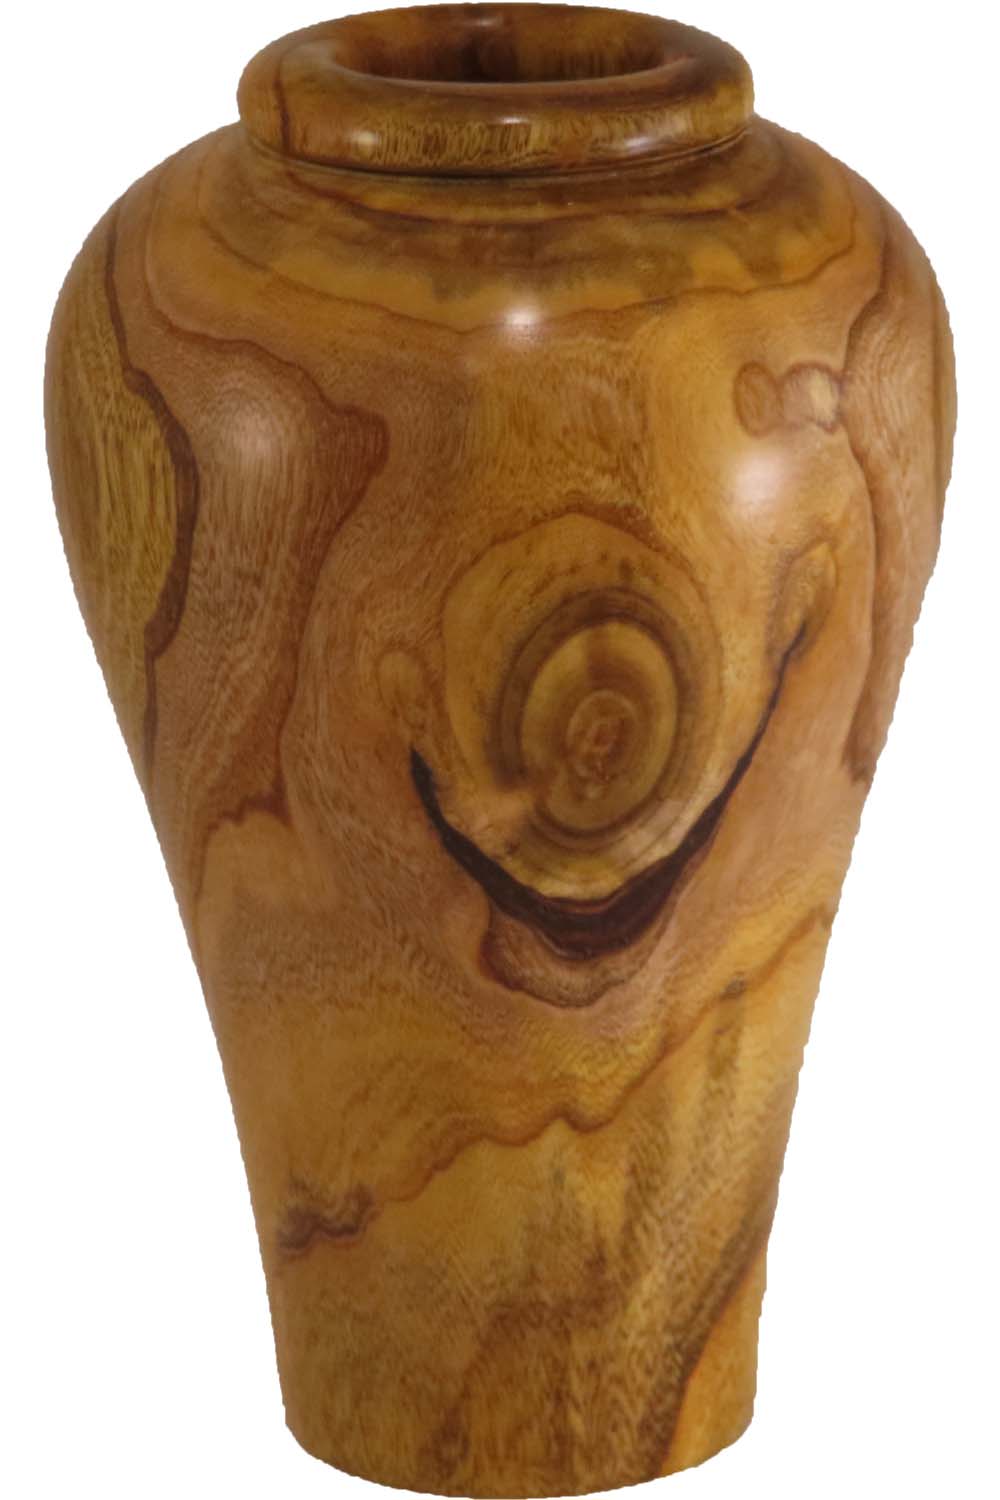
Woodturning Green Turned Vase From Backyard Red Bud
This post is best viewed here on this page. However, in case of technical difficulty, it is also posted on YouTube and FaceBook.
Several weeks ago, I turned a piece from an unknown tree harvested from my back yard. It has now been identified as red bug, a beautiful wood. After seeing how beautiful the wood turned out, I decided to turn a small vase from the same trunk.
Turned green, I then let it dry after coating with wood glue and wrapping in paper. When it stopped losing weight, I remounted the vase to finish it again.
Much of the hollowing was through the bottom which was later plugged. After all, why hollow through a tiny opening when I do not have to.
My vase is 5 by 3 inches finished with wipe-on poly.
Enjoy.
Woodturning Wide Sapele Platter / Bowl From Offcuts

Please view this post on this page. However, in case of video difficulty, it is also posted on YouTube and FaceBook.
I scored some sapele offcuts from an associate-not large enough individually. However, I could see a bowl or small platter – only larger. While I would prefer turning from a single piece of wood, I decided to glue three pieces together and go for it anyway. The wood is too beautiful to do otherwise.
Size: about 15 inches diameter by 2 inch, finished with wipe on poly.
Enjoy.