Easy Bracelet Chuck
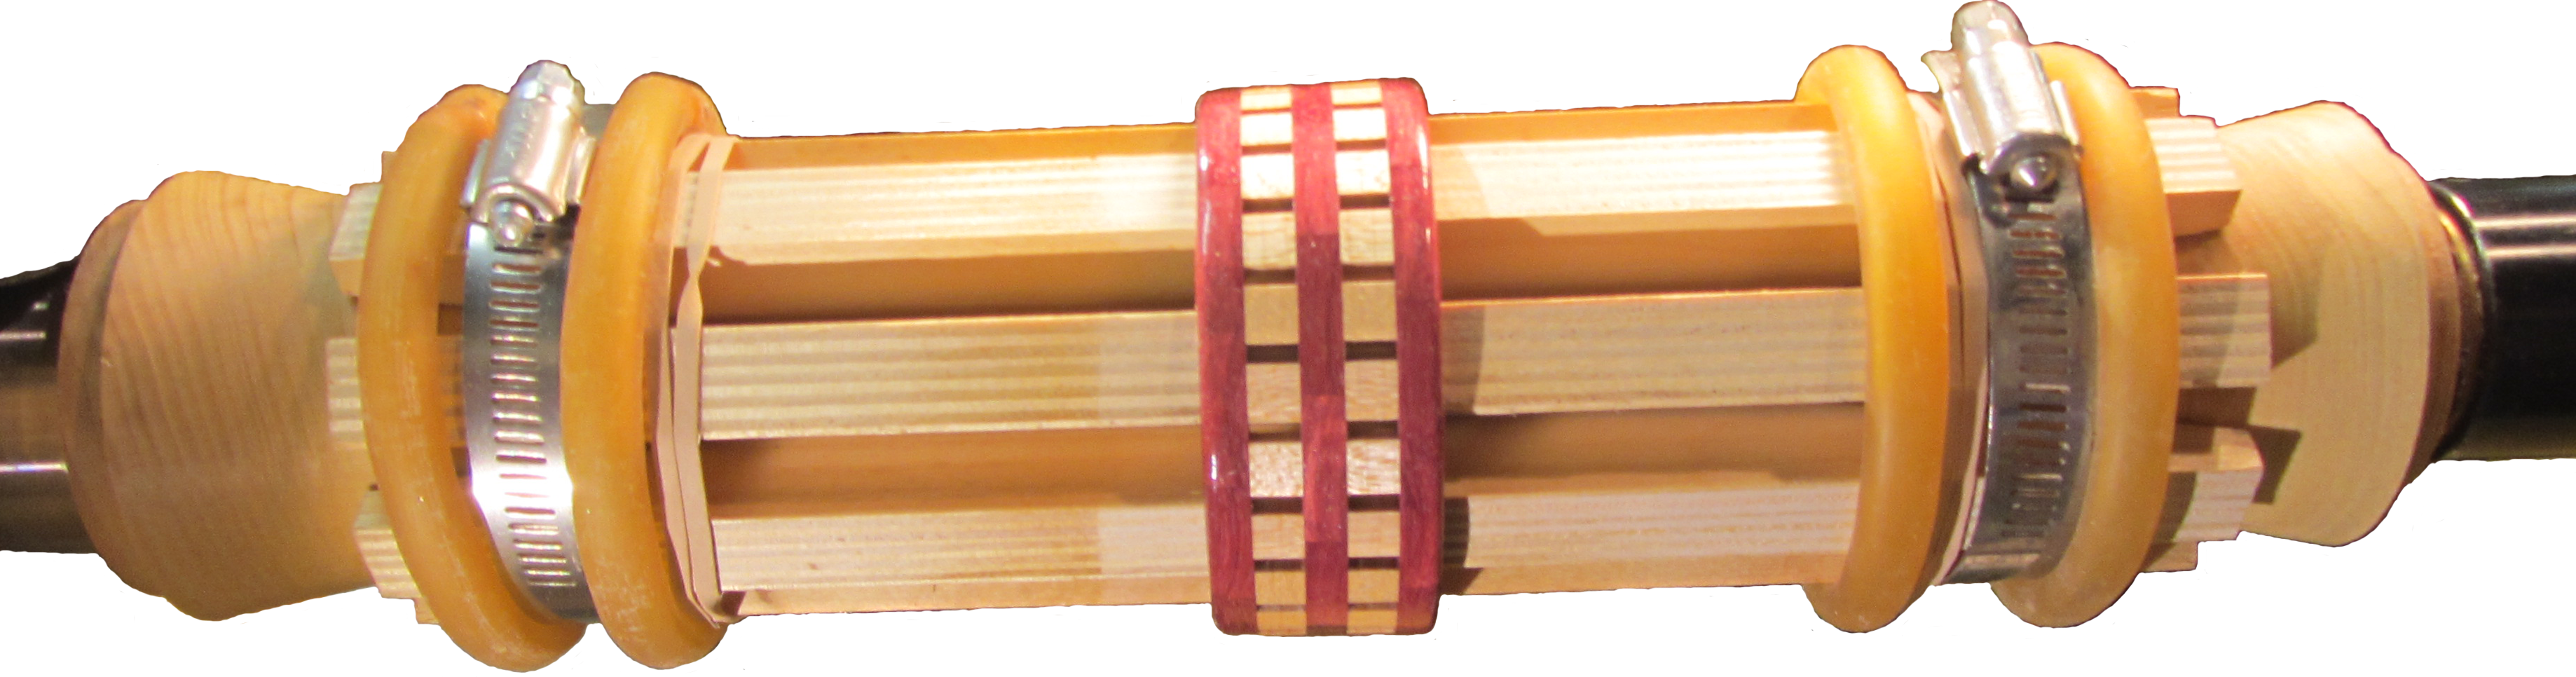 In my last video I turned a segmented bracelet using my new home made bracelet chuck. It is an expansion chuck using basic engineering principles with lathe components. It uses 2 tapered end plugs, 8 tapered side slats, 2 automotive band clamps, 4 latex tubing rings, and a little duct tape.
One end plug is fitted to the lathe spindle. As originally designed, I would have drilled a hole in the plug sized to a spur drive center. However, I decided to thread it to hold it more firmly in place. This is escpecially nice when assembling a bracelet onto the chuck. I used a tap that matches my lathe spindle from Beall.
The other end plug is fitted to the lathe’s revolving center. Again I decided to tap it to match. This time I used a carbon steel tap set from McMaster Carr (Price $27). Carbon steel should be good enough for the number of times I’ll use this tap especially in wood.
The slats are out of straight grained wood, in my case Baltic birch, 10″ long by 1.25″ wide and 5/8″ thick. I cut a taper from the middle of the 10″ side to 1/4″ from the other side. One slat was my template for turning the tapered end plugs. After turning the end plugs, I ripped the slats to 1″ wide and sanded a taper on the opposite sides. (4 tapers: 2 sawed – 2 sanded)
The chuck works by the lathe tail stock forcing the tapered ends together. This expands the side slats until they are constrained by the bracelet to hold it in place.
Theoretically, the bracelet could be the only thing holding the slats in place.
Practically, however, and with safety in mind, band clamps are also used in case the bracelet breaks. If that were to happen without the band clamps, parts and pieces could fly all over and possibly injure someone.
With metal bands now on the slats, they should not explode but now the band clamps pose a hazard. They have bumps where the screw mechanism is and a trailing band of metal. To counter this risk, the slats are 10 inches wide (otherwise, they could be shorter), the band clamp is always positioned so the trailing band trails opposite the rotation of the lathe (so it cannot dig in to a hand), and latex rings provide a final layer of protection. A piece of duct tape also holds down the trailing part of the band clamp.
The latex rings are cut from standard latex tubing. The ends are glue together on a short piece of wood dowel with medium CA glue.
This chuck avoided having to flip the bracelet from side to side and having to fit it to a jamb chuck to finish the outside of a bracelet. It made my turning job much easier and with better results.
A Segmented Wood Bracelet
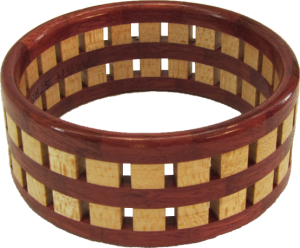 Last summer, I turned some wood bracelets for my granddaughters. Afterwards, a viewer send in a question about how to turn the outside of the bracelet without flipping the workpiece over. With that in mind, I designed an expansion chuck on which to turn bracelets. With the chuck, I can now turn bracelets more easily.
This bracelet is made from tiny wood segments. Three closed segment rings have 12 segments each. Two open segment rings have 24 segments each for a total of 84 segments. Since the wood is left over from a previous project, I’m not sure what the redish wood is (Not Padauk). The light colored wood is maple.
Woodturning A Round Train Whistle
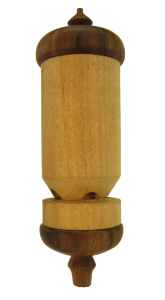
Recently Steve Ramsey on his YouTube channel made a wooden train whistle out of square pine. Immediately, it occurred to me that a train whistle must be round. So I made this whistle out of poplar with walnut end caps. It is about six inches long with a diameter of about two inches.
There are four whistle chambers in this train whistle. Varying chamber depths determine the different pitches when you blow on the mouthpiece. The longest chamber is nearly the length of the body. The shortest is about half that depth.
One end cap is only decorative with a small finial. The top end cap contains a mouthpiece and an air distribution chamber to the four whistles in this project. The tricky part is the opening in the side of the whistle body and getting the reeds just right.
The project is finished with a mix of mineral oil and beeswax. Tools used were a bowl gouge, skew, spindle gouge, parting tool, and a bedan.
DIY LED Lights For Woodturning
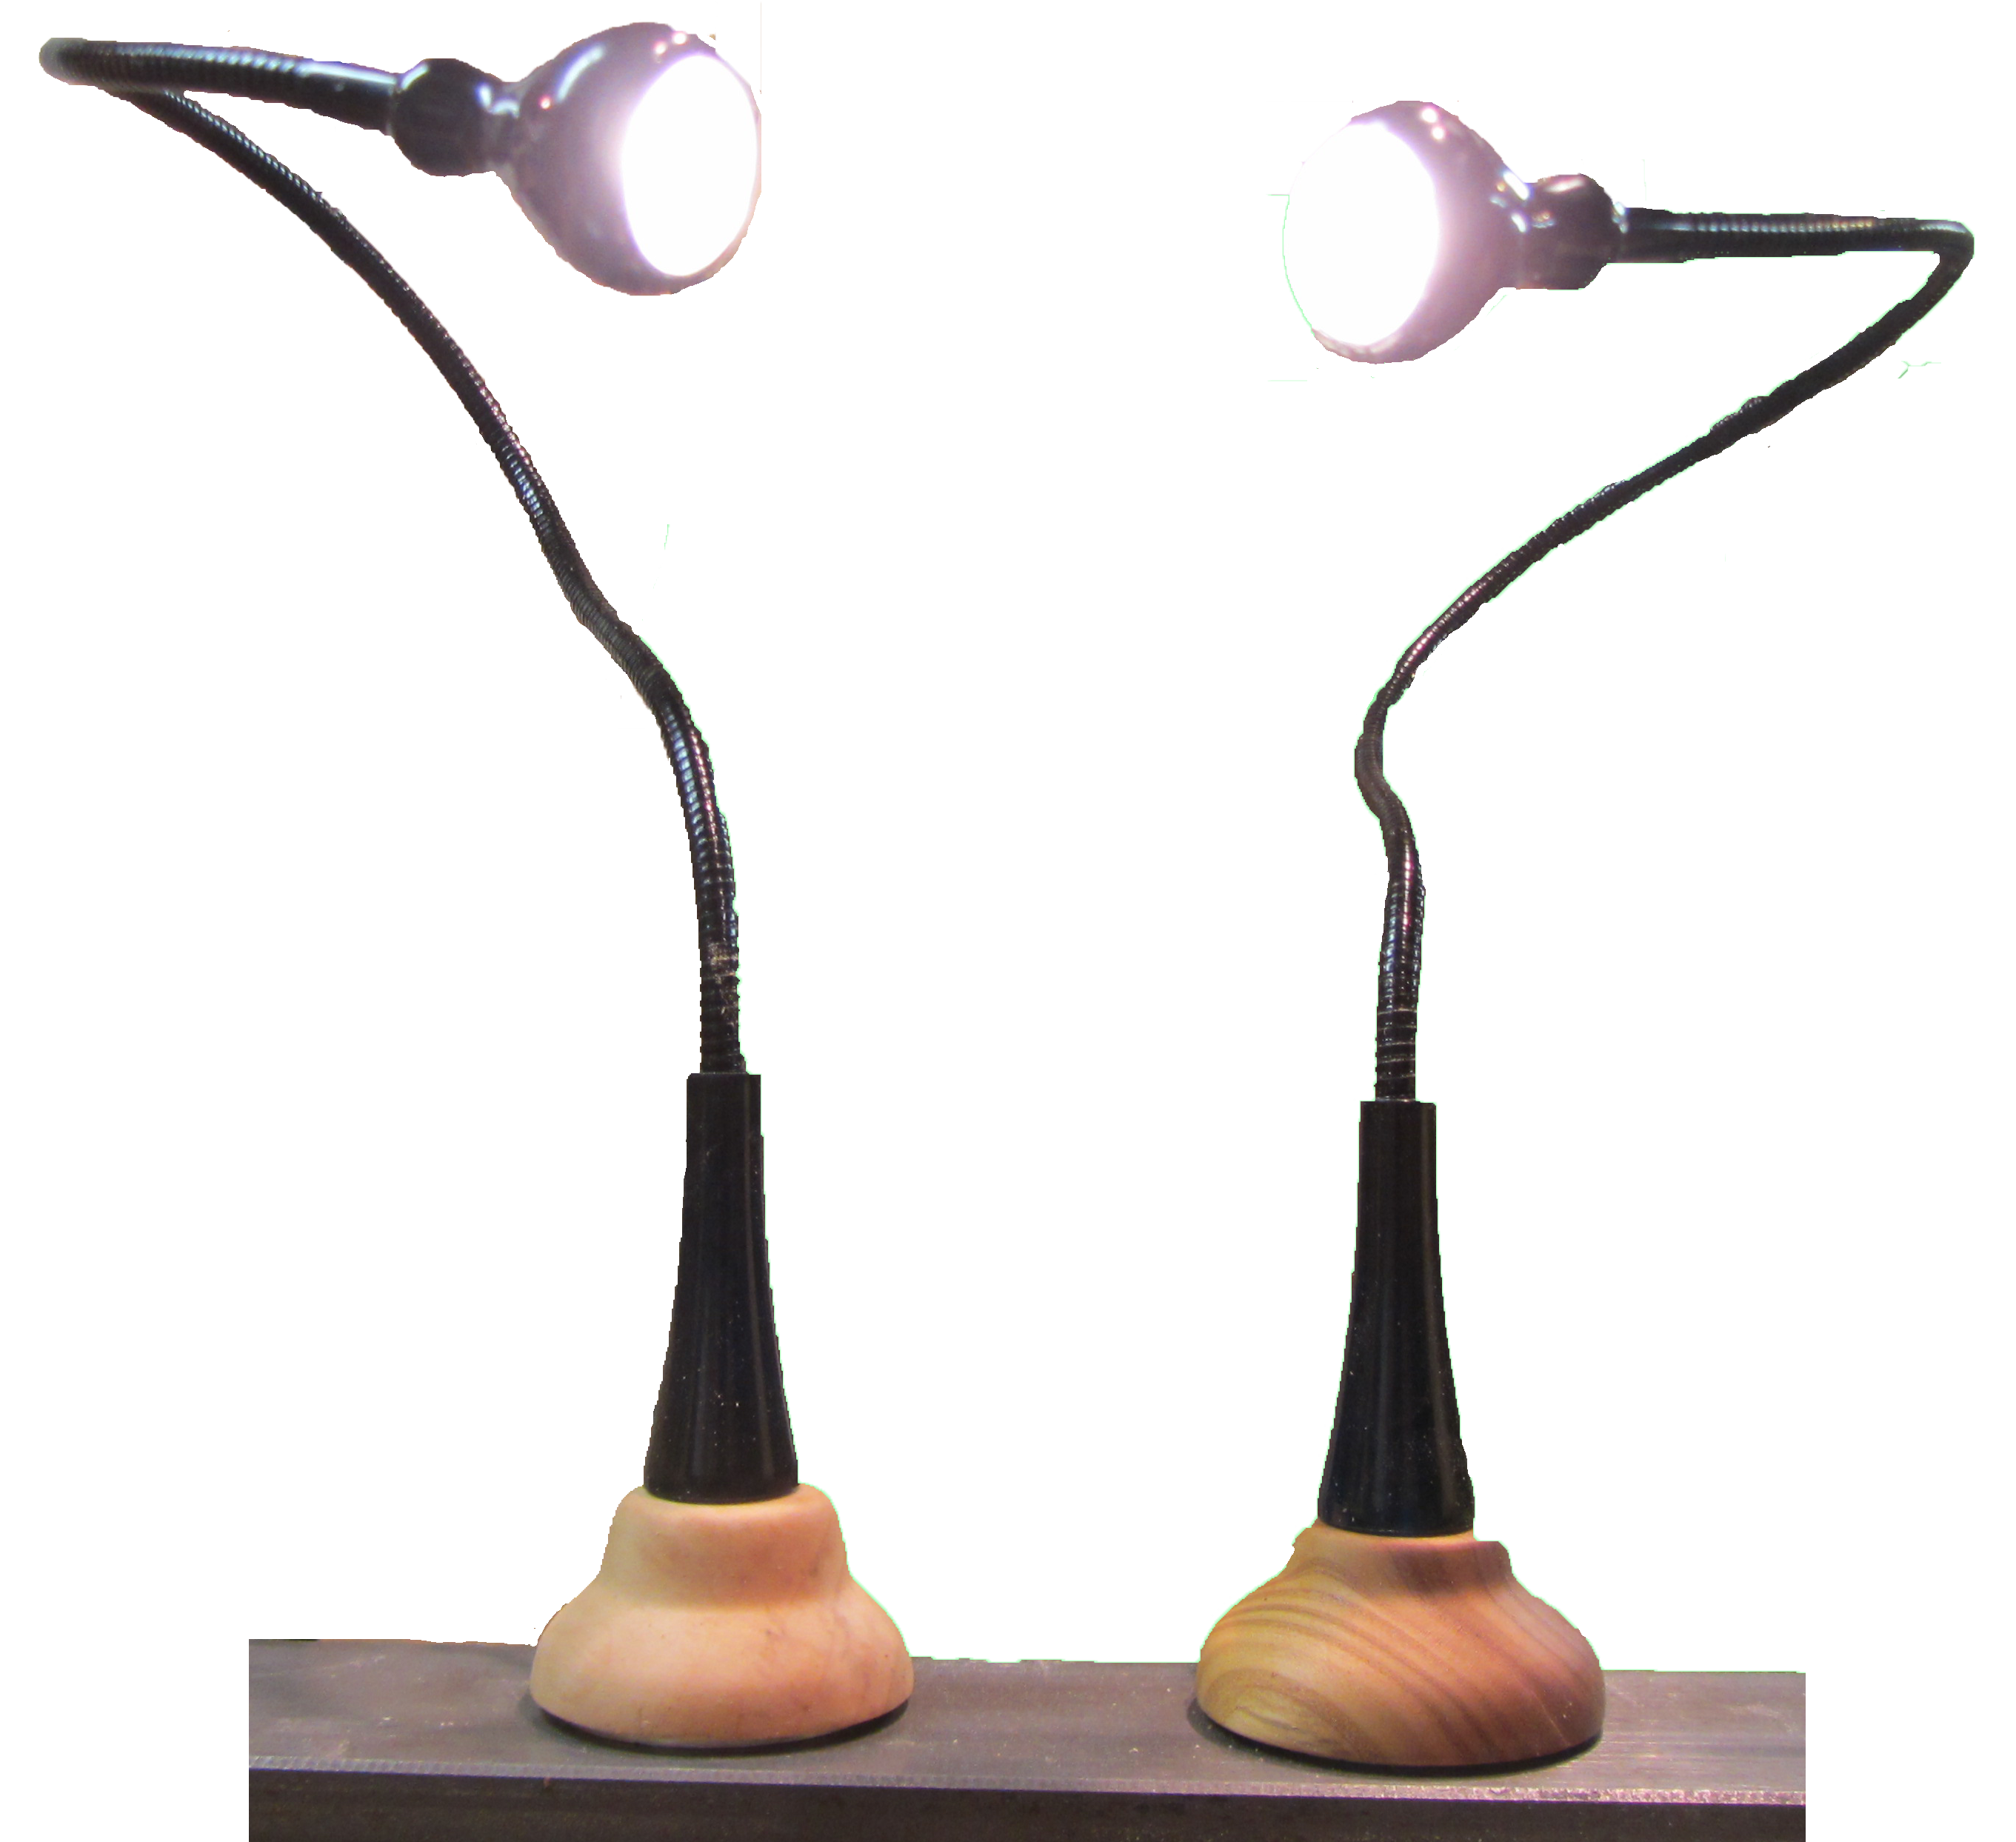 A DIY project to provide LED light to my wood lathe. The LED’s were purchased from Ikea; The magnet was purchased from Harbor Freight. I woodturned small bases to hold the light and the magnet.
Both were turned from scrap offcuts: one is russian olive, the other is aspen.
Before turning, I drilled holes to match the bottom of the LED light. Then the bottoms were turned first to make a recess for the magnet and recess to use to remount onto a chuck. They are finished with a mix of mineral oil and beeswax. Tools used were a bowl gouge and a bedan.
Woodturning A Walnut Salad Bowl

This salad bowl is woodturned walnut 10″ in diameter and 3″ tall and finished with walnut oil.
The walnut was already well seasoned. The wood was salvaged from a gun stock supplier.
It was a fairly quick, very enjoyable project. The most time (over night) came from gluing on a waste block to avoid loosing any wood to a mounting tenon. For this I used a bowl gouge, bowl scraper, and a air powered sander.
Christmas Ornament: The Star of Bethlehem
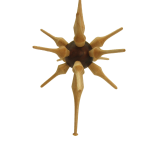
This Christmas Ornament is woodturned walnut and maple about 6″ high and 4.5″ in diameter. The walnut body and maple finials are finished with friction polish. The ornament has a handmade brass hanger.
The Star of Bethlehem represents the sign given for the birth of Jesus Christ, the true center of Christmas.
The challenge with this ornament is accurately drilling the tenon holes in the star’s body, then replicating 12 side finials.
This ornament is part of the Christmas Ornament Woodturning Challenge 2012. Please view the playlist at http://www.youtube.com/playlist?list=PL4W9FE566kZhU-Mo7smbQgsUb-wpUJGom.
A Faux Inside Out Christmas Bell Ornament
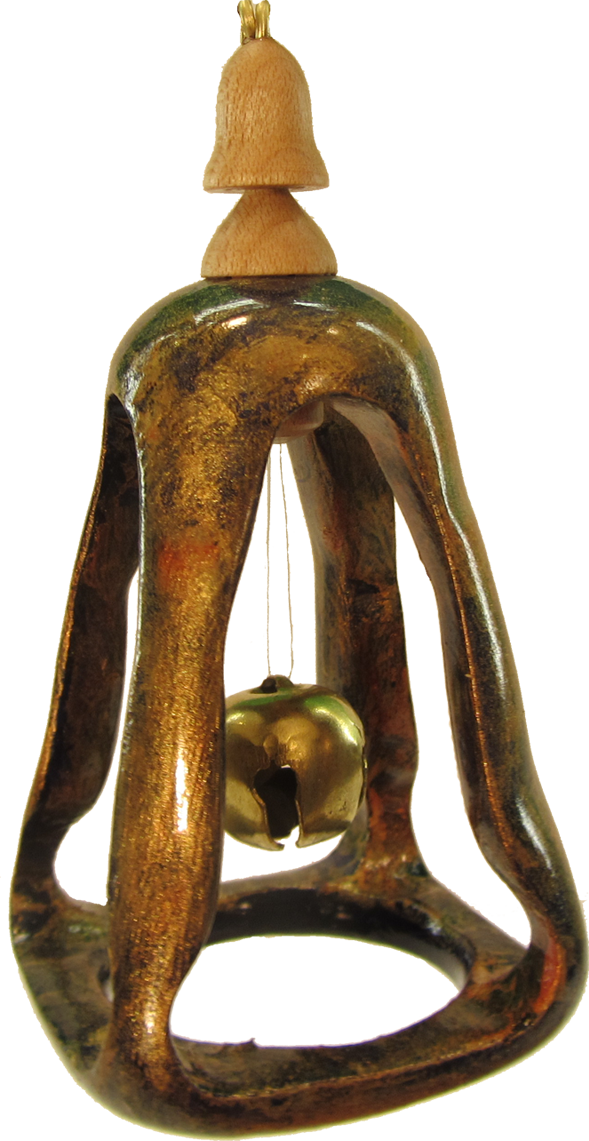 This woodturning is made of maple poplar about 4″ tall and 2″ in diameter. The poplar bell is finished with acrylic paint for an antique look. The maple finial is finished with shellac. The ornament has a handmade brass hanger.
Instead of being turned inside out, the center shape was drilled out with forstner bits. Small bits marked the top and bottom corners. Larger bits bored out the center of the bell.
After mounting the ornament on the lathe, the bottom was also bored out with a forstner bit. Then the outer shape was turned. With the void in the middle, each stoke had to be with extreme care. Then center void was refined with rasps and sandpaper.
The maple finial has a bell shape. A brass bell is the knocker for the larger bell. This is a bell within a bell suspended by a bell.
This ornament is part of the Christmas Ornament Woodturning Challenge 2012. Please view the playlist at http://www.youtube.com/playlist?list=PL4W9FE566kZhU-Mo7smbQgsUb-wpUJGom. Carl Jacobson and I are sponsoring this challenge.
A Christmas Tree Ornament
This woodturning is made of apricot about 5″ tall and 1 1/2″ in diameter. The tree branches are painted with acrylic paint. The entire tree is finished with lacquer. The ornament has a handmade brass hanger.
The branches were turned off axis. Three additional centers were marked on the base at 60 degree angles and about 3/8″ from the true center. The turning axis was shifted to the first off center axis to turn a groove at every third mark along the tree. Then the turning axis was shifted to the second off center axis to turn a groove at every third mark along the tree starting with the second mark. Finally, the turning axis was shifted to the third off center axis to turn a groove at every third mark along the tree starting with the third mark.
This ornament is part of the Christmas Ornament Woodturning Challenge 2012. Please view the playlist at http://www.youtube.com/playlist?list=PL4W9FE566kZhU-Mo7smbQgsUb-wpUJGom
Woodturning Christmas Ornament: Enhancing Poplar and Maple
This woodturning is made of poplar and maple. The body is 2″ poplar dyed red and finished with lacquer. The finials are maple finished with friction polish. Inside the ornament body is a cute little Christmas tree.
The ornament has a handmade brass hanger.
The interior of the body was drilled with a 1 1/8″ forstner bit then sanded. The dye was applied with a mouth atomizer.
This ornament is part of the Christmas Ornament Woodturning Challenge 2012. Please view the playlist at http://www.youtube.com/playlist?list=PL4W9FE566kZhU-Mo7smbQgsUb-wpUJGom. Carl Jacobson and I are sponsoring this challenge. If you would like to enter an ornament in this challenge, video yourself making the ornament, upload it to YouTube, and let me know where the video is. I’ll then add it to the challenge playlist.
Christmas Ornaments: Icicles From Exotic Woods
This woodturning is a set of three exotic wood icicles ranging from 3 inches to 4 1/2 inches in length. Each as a finial at the bottom and a series of other shapes above the finial. They are strung on nylon thread and have a handmade brass hanger.
Each as a variety of woods that I purchased at a black Friday sale. The store did not identify the woods but they have a nice color and density.
I challenged myself to turn this entire project with a skew.
The small scale of this project was a challenge. The 1/16″ drill bit was prone to wander off center which resulted in a crooked hanging. Ok for these but I would prefer them to be straight.
This ornament is part of the Christmas Ornament Woodturning Challenge 2012. Here’s a link to the playlist on YouTube. Carl Jacobson and I are sponsoring this challenge. If you would like to enter an ornament in this challenge, video yourself making the ornament, upload it to YouTube, and let me know where the video is. I’ll then add it to the challenge playlist.