Woodturning Spiral Segmented Vase With Blooper Fix
In case of difficulty, this video is also posted on YouTube and FaceBook.
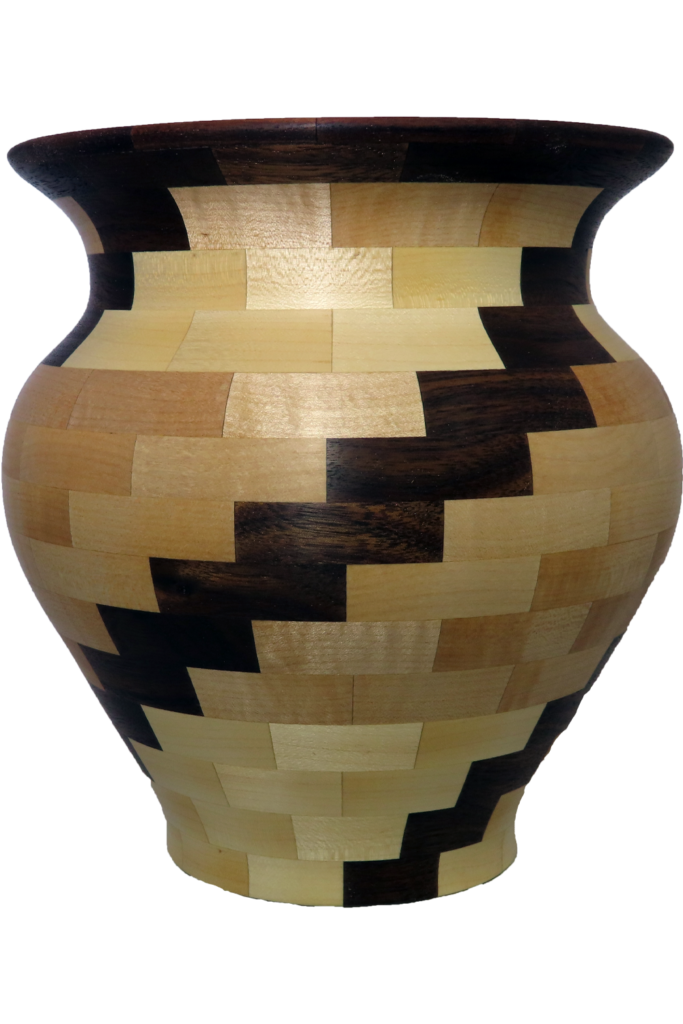
With this project, I am exploring more into segmented turning. Beyond plain rings, this vase features a spiral at 120 degrees apart around the vase.
Featuring 15 rings of 12 segments each, the segment count is 180 segments plus the base which is 3 plys of maple. The vase is finished with walnut oil for a nice matte finish. It stands about 8 inches tall and 7 inches in diameter.
I made a mistake in the second layer. My segments were not correctly spaced. I did not notice the error until the bottom section had been glued up. I had to remove the bad ring and replace it. But noone would be able to tell the difference.
For the steady rest, please see my video where I review it.
Woodturning – My DIY Steady Rest Is Still Steady
Enjoy!
Hey Alan
Thanks for all the teaching and demonstrations you
do – you are a wealth of information. Thanks for taking your time so I can learn!
Keep up the good work!
Tom
Thank you Tom, Will do
Alan
this was awesome loved watching thank you
Thank you Jerry,
Alan
Kent –
Nice job on the vase and very clear and organized tutorial. I just completed my 1st segmented bowl after much you-tube research. I decided to make a 12″ diameter bowl with 8 – 3/4″ thick rings. I first cut the strips from scrap, then used an inexpensice Protech miter on my table saw to cut the segments at 15*. I used an online segment calculator to calculate segment lengths. Net I dry fitted each ring, then glued up as you, but I used pipe band clamps to hold in shape while glue dried. I staked teh rings with waxpapaer between them and placed a piece of plywood and a 30 lb dumbell on top while they dried. The next day I ran all of the rings thru a planer. Next I lined up and marked lineup with a sharpie in 2 spots on each ring. Next was to glue up teh rings at one time, lining up the sharpie marks and then clamping them all together with 4 18″ pressure clamps. The final glue up step was to glue onto the 1″ think maple base that I had previously turned and left the tenon on the bottom. Once all of the glue had cured, I placed on the lathe and did teh final turning and shaping. I did not use teh cole jaws until I removed the tenon from the base
Great review of the process.
Alan
Do you always use the same hardness of wood in a segmented turning? For example using walnut with pine or cedar? Or wild cherry with soft maple?
Thanks
Cathy
I try but not always.
The problem shows up some in turning as softer wood cuts away more quickly.
Then when sanding, the same happens.
When this is the case, I sand a higher speed and sometimes use a hard block while sanding.
Alan
Great looking vase, you are becoming a Master! Thanks for sharing all these years.
Cathy
Thank you Cathy
Alan