Woodturning Olive Vase Hollow Form From Wet To Dry
If the above video does not play, this video is also posted on YouTube(link) and FaceBook.
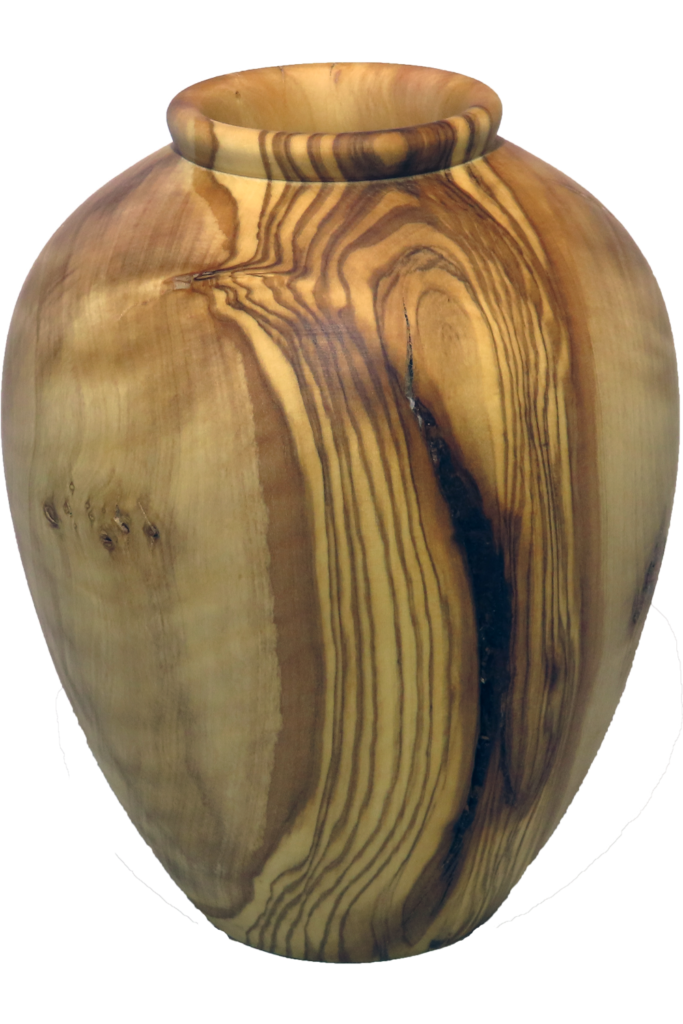
This olive wood came from the Phoenix, Arizona area. While rough turning the vase instead of a full hollow, I bored a 2 inch hole. At 2 inches, I can drive the Jacobs chuck into the vase without an extension.
The wet wood was sealed with Tree Saver Green Wood Sealer
from Craft Supplies USA.
Over 17 months, the wood lost 24% of its weight through moisture loss.
Fortunately, no crack developed in the base.
This vase is approximately 5 inches diameter and 7 inches tall, finished with walnut oil.
For the steady rest, please see my video
Woodturning – My DIY Steady Rest Is Still Steady
Enjoy!
Woodturning Jewelry Tray In Zebrawood
In case of difficulty viewing this video, it is also posted on YouTube(link) and FaceBook(link).
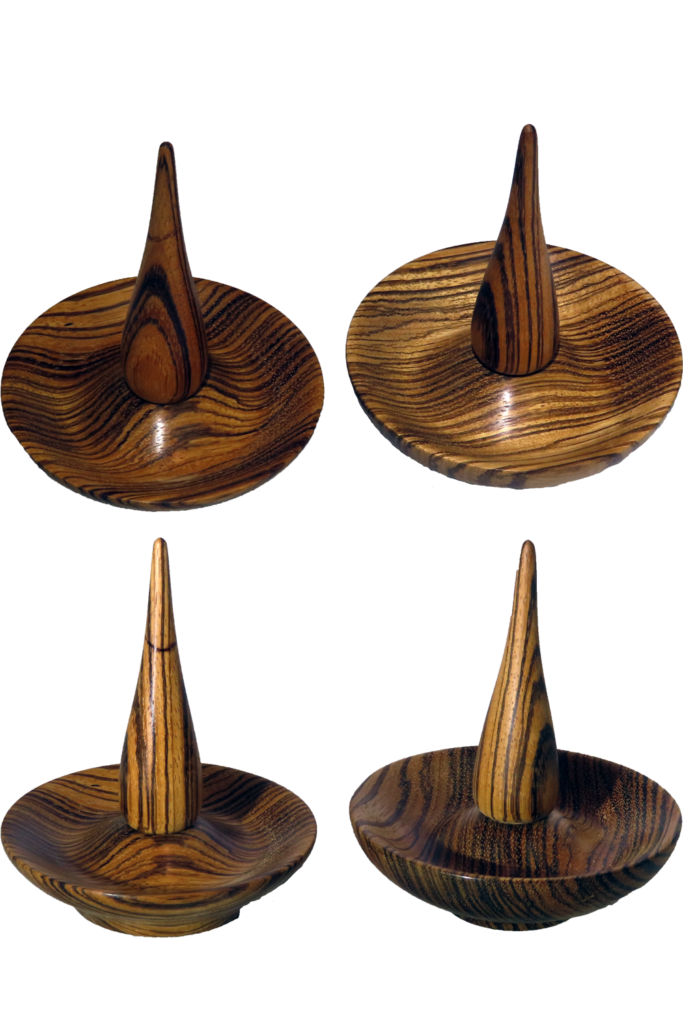
With several weddings approaching, I need to turn more jewelry trays. I like them because they are unique gifts that no one else will be giving. They are not difficult. As a small bowl and a short spindle, they do not take very long. Yet they have their own personality.
These are zebrawood for a distinctive grain finished with shellac. They are about 4 inches in diameter and 5 inches tall.
Enjoy!
Woodturning Triple Lobe Celtic Knot Segmented Vase
In case of viewing difficulty, this video is also posted on YouTube and FaceBook.
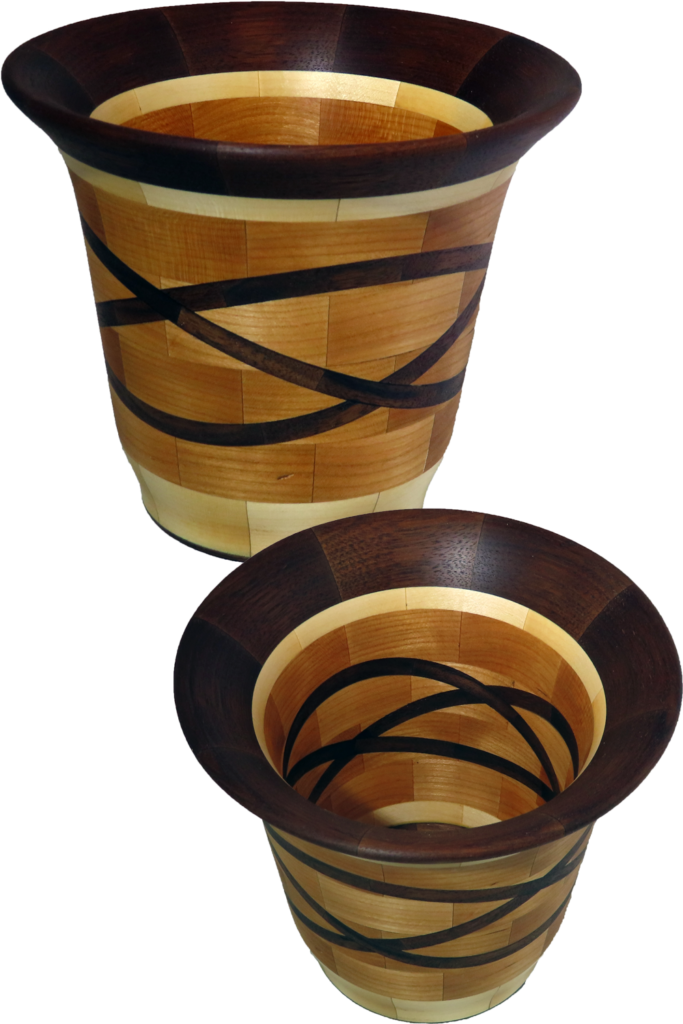
I have been working up to this project for several weeks developing a variety of techniques and processes. I first developed a N-Loop Celtic knot process in 2015. That process uses a table saw to produce perfectly formed Celtic knots. I know have expanded with a process for a band saw that enable larger diameter projects.
This is a segmented project with 104 segments of maple, cherry, and walnut, finished with walnut oil.
The jig uses a 3D printed knob that I have not seen anywhere else. I now make the knob available on Etsy at https://www.etsy.com/shop/AsWoodTurnsTools
I can present this process in detail in a remote demonstration.
Enjoy!
Woodturning Three Part Goblet From Walnut and Hazelnut
In case of difficulty viewing this video, it is also posted on YouTube(link) and FaceBook(link).
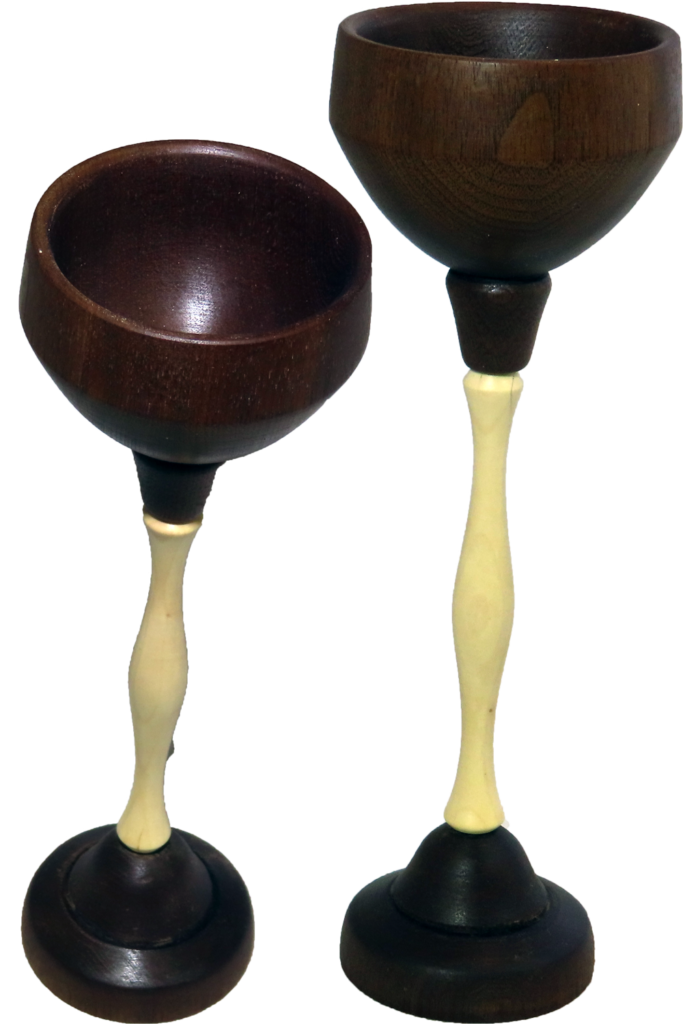
After I turned the goblet last week, one person asked if I could have salvaged the original or make it from multiple pieces. YES. Here we go.
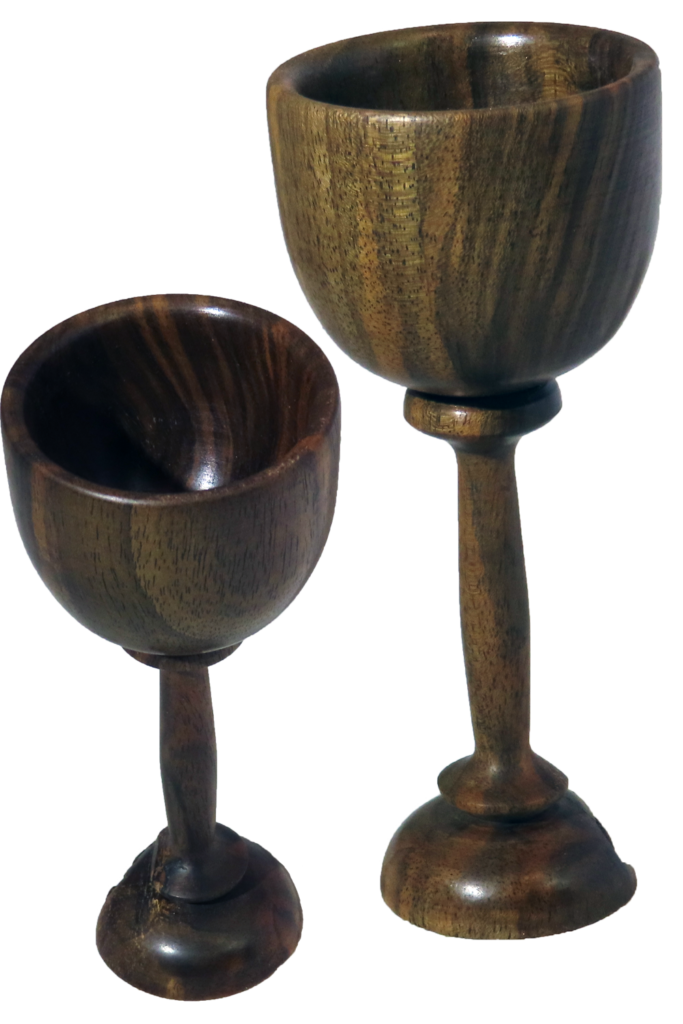
This one is walnut for the cup and base; hazelnut for the stem. it is 2.5 inches by 7 inches finished with shellac.
I also used a 0.25″ #2 Morse Taper collet to hold the spindle. Worked much better and safer than a Jacobs chuck.
BTW
- #2 Morse Taper 0.25″ Collet: Little Machine Shop #1747, about $11.95
- Draw bar, 3/8″ all thread; Hardware store
- 3/8″ knob, DIY or purchase.
Enjoy!
Woodturning Stemmed Goblet From Walnut
In case of difficulty while viewing, this is also posted on YouTube(link) and FaceBook(link).
Eight months ago, I started turning a goblet from fresh wet elm. At that time, I rough turned it and set it aside to dry. Now, it felt very dry. I thought it would be perfect to turn another goblet. However, the stem broke with a very clean cross break. Disaster.
What to do?
I went out to the scrap pile and found a small chunk of gnarly walnut, definitely dry. Could I turn a goblet out of this poor piece of wood?
The goblet is 2.5 inches by 5.5 inches and finished with shellac.
I turn a goblet from the top down to preserve strength in the stem.
This one survived. I am happy.
Enjoy!
Woodturning Hand Chase Threads – Three Plus Critical Tips
In case of difficulty viewing this post, it is also posted on YouTube (link) and FaceBook(Link).
Threading can be intimidating. Expensive wood, fine detail, high risk for destroying a project.
What to do?
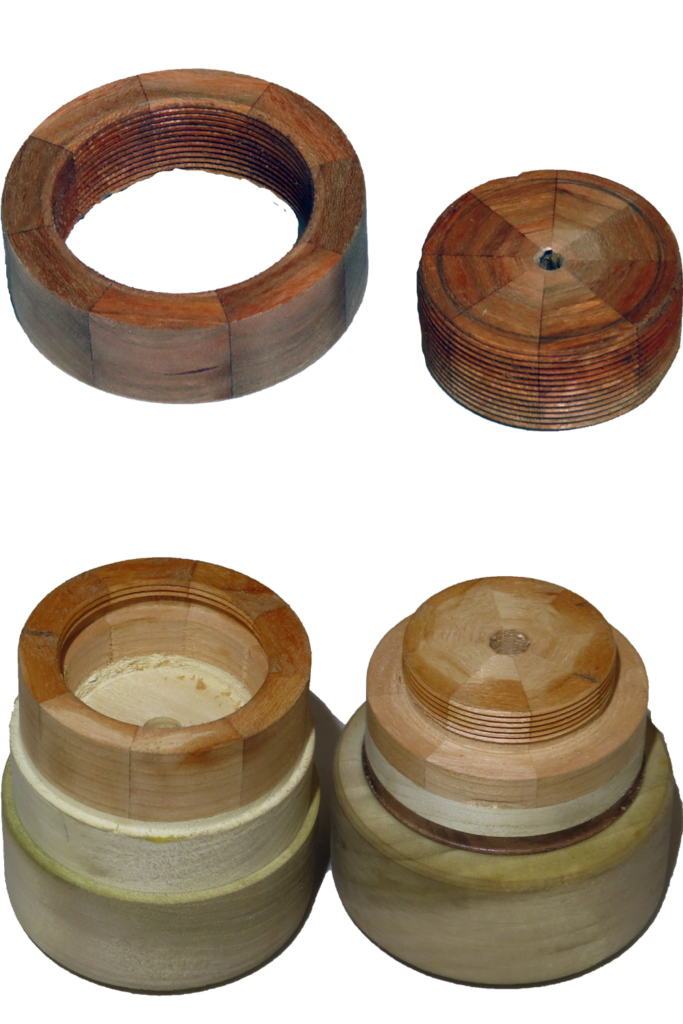
- Separate threading from the main project. Thread an insert. While inserts can be purchased, with a little practice, you can make your own.
- Use common woods such as cherry, poplar, maple in a segmented disk for your insert. These are sustainable woods that do not deplete the rain forest.
- Overcome fear of threading: In this video, we address how to train yourself to the appropriate rhythm for threading and how to avoid double threading.
BTW, for a 16 tpi, the distance from the peak of a thread to its valley is about .08 of an inch. For 10 tpi – ~ .13; for 20 tpi .065.
Threading tools come mainly in 10, 16, and 20 threads per inch (tpi) and are available at Craft Supplies USA, Amazon and others.
I lubricated the threads with walnut oil.
Enjoy!
Woodturning Oak & Plum Burl Cross Grain Box
In case of viewing difficulty, this video is also posted on YouTube and FaceBook.
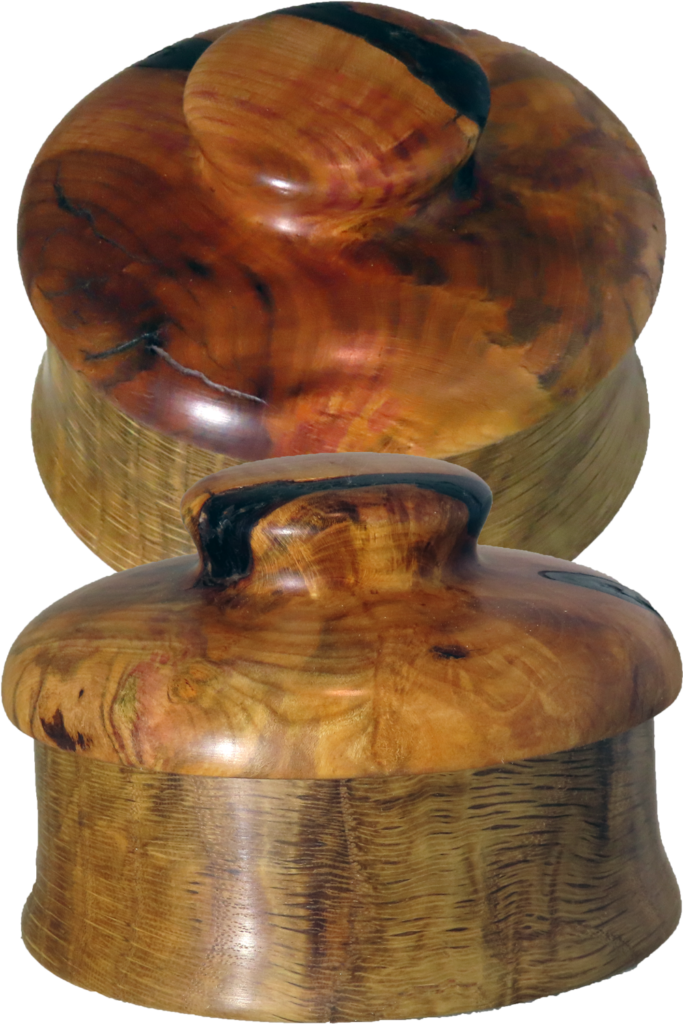
I turned the project in preparation for a club remote demonstration. The base is nicely figured white oak. The lid is plum with a lot of burl figure.
A cross-grain box like this one requires at least six mounts or remounts: three for each piece. The first is for the rough one; each then requires a top and bottom mounting. Some are in compression mode while others is expanding into mortises both deep and shallow.
I used a pin faceplate for the first mount of each piece. It was pretty handy. I prefer it to using the face of closed chuck jaws.
I think it turned out nice.
Enjoy!
P.S. You can see my list of club demonstration topics at www.AsWoodTurns.com/Demonstrations/
Woodturning Double Triple Celtic Knot
In case of difficulty, this video is also posted on YouTube and FaceBook.
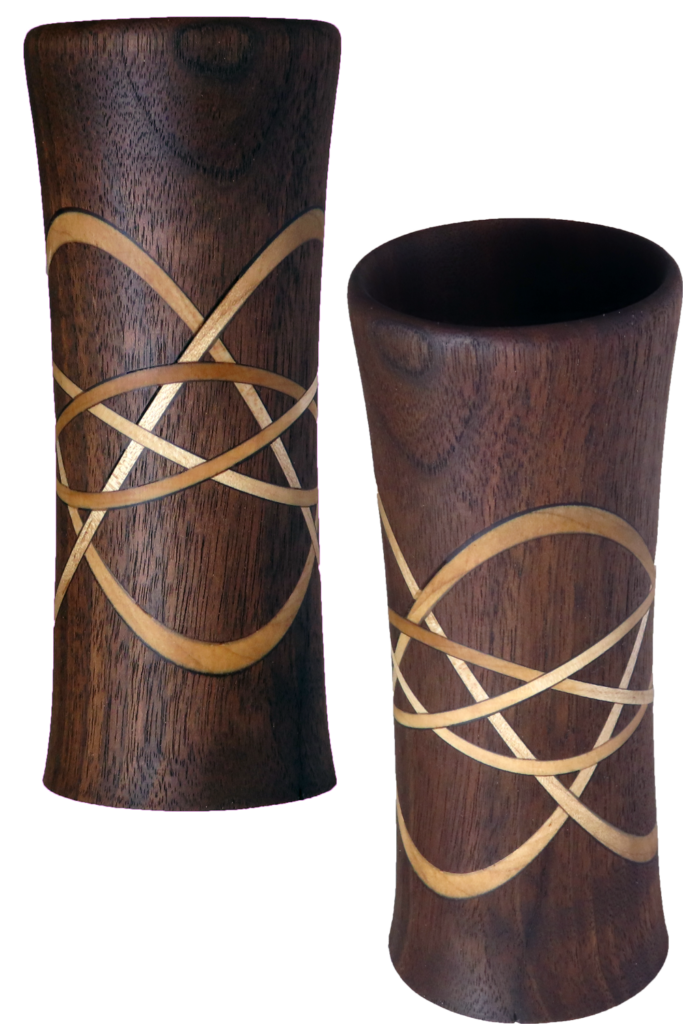
This project features a walnut vase with two sets of Celtic knot loops of maple. It is 2.5 inches diameter and six inches tall.
Helpful equipment and accessories are:
- 2 hexagon templates sized for the maximum capacity of my tablesaw. These are drawn in software and printed then glued to .25 inch plywood or hardboard. I saw and sand to the line.
- a tablesaw sled to which I can temporarily fasten scrap to position my project for sawing.
- hot melt glue gun.
I screw the templates to the rough turned stock at the center and hot melt for additional security.
After positioning the project with templates on the sled at an angle of choice, I fastened scrap pieces to the tablesaw sled to enable returning the project to the same position on the sled.
Before sawing, I also fasten scrap to the top of the project with hot melt glue. This wood maintains the relative position of the two halves of the project that soon will be.
Then saw but not through the positioning scrap.
Now glue in the replacement wood. I used maple.
Repeat for each loop. However, I changed the angle after sawing every other point on my hexagon before sawing the next three alternating loops.
Then hollow and shape to taste.
Enjoy!
Woodturning Spiral Segmented Vase With Blooper Fix
In case of difficulty, this video is also posted on YouTube and FaceBook.
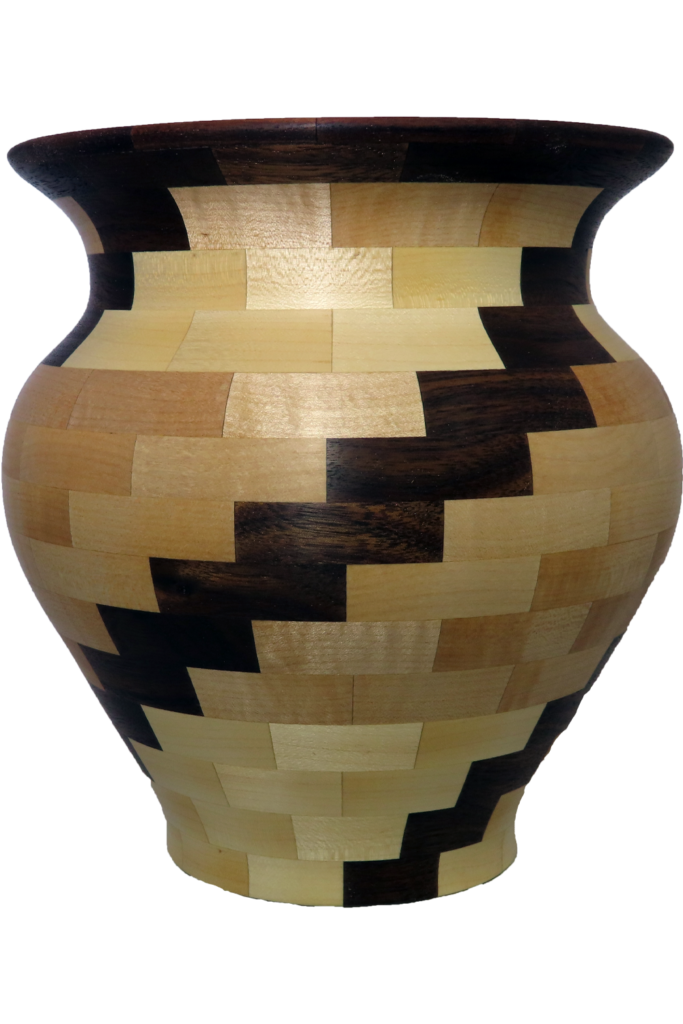
With this project, I am exploring more into segmented turning. Beyond plain rings, this vase features a spiral at 120 degrees apart around the vase.
Featuring 15 rings of 12 segments each, the segment count is 180 segments plus the base which is 3 plys of maple. The vase is finished with walnut oil for a nice matte finish. It stands about 8 inches tall and 7 inches in diameter.
I made a mistake in the second layer. My segments were not correctly spaced. I did not notice the error until the bottom section had been glued up. I had to remove the bad ring and replace it. But noone would be able to tell the difference.
For the steady rest, please see my video where I review it.
Woodturning – My DIY Steady Rest Is Still Steady
Enjoy!
Woodturning Mesquite Vase – Rough and Tough From Green To Finished
In case of viewing difficulty, this video is also posted on YouTube and FaceBook.
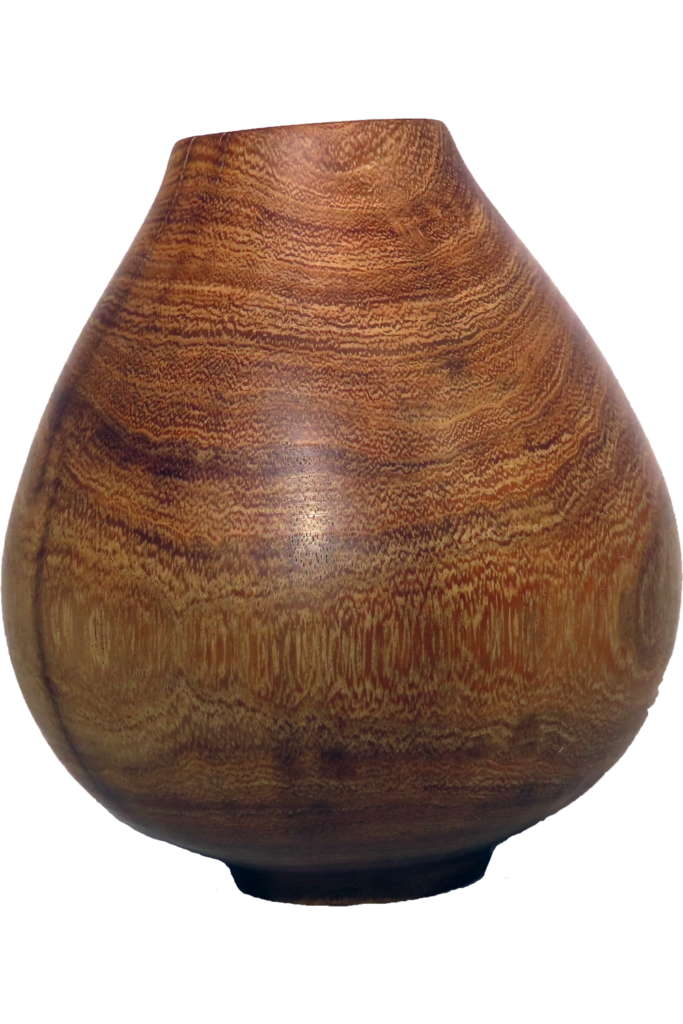
I picked up this mesquite in Arizona over a year ago. Shortly after bringing it home, I rough turned and partially hollowed it. I only partially hollowed it because I was still working on my hollowing rig at the time. I regret not hollowing it more while green and a little softer.
I sealed the wet wood with Bowl Save from Craft Supplies USA, a PVA based wood sealer and let it dry.
Once dry and harder, I finished hollowing and then finished the outside. It is difficult to show hollowing since the real action is inside the vase – out of sight. I use a USB borescope camera on the hollowing rig. The camera moves with the cutting bit. Even though the bit is inside the vase, it still shows the relative position of the cutter and the outer wall of the vase on the screen.
For those wondering why the hollowing video segment is so poor. The tool is marked on an transparency covering the screen. What you can see is a camera shot of my small screen including the transparency. For you tech savvy people, I challenge you to find a better way to show this setup.
The vase is five inches diameter and six inches tall finished with walnut oil.
For the steady rest, please see my video where I review it.
Woodturning – My DIY Steady Rest Is Still Steady
Enjoy!