Woodturning Cross Grain Box – This One Had Other Plans
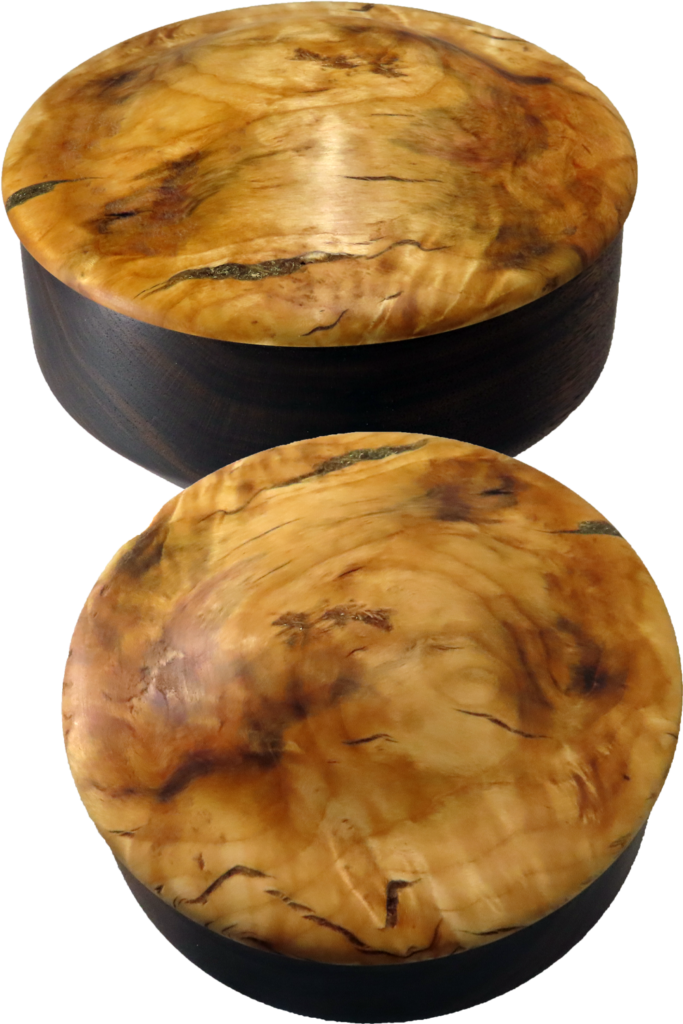
For convenience, this video is also posted on YouTube and FaceBook. Best Right Here!
Recently, our club had a remote demonstration of turning a cross grain box. The demonstration was not so remote for myself since our club president came to my shop to do the demonstration. After a great demonstration, I usually want to turn the same or similar project myself.
A cross grain box is defined by the grain of the wood running perpendicular to the turning axis. This results in a very different grain pattern than and end grain box. Taking advantage of the grain orientation, a cross grain box is often larger in diameter than in height.
However, the seasonal movement of wood is also different. With humidity changes, an end grain box will grow/shrink uniformly at the joint between base and lid. In this case, the lid can be tight if desired. Cross grain does not grow/shrink uniformly. Consequently, the joint must be more loose so that the pieces do not lock together.
Another advantage of a cross grain box then is that the material for the lid may be different than the material for the base. Different species of wood grow/shrink differently. A cross grain box with different wood for lid and box leverages its tolerance for different expansion rates.
In this case, the box base is walnut while the lid is plum burl. It is 5 inches by 3 inches overall and finished with beeswax and mineral oil. The beeswax leaves a pleasant scent to the interior of the box.
Enjoy!
Woodturning 3D Holographic Display
For convenience, this video is also posted on YouTube, Vimeo, and FaceBook. Where to go? Just stay right here at As Wood Turns.
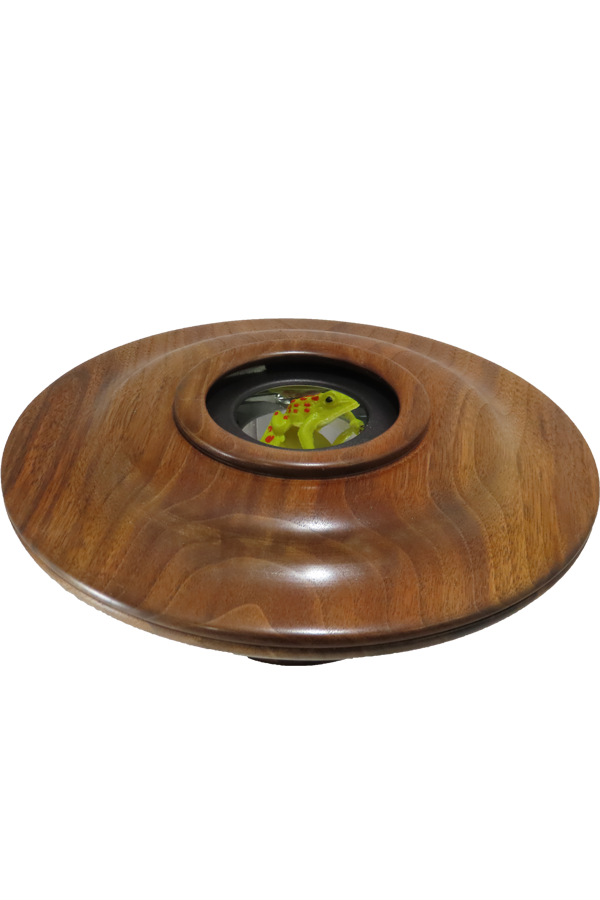
My wife found a 3-D Mirascope on Amazon. This is a child’s toy exploring 3-D projection. It uses a pair of parabolic mirrors to project the hologram.
As is, while interesting to view the hologram, the case is black and uninteresting. My task is to elevate this toy to be worthy of being on display.
I turned two bowl like pieces of walnut and fitted the toy inside. The fitting is the hard part.
The wood is walnut just over seven inches diameter and about three inches in total height. It is finished with shellac friction polish.
From toy box to display – Nice!
Enjoy!
Woodturning Elevated Platter / Bowl – Patience Rewarded
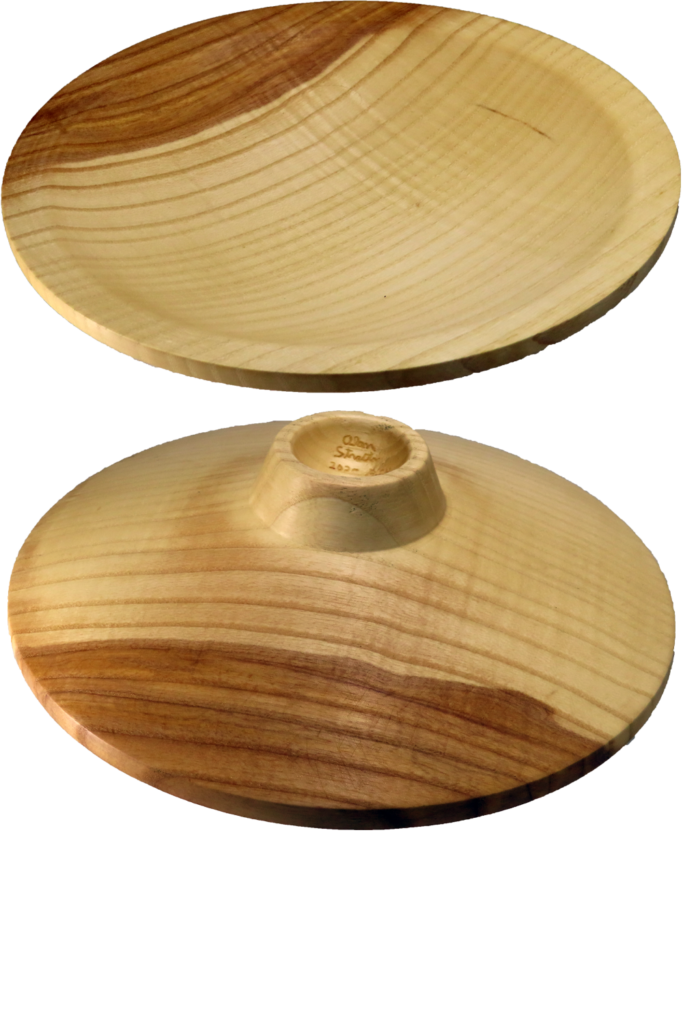
For convenience, this video is also posted on YouTube, Vimeo, and FaceBook. Since you are here, why go anywhere else?
This item is either a bowl or a platter depending on your definition. To me, a bowl is perhaps more of a container and a platter has a flat inside surface. This one is half and half.
The wood is ash, harvested green, turned rough, dried, then remounted and completed. Total time is about 14 months. The platter is finished with walnut oil. Dimensions 9 inches diameter and 2 inches high.
This design has its own elegance.
Enjoy!
Woodturning Beautiful Burl Bowl From Ugly Wood
For convenience, this video is also posted on YouTube, Vimeo, and YouTube. Where Best? You are already here!
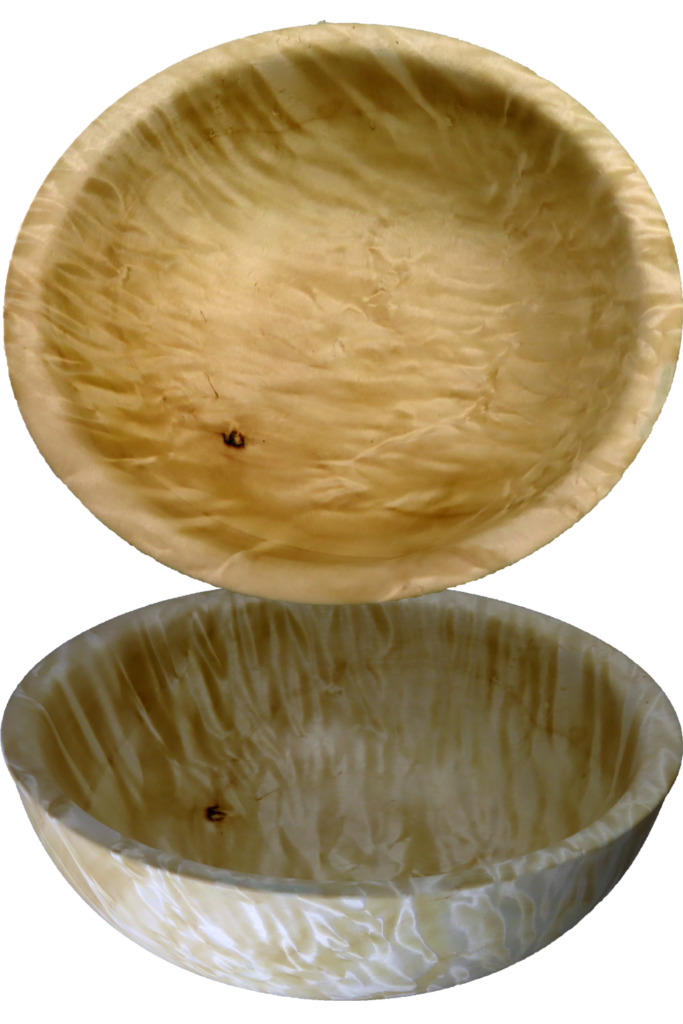
I love turned wood bowls. However, the best ones take time.
I rough turned this bowl from a box elder burl about eight months ago. Since then, the rough bowl has been drying.
It is dry now and I remounted it and finished the bowl. Now I can see beautiful burl figure in the wood.
Well worth the wait. Just for you, I have compressed the time so you can see the whole process in one video.
Enjoy!
Woodturning Perfect Spheres – For Wise Turners
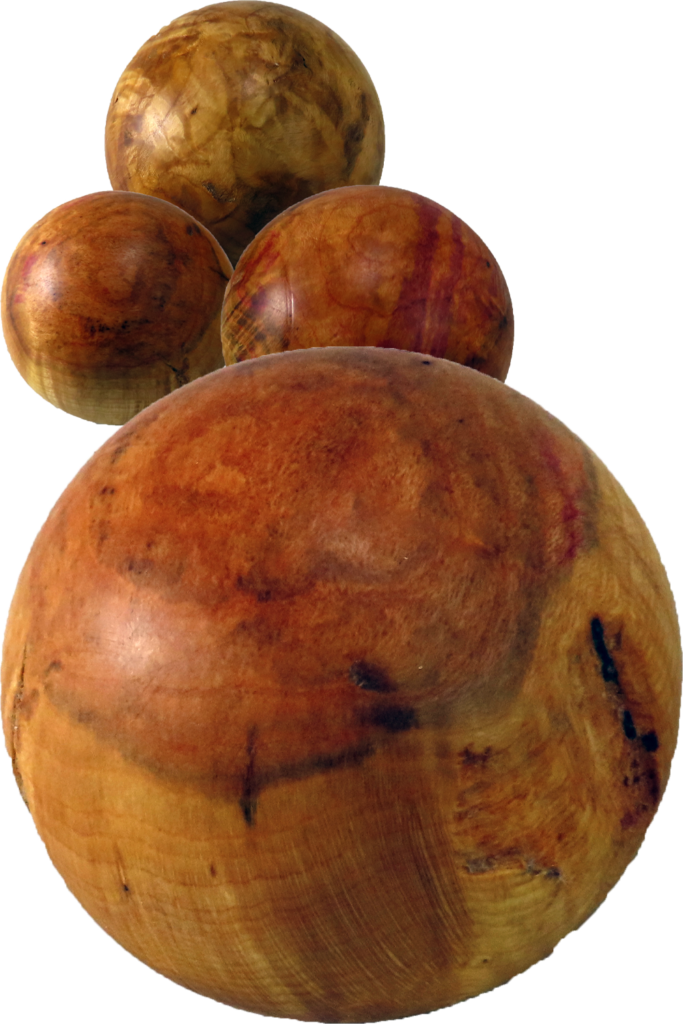
For convenience, this video is also posted on YouTube, Vimeo, and FaceBook. Best place? – You are already here!
Whenever I see someone promote a sphere jig, a conflict boils up in me.
On one hand, I respect someone who can create a good jig and appreciate the apparatus.
On the other hand, a sphere jig is a terrible expense for most turners when the same result can be achieved in the same amount of time with typical tools and trivial expense. I would rather use my budget to purchase a good multi-purpose tool.
Well, I saw another and decided to again present the process to turn a perfect sphere without any expensive jig. This process combines the octagon method and cup centers. There sphere in this video took only 27 minutes from the cylinder stage to completed stage. I did not work quickly because I did not intend for it to be a race. However, after realizing how quickly the sphere turned, I am issuing a challenge.
The Challenge is in two parts: For turners who already have a jig and for turners who do not have a jig. For both groups, start when you have a cylinder of the chosen diameter.
Turners with a jig:
Using your jig – any jig – turn a sphere at your standard pace (not race speed) to completion and report your time. My time was 27 minutes to finished.
Turners without a jig:
Follow the process in this video. Turn a sphere at your standard pace (not race speed) to completion and report your times. An even better plan is to turn 3 spheres to cement the process in your brain and body.
Instead of blowing the budget on a special purpose tool, develop a basic skill to be used again and again in the future.
Enjoy!
spherejig #sphere #woodturning #woodlathe #turning #woodworking #AlanStratton #DIY #woodturningprojects #video #spheresfordummies
Woodturning Dyed Vase – Wet to Dry
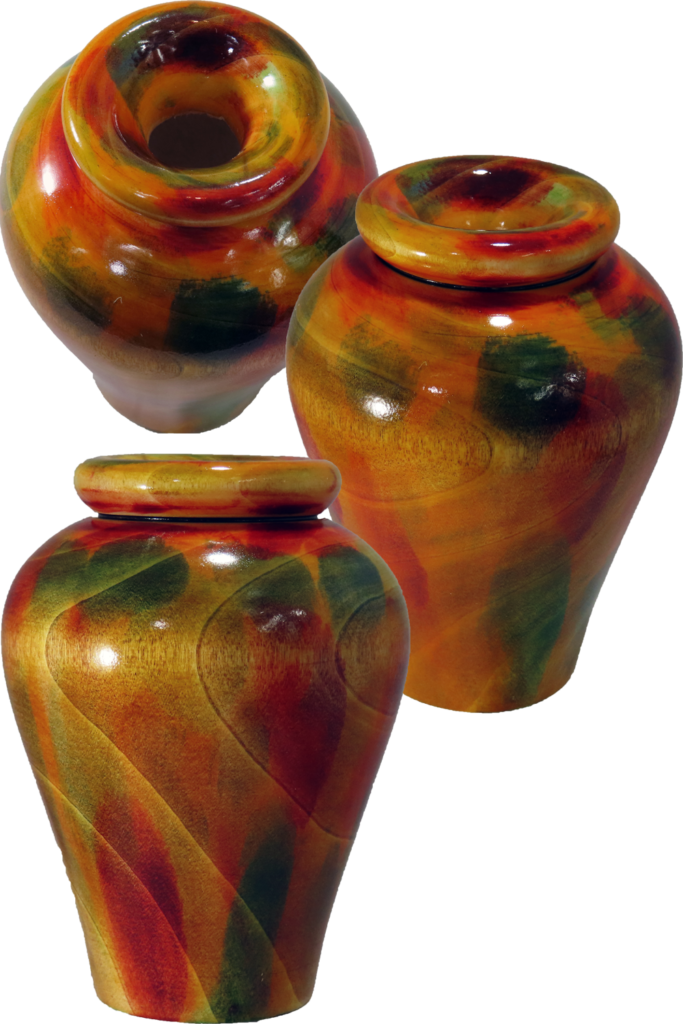
For convenience, this video is also posted on YouTube, Vimeo, and FaceBook. More better right here.
The wood for this project is green or wet aspen that I received in a club wood exchange (pre-Covid). I turned it green, and put it away to dry. Now I can remount, finish hollowing, and finish the vase.
However, aspen is (to me) a plain wood without a lot of character.
To compensate, I decided to apply alcohol based dye. Since I could not decide which color would be best, I used all that I have – even black (it is on the bottom).
I think it turned out nice. I would apply color this way again.
I also used my DIY steady rest for insurance against unidentified flying objects in my shop.
Enjoy!
Links
My DIY Lathe Steady Rest
Update To My DIY Lathe Steady Rest
Woodturning With Negative Space – Whoops What Happened?
FYI, This post is also on YouTube, Vimeo, and FaceBook, Best right here!
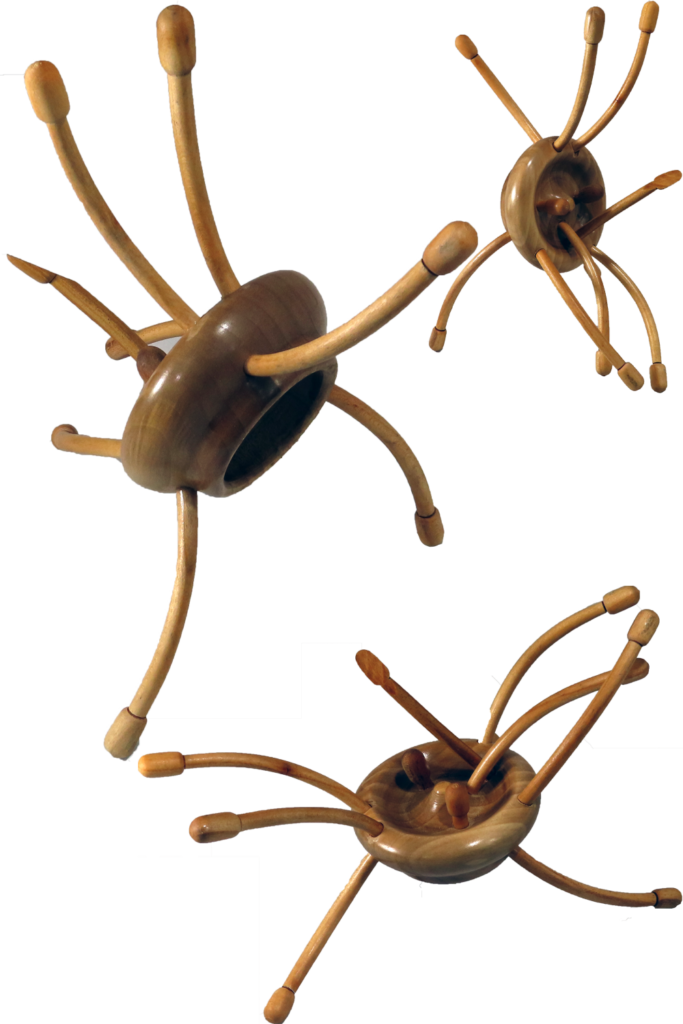
I started this project to explore a bowl form with negative space. My plan was to turn twelve long thin spindles and form them into a bowl shape.
Turning twelve similar spindles is a challenge so I kept the profile very simple. In addition, variation in spindle thickness would bend very differently. I used air dried cherry that I split so the cuts would follow the grain.
Bending was a challenge. I divided the spindles into two batches of six. Then steamed each batch for 20 minutes in a pressure cooker. After a full cycle, I bent the spindles around a plywood form and clamped them to dry. However, even with splitting the wood, many did not survive the bending. Many split as they bent. Perhaps the curve was too great.
I turned more out of another half log of cherry. These I rough cut on the band saw trying my best to follow the grain. Most of these also broke or split when turning or bending. Many broke instead of splitting, indicating low strength in the wood.
I needed still more to replace those that broke. I grabbed a kiln dried board of cherry and turned two more. The grain was very straight and turned nicely. However, when steamed, the first immediately split. The other did not want to bend. I steamed the other again immersed in water. This one finally bent easily but still split.
Disaster had struck. Plan “B” was long gone.
Enjoy!
Woodturning Thin Stem Goblet With ‘Shaggy Dog’ Bark
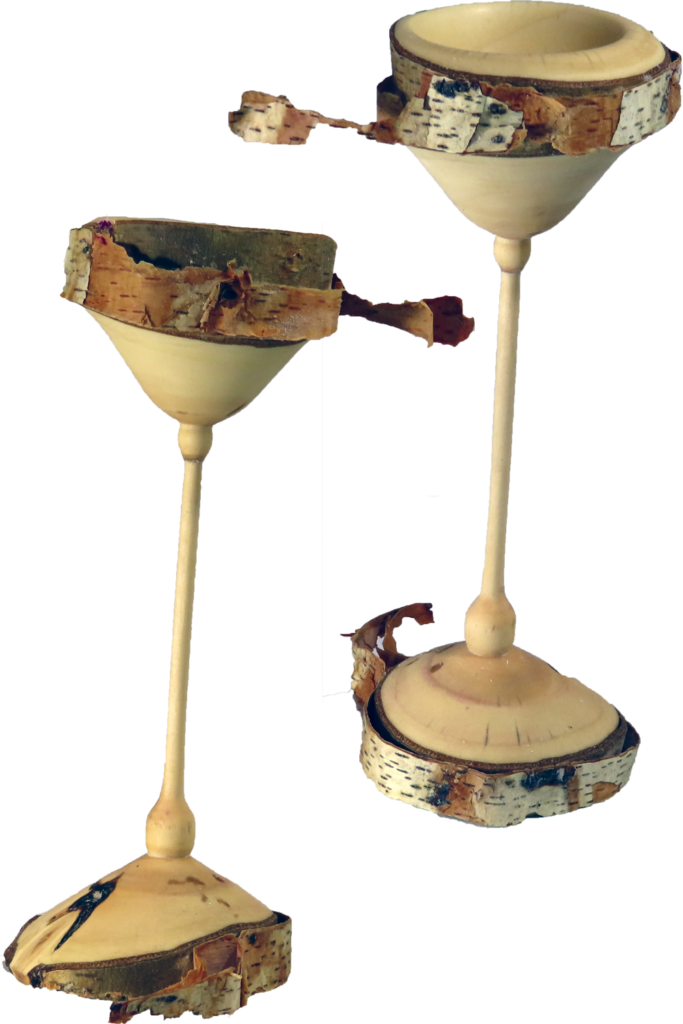
You are here which is great. In case of difficulty, this video is also posted on YouTube, Vimeo, and FaceBook.
The wood for this goblet is unusual. It is birch with a very shaggy bark. It did not leaf out this spring. So, now it is wood for turning.
Turning a thin stem on this goblet does require some special provisions including support for the long thin piece.
My process sequence is:
- Mount between centers making sure the pith is off center.
- Cut a mounting tenon and remount in a chuck.
- Cut a smooth area in the stem area for use with the steady rest.
- Engage the steady rest.
- Hollow the interior of the goblet and sand. Optionally apply finish.
- Support the bowl portion with a fitted faceplate on the live center. Remove the steady rest.
- Cut the exterior of the bowl portion.
- Working in small sections, form the stem portion, never going back up to previous thin sections.
- Form the exterior of the base.
- Either on the lathe or with carving tools, hollow the interior of the base if the wood is wet.
The goblet is 6 inches tall and 2 inches in diameter and finished with walnut oil.
I now can do remote demonstrations for any club, world-side.
Links:
My DIY Lathe Steady Rest (Be sure to also watch the next one)
Update To My DIY Lathe Steady Rest
Enjoy!
Woodturning Pear Bowl – Wet To Dry To Finished
This Video is also posted on YouTube, Vimeo, and FaceBook. Please stay right here. This is it.
The wood for this bowl came from a neighbor’s ornamental pear tree that came down in a microburst. The wet wood was heavy and dense – wonderful. I have made several projects from this tree.
Shortly after harvesting the tree, I rough turned the bowl. The wood was very irregular – prompting an extra mount to resolve the uneven bottom surface.
After coating the bowl with green wood sealer, I let it dry about 11 months, periodically weighing the bowl and recording the date and weight. When the rate of change in minimal, it is dry enough.
I was concerned about a branch running vertically in the side of the bowl. This could be the source of uneven drying, cracking, and extreme warping. As it turned out, it only distorted the side of the bowl but was the source of tear out that I had to sand.
The bowl is 9 inches in diameter and finished with walnut oil.
I now can do remote demonstrations for any club, world-side.
Enjoy!
Woodturned Plate – Chop To Dry To Finished
This video is also posted on YouTube, Vimeo, and FaceBook. I’m glad you are here at As Wood Turns.
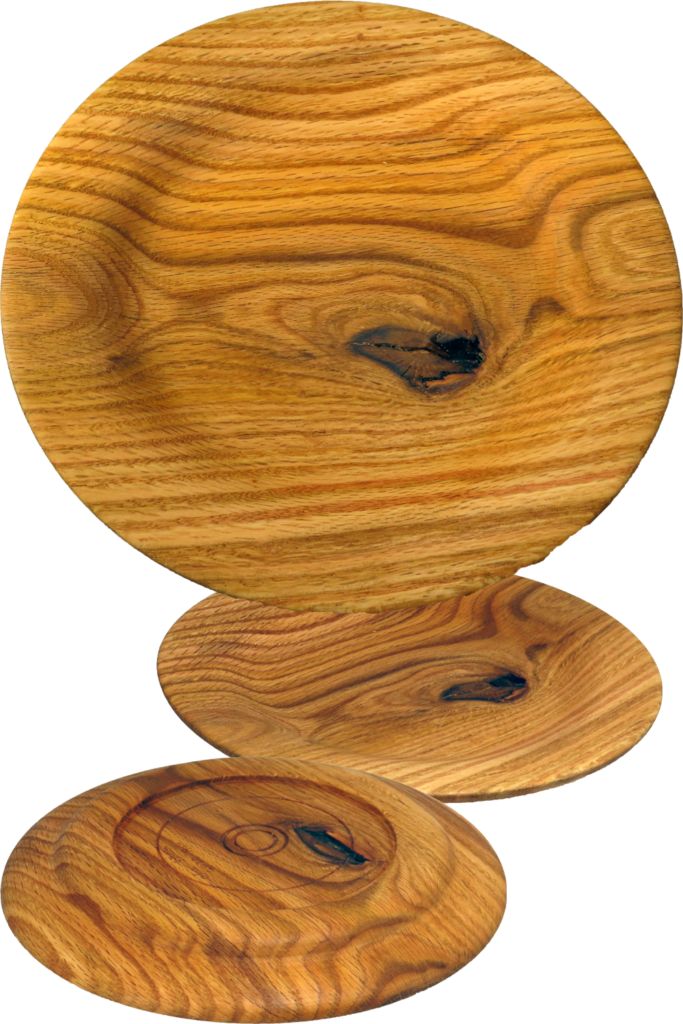
The ash wood for this plate came from a friend’s tree over a decade ago. At that time, I was cutting for bowls but had a couple of slabs left over that were near the pith. I sealed the wood with wood sealer and left it to dry.
I got busy and did not get back to the wood for a long time. In the meantime, the wood dried, warped, and developed a crack. The crack bothered me since I had left some of the pith in the slab. That is where the crack was.
There was additional delay as I debated whether to use a screw center or a pin face plate. A screw center requires a pilot hole to a precise depth. Since a plate is shallow, this was a risk. The kink from the wood warping would also not let the wood seat well on the screw center.
On the other hand, a pin faceplate must have the wood held by the live center. I like to finish the bottom side early in the turning process but the live center would have been in the way.
I compromised by cutting a sacrificial tenon and flipping the wood over one additional time. The sacrificial tenon would be on the top side of the bowl.
The plate is 9 inches in diameter and finished with walnut oil. A loose knot decorates the center.
Related Video Link.
Pin Face Plate and Threaded Wood Face Plates For Woodturning
I now can do remote demonstrations for any club, world-side.
Enjoy!