Turning Segmented Vase – Heirloom Sycamore
Please view this video here on this page. However, in case of gremlin uprising, it is also posted on YouTube and FaceBook.
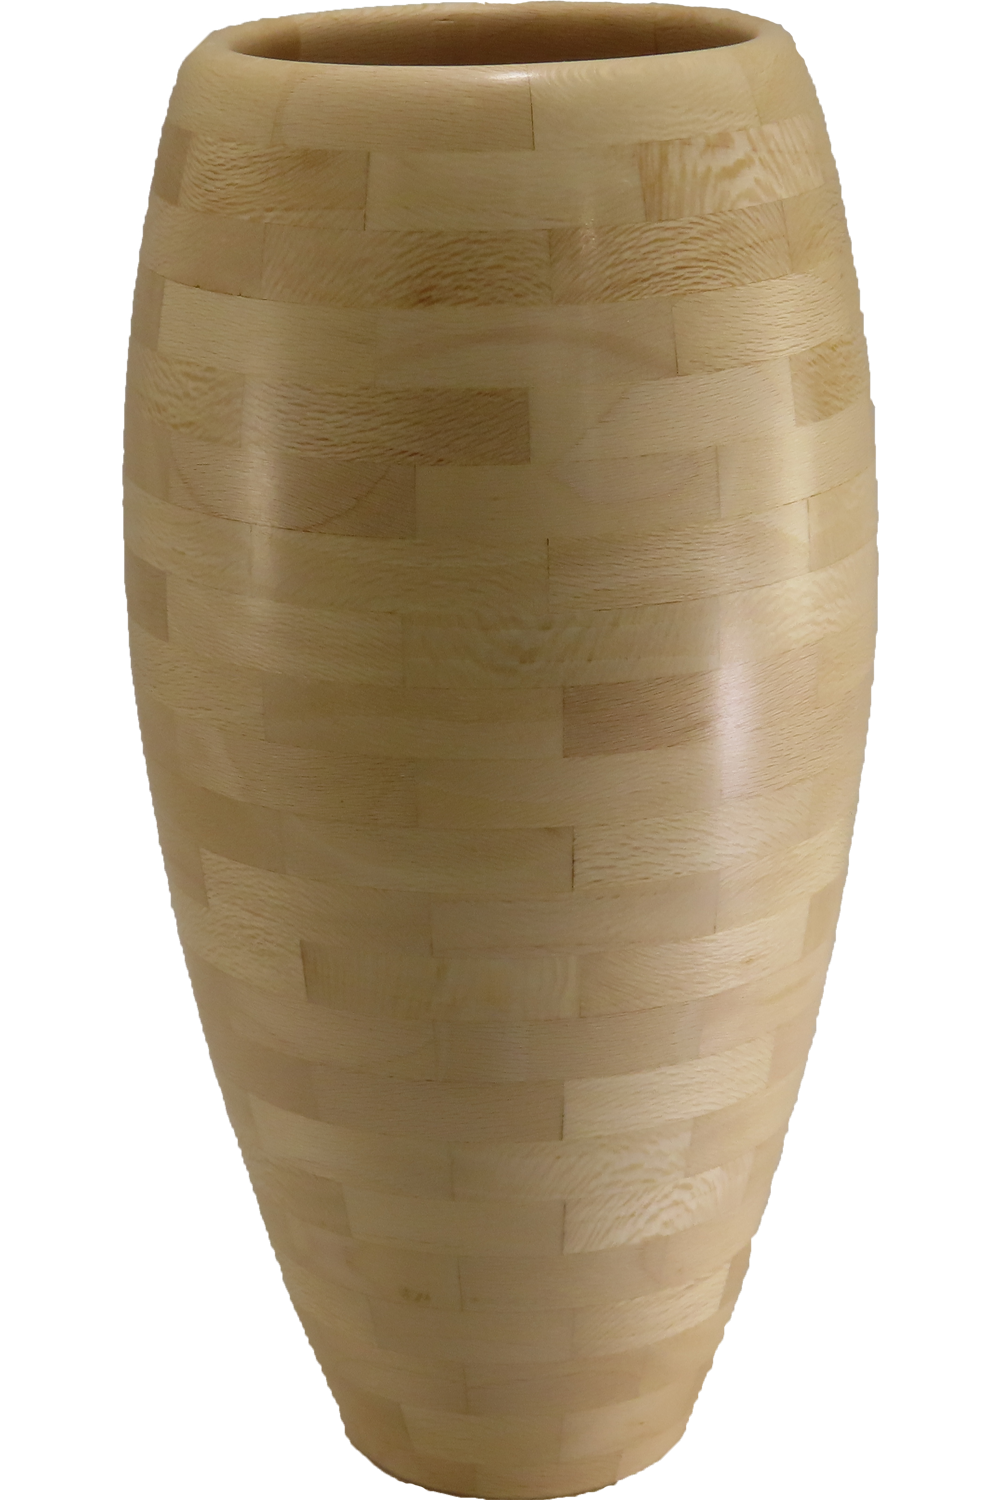
This 4 x 8 inch vase is for a lady whose tree provided the wood.
It is segmented sycamore with 8 segments per ring and 22 rings or 172 segments. It is finished with wipe on poly. The base is three layers of sycamore to prevent expansion cracks.
The wood was difficult to process as it came from short trunk segments that was partially dry.
Some newer viewer may wonder why I insist on wearing a face shield for safety. Please check out this video:
Woodturning Disaster
Enjoy.
Two Ways To Turn Yo Yo’s
This post is best viewed here on this page. However, in case of technical glitches, it is also posted on YouTube and FaceBook.
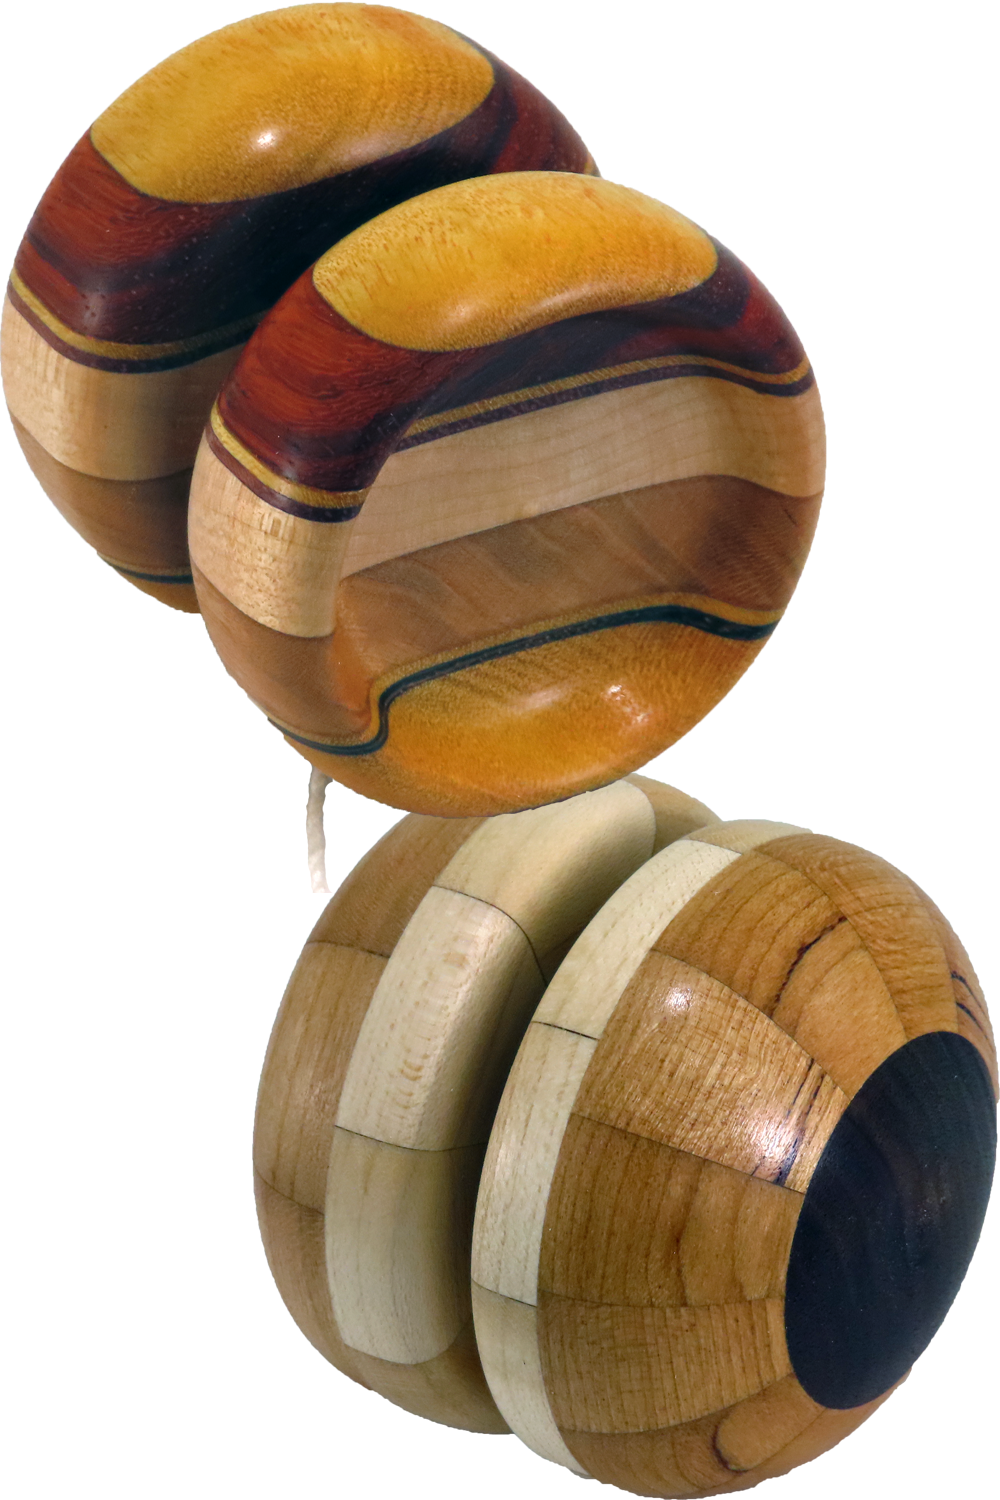
After viewing a club member demonstrate turning a yoyo, my wife encouraged me to also turn one. I wanted to upscale mine. So I went to the internet to research. I hoped to find a specific recommendations. I found that there are no guidelines – it seems that you have to be a professional yoyo artist to appreciate it.
Observations:
- Gap: to tight and the yoyo will not sleep. A larger gap helps sleepy tricks.
- Weight: Weight distribution matters but some like it more to the perimeter; others to the center.
So, I split the difference and turned two yoyo’s to at least illustrate the differences.
BTW, check out the amazing ornaments already entered into the Ornament Challenge www.OrnamentChallenge.com to view and enter the challenge. Entries will be accepted through November 30, 2023. Don’t wait for the last minute.
Some newer viewer may wonder why I insist on wearing a face shield for safety. Please check out this video:
Woodturning Disaster
Enjoy.
Turning Multi-Axis Stacking Rock Box Tower
In case of technical difficulties, this video is also posted on YouTube and FaceBook. However, you are already here. so, Enjoy
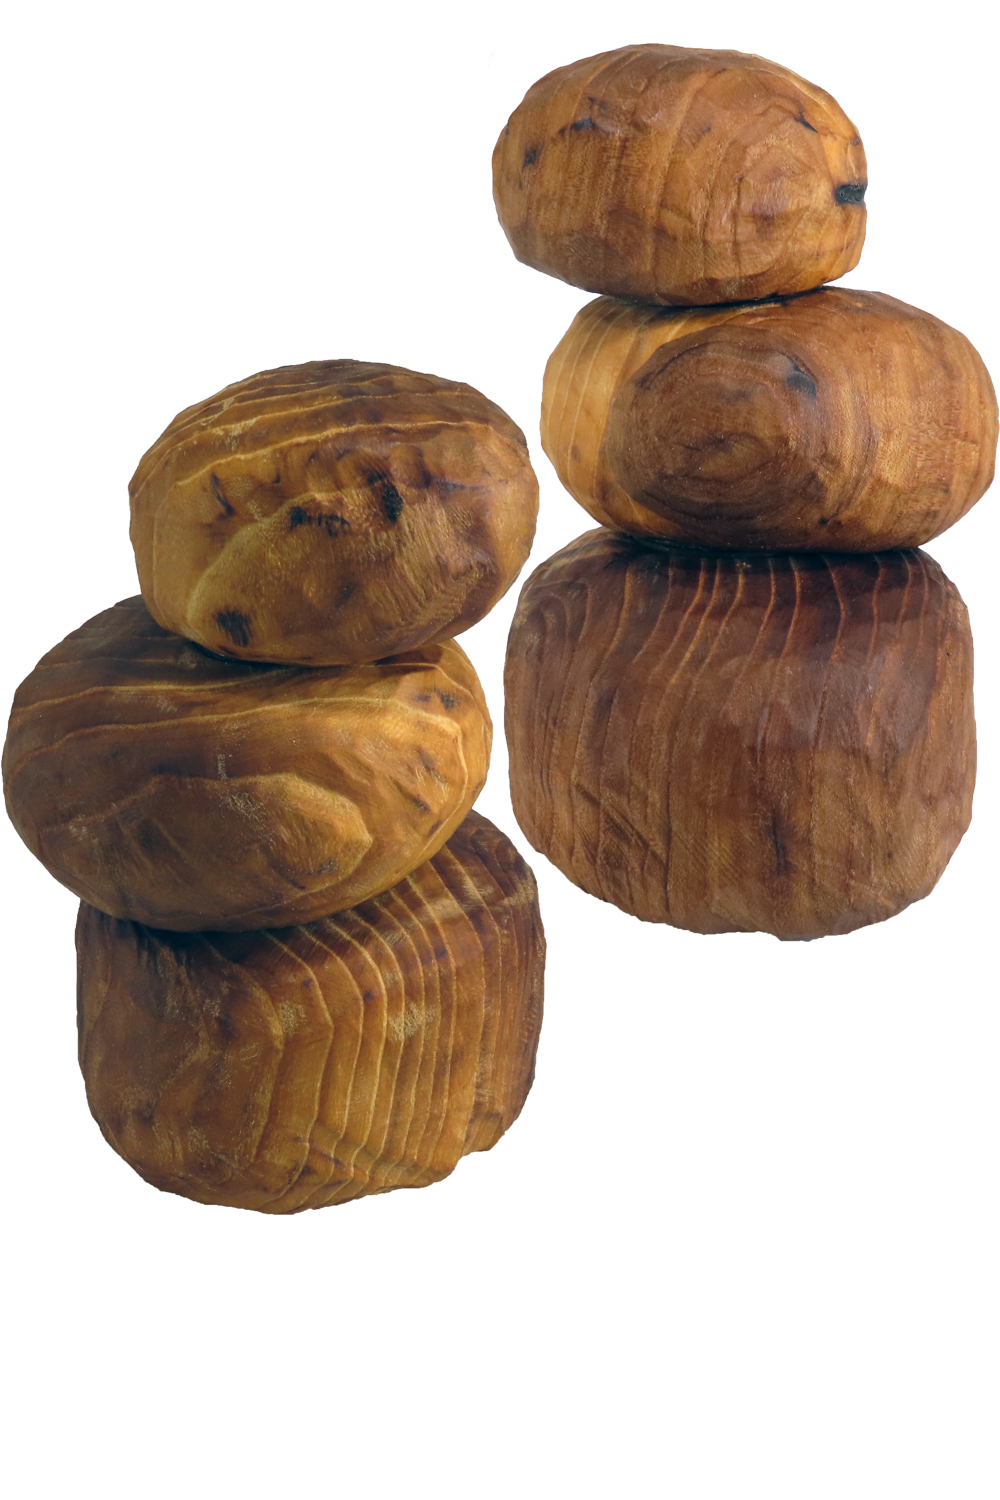
Despite an excellent demonstration by Yann Marot at the Rocky Mountain Woodturning Symposium, I had to turn my stacking rocks my way. To me they resemble a mountain trail marker that I saw frequently in Boy Scout adventures. The main difference is that I used bayonet style bushings between the rocks instead of tenons.
The bottom two rocks are hollowed to lighten the stack and to enable hiding something special inside. The top rock is drilled to lighten it and to accept the bushing. They are finished rough and with walnut oil. The stack is about 7 inches tall and 5 inches diameter at the base. It stands securely on three rocky protrusions on the bottom side.
The upgraded bayonet style bushings will be available soon in my Etsy site.https://www.etsy.com/shop/AsWoodTurnsTools
Some newer viewers may wonder why I insist on wearing a face shield for safety. Please check out this video:
Woodturning Disaster
Enjoy.
p.s. If you would like a more in depth demonstration than my weekly videos, please contact me for an IRD (Zoom Demo) on this or other topics.
Turning From Green To Dry Mesquite Bowl
If you have difficulty viewing this video here, it is also posted on YouTube and FaceBook. Best right here.
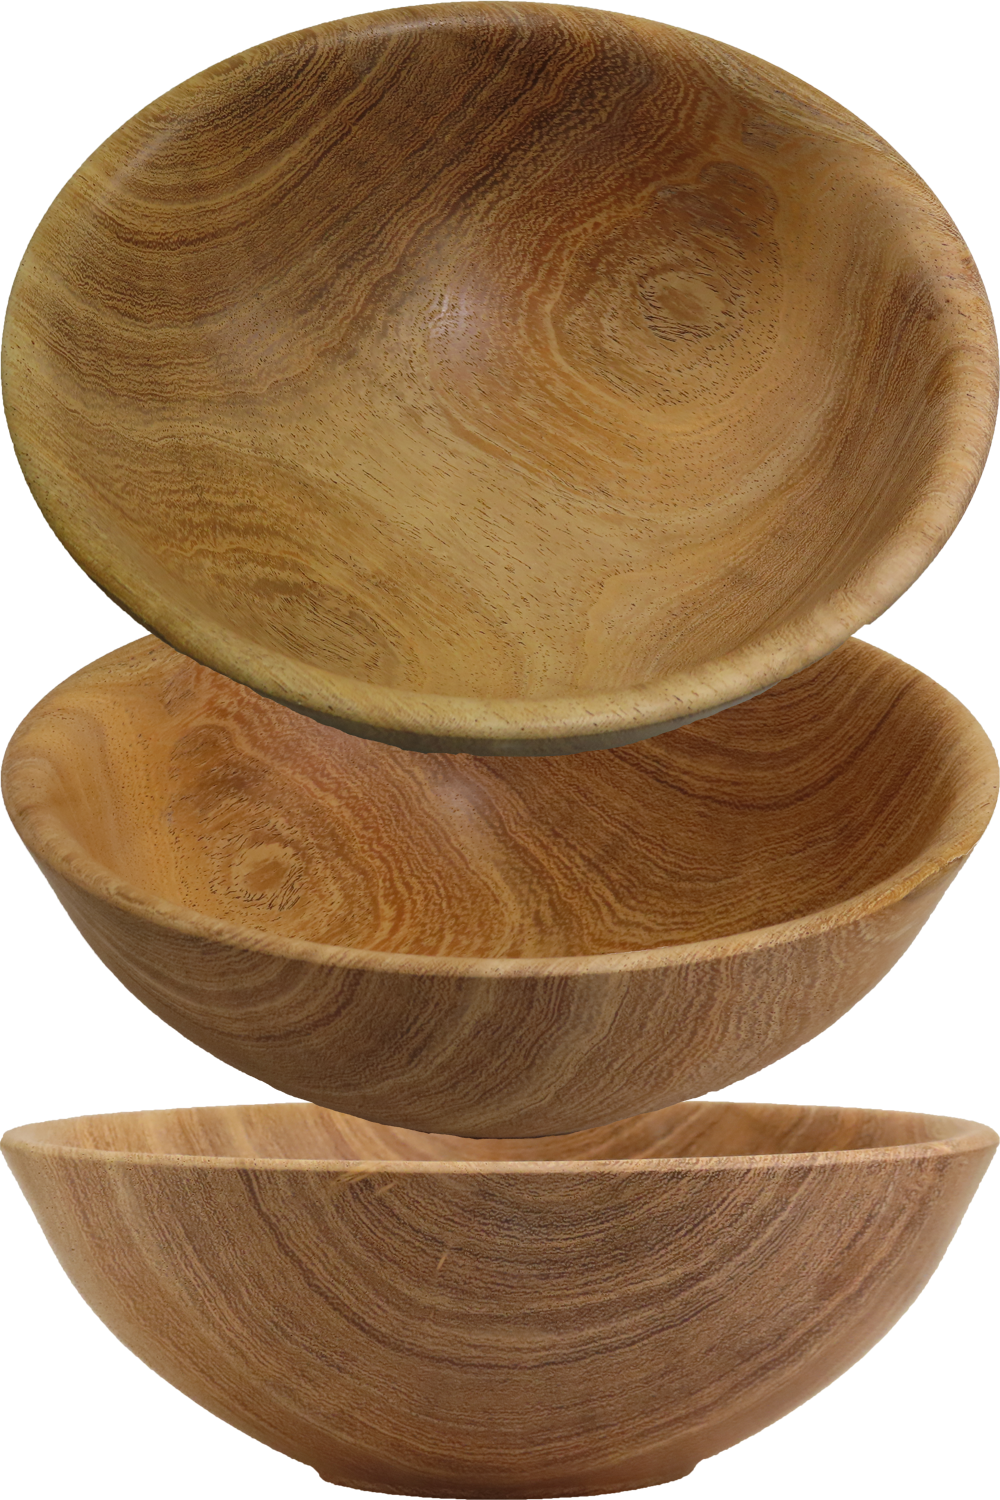
Before the pandemic during a trip to the Phoenix area to visit a son, a viewer offered me some mesquite and olive wood. The wood was recently cut down. I hauled several chunks home and got to work. One chunk of mesquite is this bowl. I turned it while green, leaving the walls over an inch thick to accomodate warping while it dried. After sealing the wood, I weighed the bowl periodically until it stopped losing weight meaning that it was dry. However, I did not get around to a final turning until now.
This turning resulting in a 7 inch by 2.5 inch bowl finished with wipe-on poly. I opted for an extra mount in this bowl beyond what I usually do. Other than that, this was a typical bowl turning exercise. While turning this bowl, I put my Hollow_pro Caliper to good use to measure the wall thickness. I prefer it to typical figure 8 calipers.
Some newer viewer may wonder why I insist on wearing a face shield for safety. Please check out this video:
Woodturning Disaster
Enjoy.
Turning Multi Axis Eight Point Star With Jig
In case of system glitches, this video is also posted to YouTube and FaceBook. Best viewed right here.
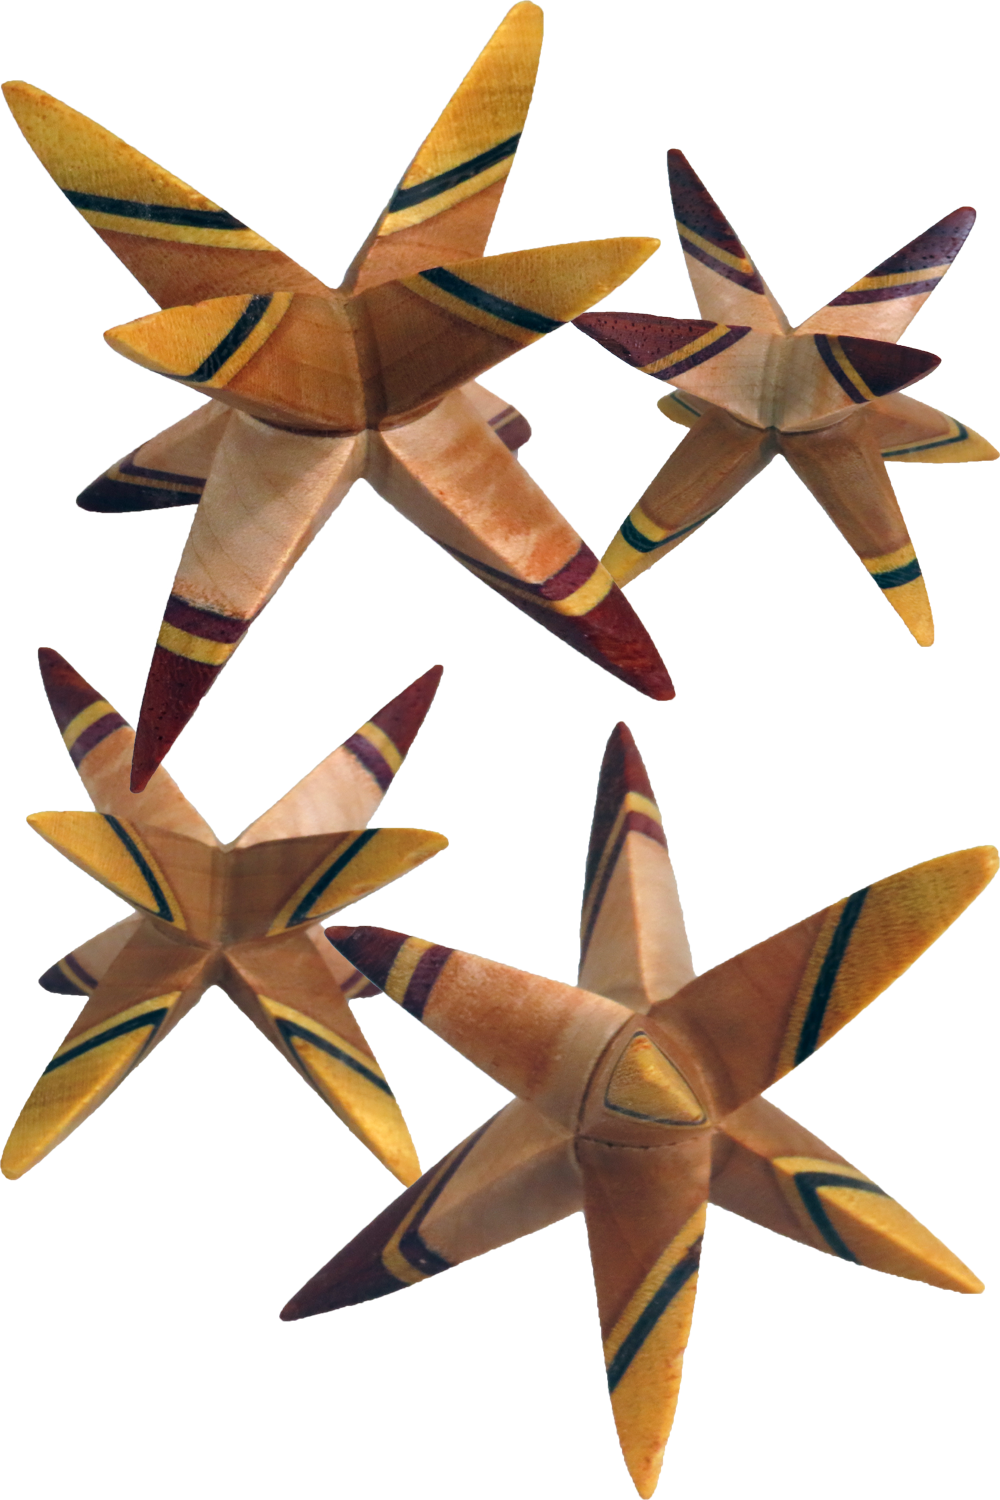
The inspiration for this project comes from Theo Haralmapou over a year ago during an online symposium. This was reinforced at SWAT by Donna Frazier. This star is turned on three axes and therefore requires the preparation of a chuck fixture for the second and third turning. A signicant part of Theo’s presentation involved preparing the chuck fixture.
I own, design for, and operate a 3D printer. This printer has become an essential tool in my shop. Fixtures and other things that I would have made from wood or maybe aluminum, I can draw, print, and tweak until I get it right. If from wood, I would typically have one shot at completing these fixtures. As a bonus, on small items, my hands are no where near sharp blades. This fixture went further to include threads to mount to the spindle and live center.
In addition, I designed a template to guide turning the groove to the best shape and depth.
My star begins with a 2x2x2 cube. Theo started with a 60 mm cube. The wood should be hard and sturdy. If prone to chipping, use a different wood. My star is finished with wipe-on poly. The woods are maple, cherry, wenge, paduak, and yellowheart.
My fixture and gauge is posted to Printables.com https://www.printables.com/model/620500-jig-for-woodturned-star
Enjoy.
Preparing To Turn A Stave Segmented Beads Of Courage Box
This post is best viewed right here. But, in case of technical difficulties, it is also posted on YouTube and FaceBook.
Our club is preparing to support the Beads of Courage program. Beads of Courage works in participating hospitals with children who are seriously ill. At each significant procedure, the child received an additional bead to put in their own box. As a woodturning club, we will help provide boxes. My job was to introduce the program as a demo.
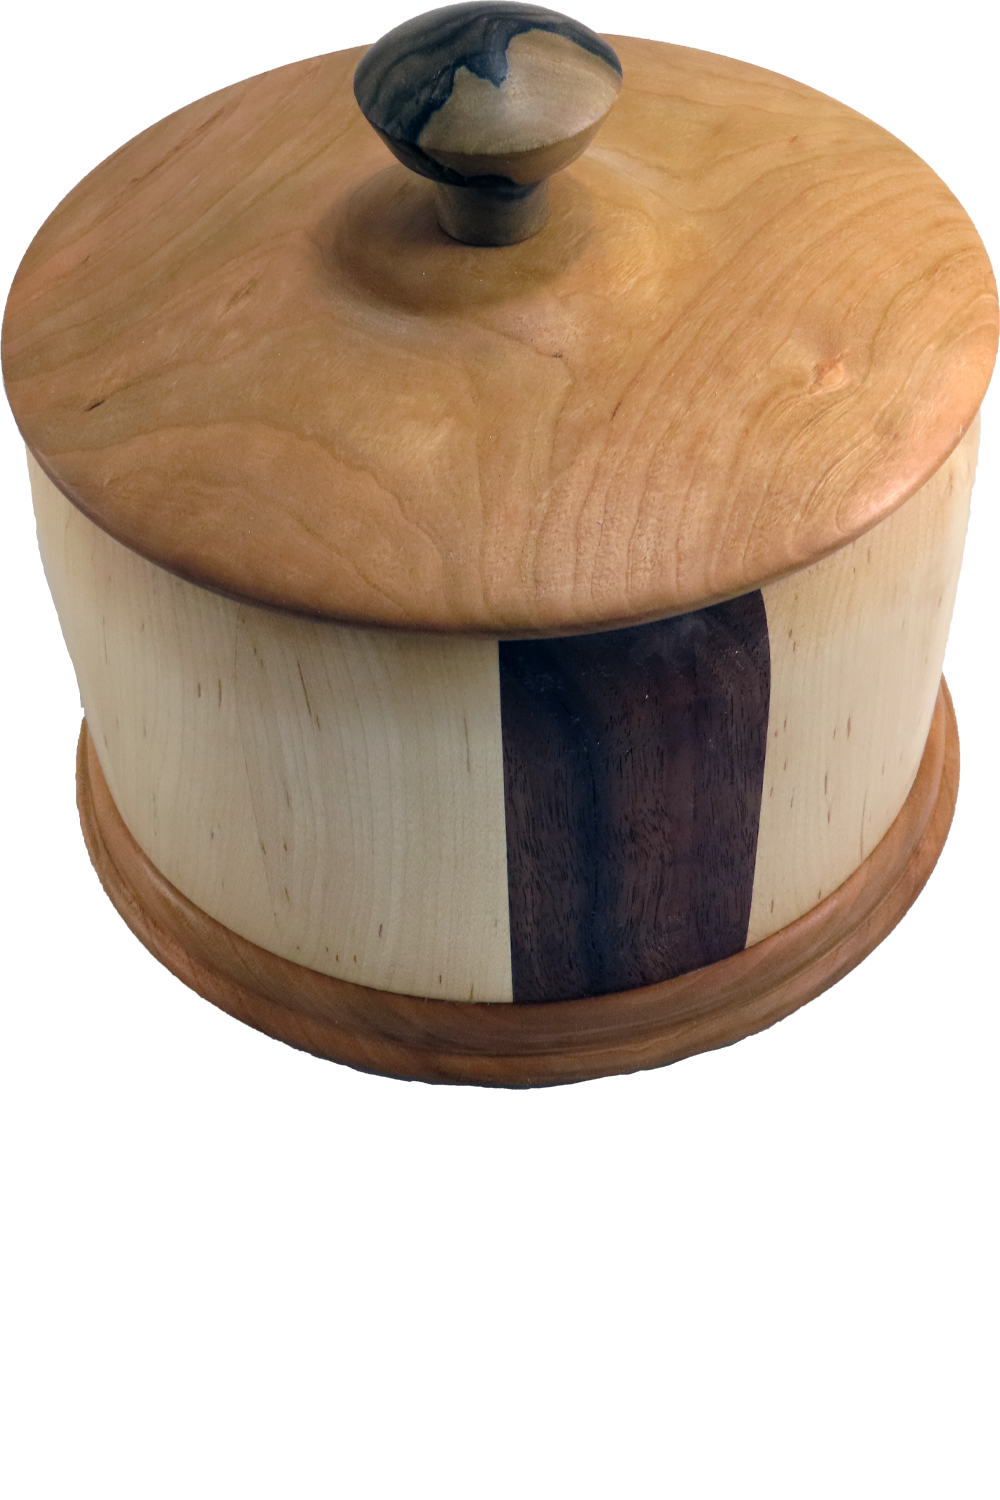
While boxes for Beads of Courage can be any type of construction, I demonstrated the basics to construct a stave segmented box. In stave segmentation, the wood grain runs vertically in the sides of the box. Stave segmenting requires different jigs. My favorite weggie sled could not be used.
I have not been pleased with my previous stave segmenting when cutting the staves. With this in mind, I created a new table saw sled and measuring fixture that made this cutting a pleasure.
Then on to using the rub joint technique to glue staves into half cylinders. After truing the half cylinders, they were also glued together.
At this scale, there are other issues to overcome that are illustrated in the video.
Enjoy.
Turning An Inlay Tray or Platter Without Vacuum Chuck
In case of technical difficulties, this post is also uploaded to YouTube and FaceBook. But it is better right here on this page.
For this project I drew inspiration from a demonstration at the Rocky Mounting Woodturning Symposium and combined it with a monthly club challenge. The symposium demonstration by John Giem inlaid solid wood into solid wood for a coaster. I took away several ideas that I wanted to try.
However, John used a vacuum chuck. I chose to avoid a vacuum chuck and see if I could accomplish the same project.
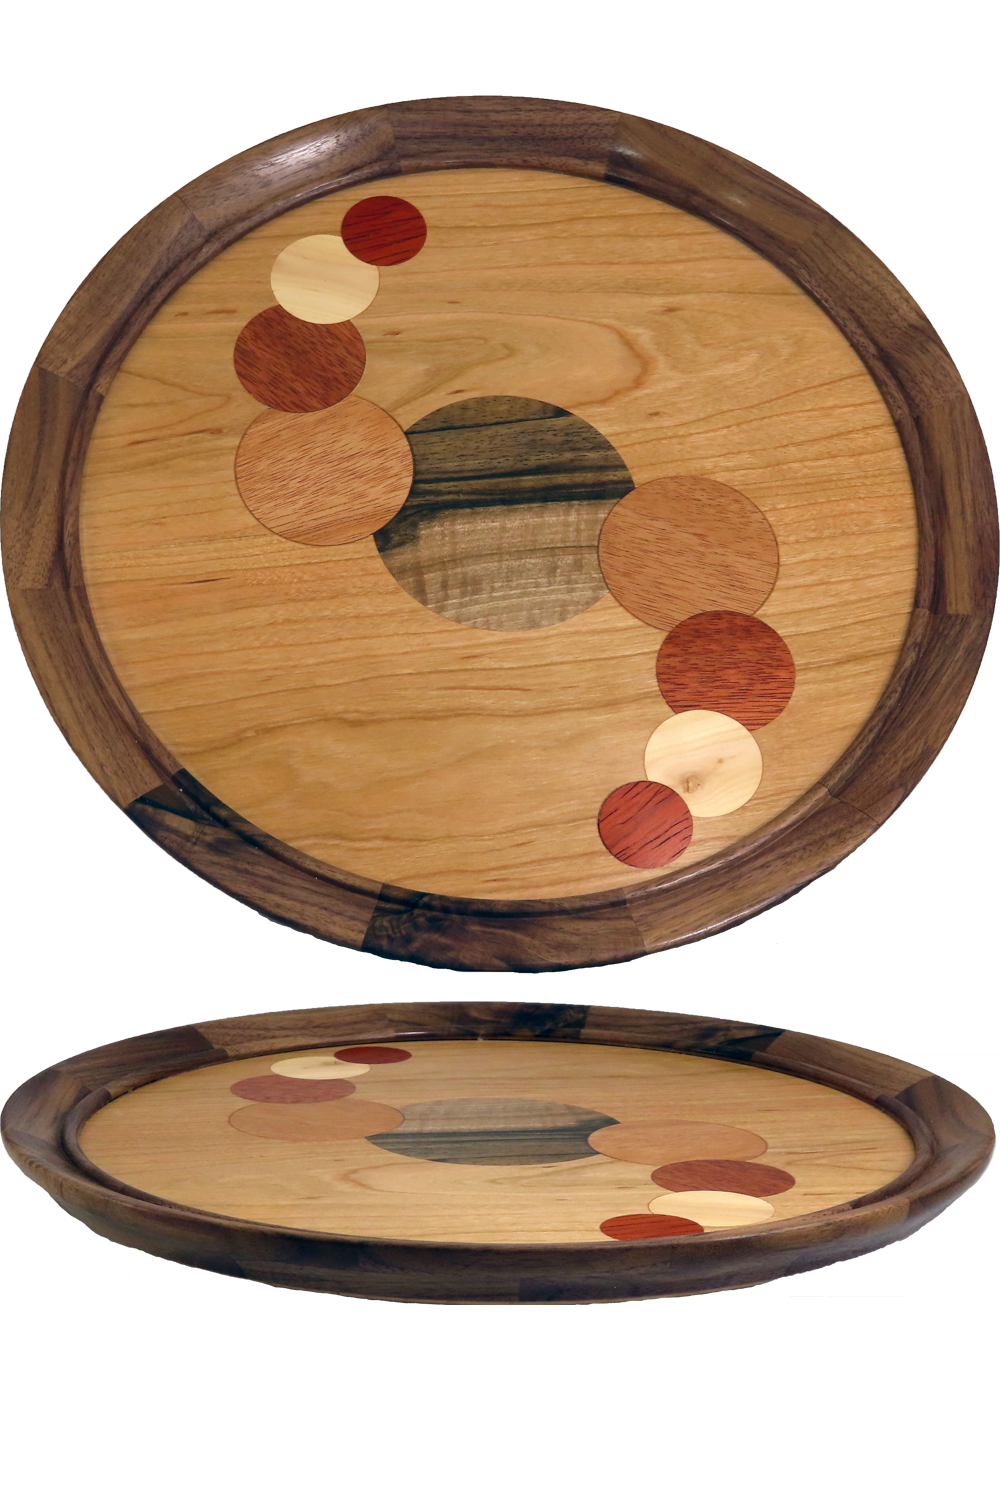
The primary wood is two layers of cherry with internal cross banding with veneer. However, I did not laminate the base wood until the inlay work was complete. This enabled me to avoid issued with drill points going too far. I inlaid disks of walnut, mahogany, bloodwood, apple, and padauk. After the main platter was completed, I made a segmented ring to serve as a rim.
This tray is eleven inches diameter and about 1 inch tall, finished with wipe-on poly.
Enjoy.
Ornament Challenge 2023 Kickoff
Here we are again – The season for decorations and ornaments.
And, the annual Ornament Challenge of 2023. It is time to make your ornament for the 2023 Christmas Ornament Challenge. The time to submit your picture is during the month of November 2023.
Again this year, there is something for everyone. Grand prizes for the top ornaments selected by public vote and the two hosts in the form of gift cards or tools or supplies. Other vendors are providing discount codes for EVERYONE who submits an ornament. The top three craft clubs will receive a free zoom remote demonstration (IRD).
This video has all of last years ornaments for your inspiration or just to admire the creativity they show. Draw from what you see and interpret an ornament your way. Send us a picture of your favorite(s).
We love to see the pattern of inspiration and people stretching their limits.
For official rules, go to www.OrnamentChallenge.com
For inspiration, go to www.OrnamentChallenge.com
During November, go to www.OrnamentChallenge.com to enter your ornament.
Enjoy!
Music:
Carol Of The Bells by Audionautix is licensed under a Creative Commons Attribution license (https://creativecommons.org/licenses/by/4.0/)
Artist: http://audionautix.com/
Joy To The World by Audionautix is licensed under a Creative Commons Attribution license (https://creativecommons.org/licenses/by/4.0/)
Artist: http://audionautix.com/
Silent Night (Instrumental Jazz) E’s Jammy Jams Used with Permission
We Wish You a Merry Christmas (Instrumental) Jingle Punks Used with Permission
Turning A Multi-Axis Faux Sea Urchin Ornament
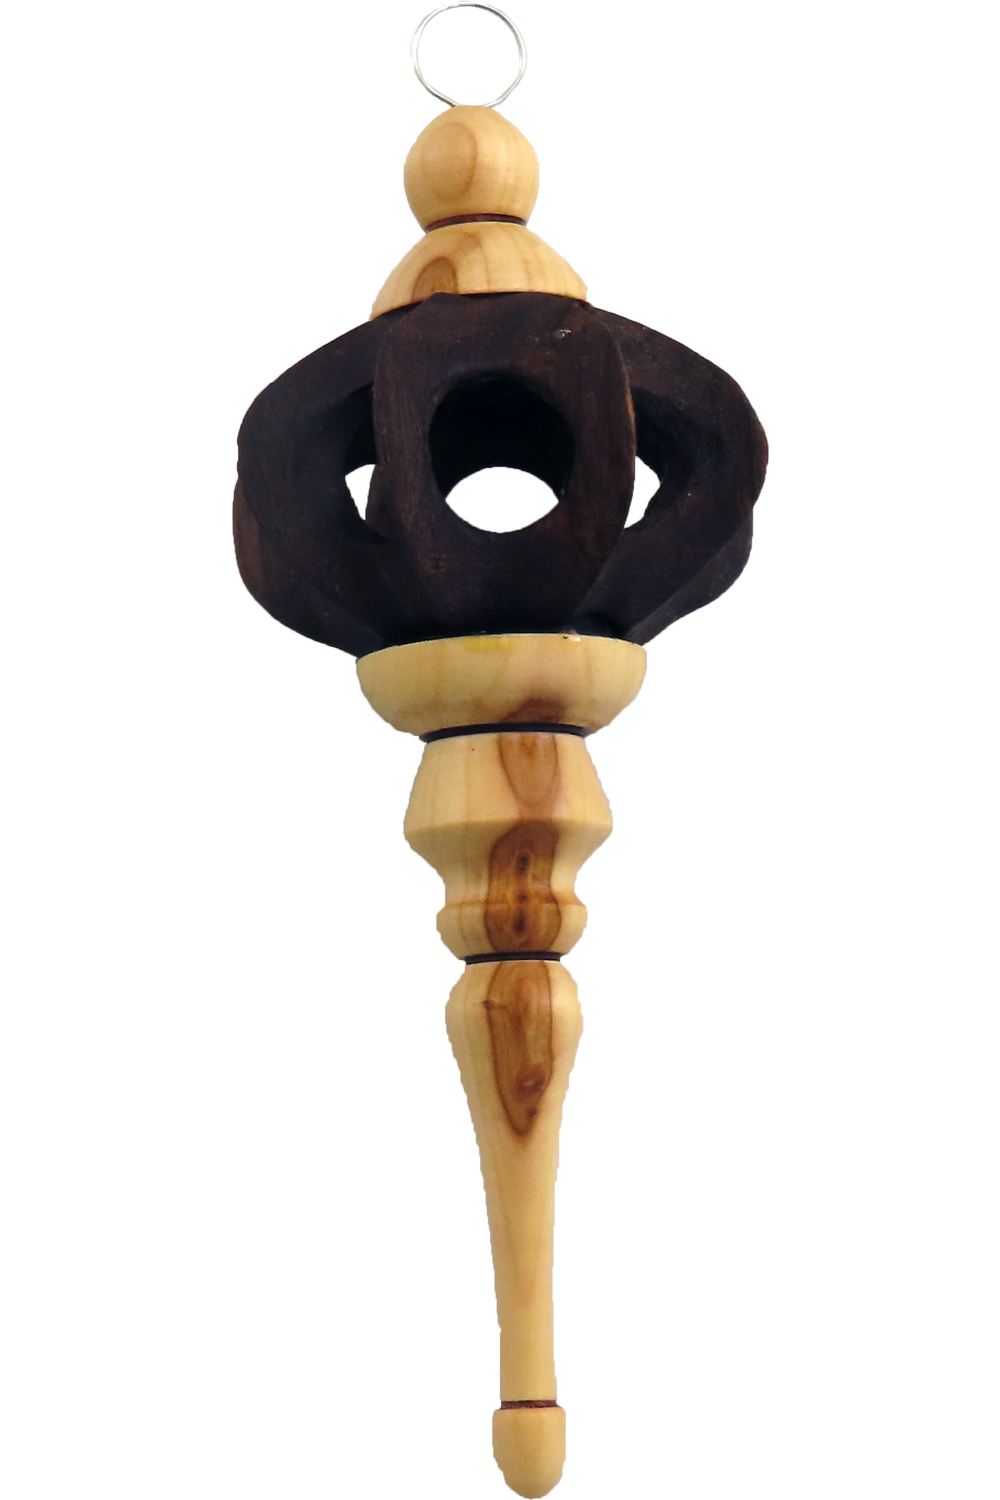
I love this ornament inspired by sea urchin ornaments. Instead of the shell of a sea creature, it is turned from almost any wood.
This one started as a 2.4″ diameter sphere turned using the octagon method. Nothing else gets me closer to a perfect sphere as quickly.
Then after some indexing, it is mounted four additional times at four additional turning axes.
Then some carving cleans and lightens the ornament.
Don’t forget to add appropriate finials!
Get your ornament ready for this year’s ornament challenge. Details are at www.OrnamentChallenge.com
Enjoy.
Resources:
Turn A Perfect Wood Sphere Or Ball – No Expensive Jig
Woodturning Essentials – Octagon Method For Perfect Spheres
Woodturning Perfect Spheres – For Wise Turners
Turning A Winged Bowl From Laminated Cube
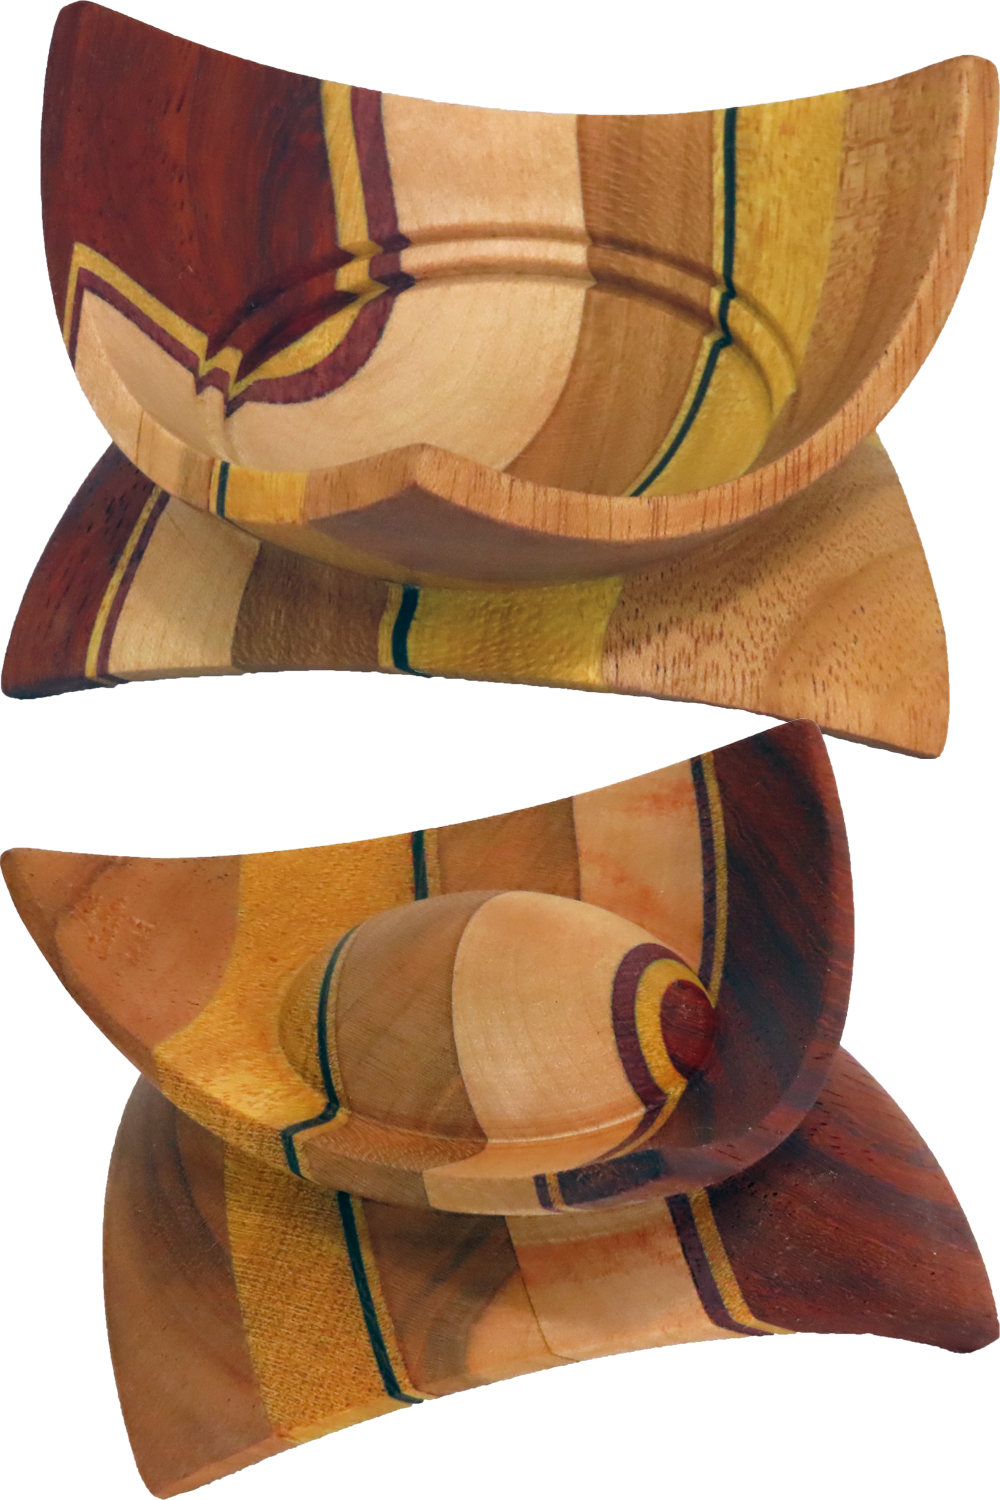
In case of difficulty, this video is also available on YouTube and FaceBook. Where Best? Right Here!
Inspired by fellow club members, this project is to turn a cube into a bowl.
For this style bowl, first a blank must be prepared as a perfect cube of any size. My project uses a laminated block of wenge, yellowheart, padauk, maple, mahogany, and cherry.
The trick is to mount the cube to the lathe with one corner at the spindle and the opposite at the live center. On the spindle side, many examples simply put the coner is the hollow of the spindle – not using any chuck or center. IMHO, this mount is prone to spinning as there is limited friction between the steel and the wood. Instead, I mounted a wood faceplate with a hole at center. The cube edges bit into the faceplate wood for a great hold – no slipping.
On the live center side, some examples pop out the center of the live center and press the corner into this cavity. Others nip off the corner but then need to center the live center. This is prone to error while excellent alignment is required for this style of turning. Instead, I mounted another faceplate to my threaded live center which performed similarly to the opposite faceplate.
Then the turning requires careful gentle work since a lot of air is required to cut; there are corners that can hit hands. The wood is at an angle to usual turning which lends itself to chipping.
This bowl is finished with wipe-on poly. It is about 4.5″ by 2″.
It is time to prepare for this year’s challenge. Details are at www.OrnamentChallenge.com
Enjoy.