Turning Lidded Box From Green, Wet Wood
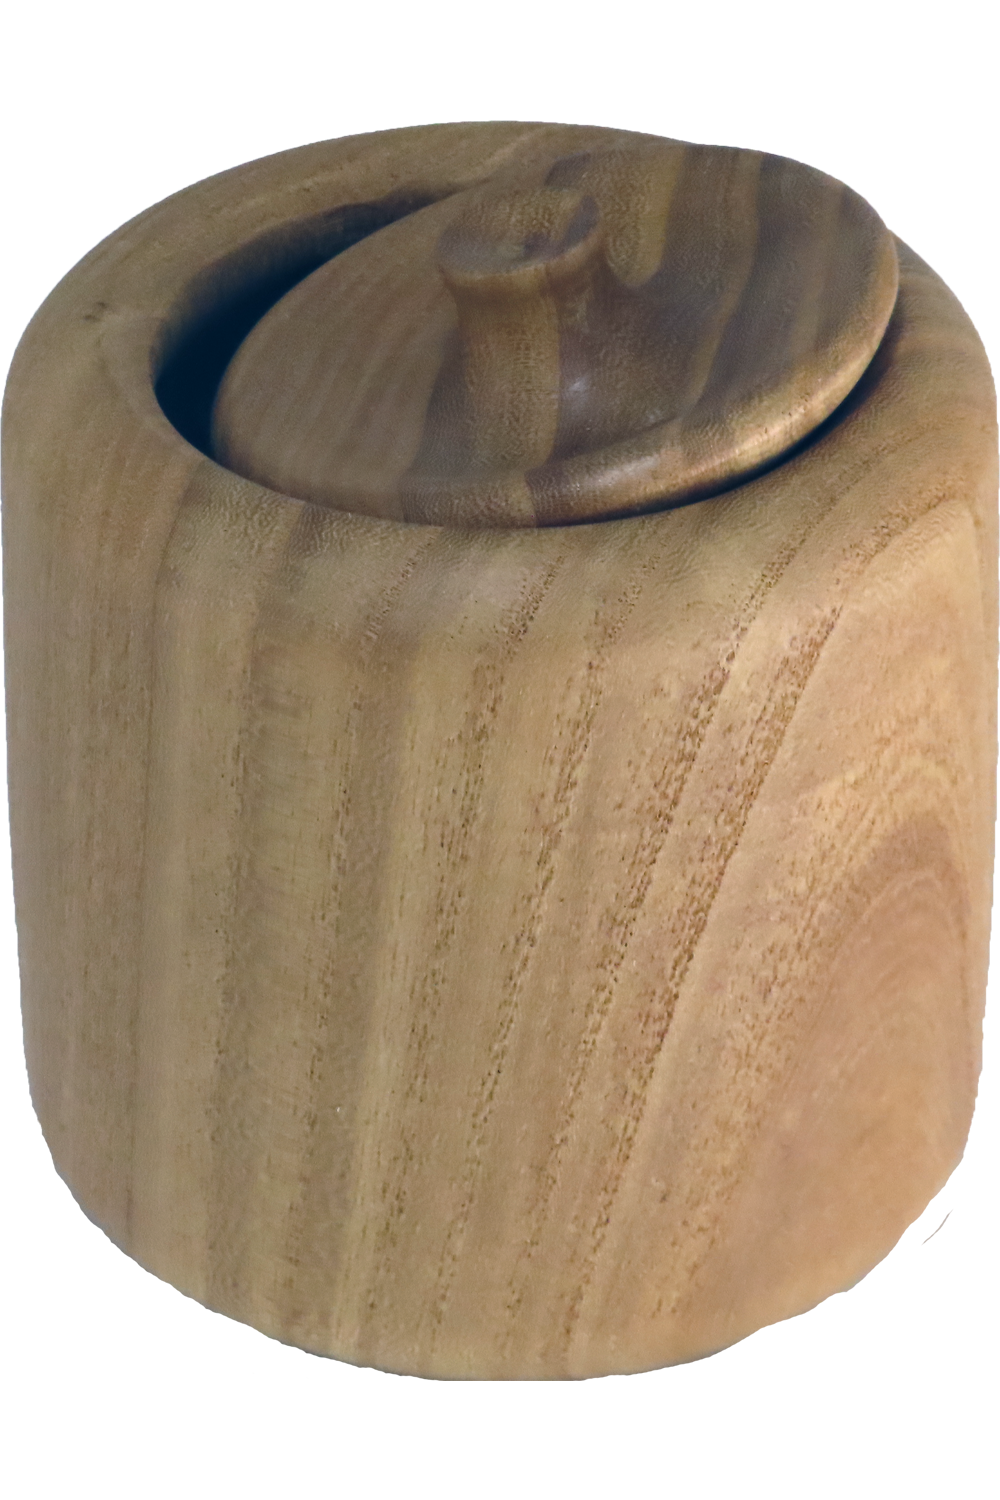
This post is best viewed right here — But if there happens to be technical difficulties, it is also posted on YouTube and FaceBook.
I love to turn fresh, green, wet wood. While it is sometimes
a shower, the wood is soft and cheap. The problem is that it
is wet and will always shrink and warp.
The solution – turn it twice with time to dry between. While
there are still precautions to avoid cracks, this works.
Except that with all that time working on other projects,
I forget about the wood that is drying and what I intended
for it.
Fortunately, I can get back to the project and finally turn it.
Having visited other turners’ shops, I am not alone. 🙂
Some newer viewers may wonder why I insist on wearing a face shield for safety. Please check out this video:
Apricot Disaster
Enjoy.
Turning Simple Three Part Goblet – Low Risk – High Reward
This video is best right here but in case of technical difficulties, it is also posted on YouTube and FaceBook.
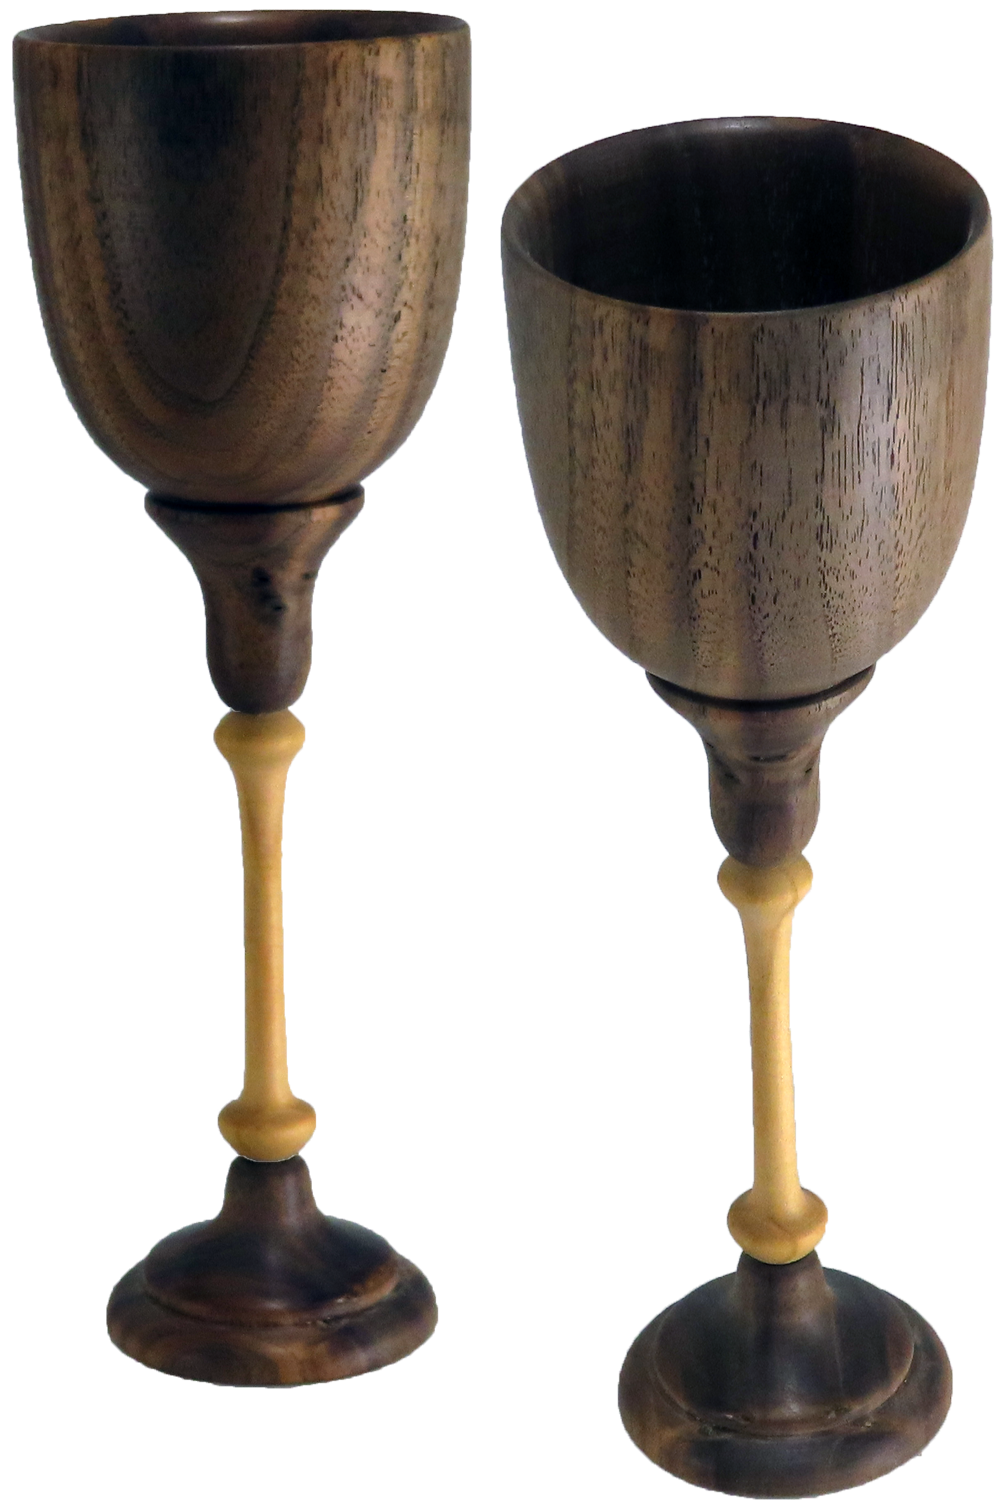
Of the many types of goblets that I have turned, I think
a three piece goblet is the simplest and very rewarding.
Simple: Only smaller pieces are extending out from the spindle.
Therefore, no steady rest is usually required.
Efficient: Smaller size pieces of wood can be used.
The stem does not require wasting most of a block of wood.
Pretty: The bottom of the base is easily turned and finished.
My goblet is about 8 inches tall and about 2.5 inches diameter,
finished with wipe-on poly.
Some newer viewers may wonder why I insist on wearing a face shield for safety. Please check out this video:
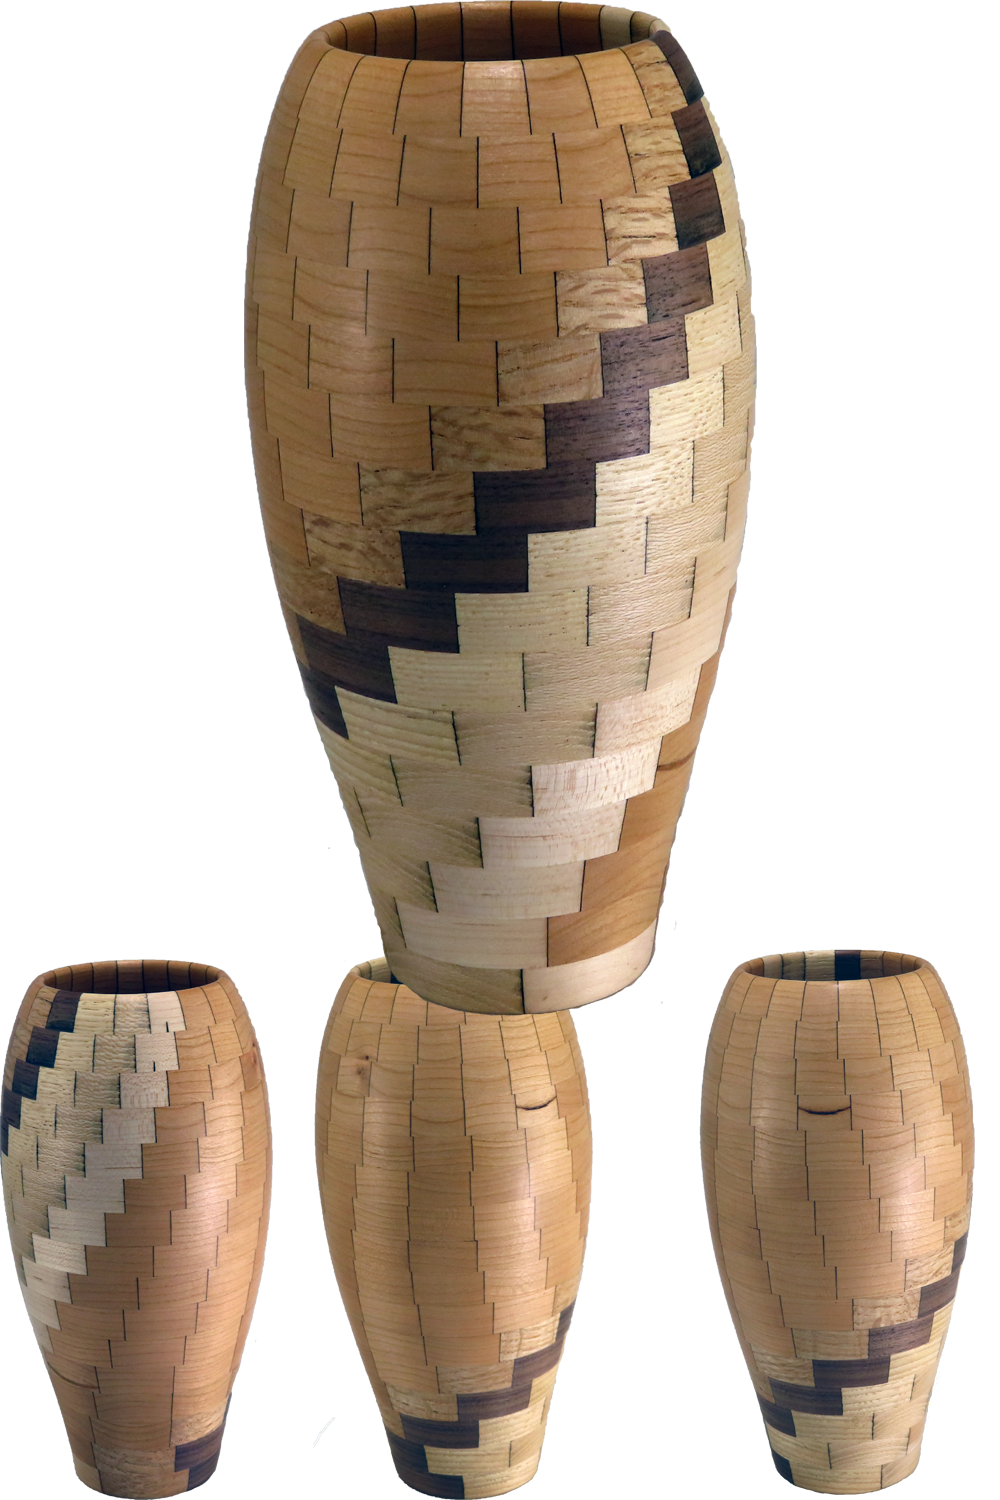
Turning Laser Cut Segmented Spiral Vase
In case of technical difficulties, this video post is also on YouTube and FaceBook. Where Best? Right here at As Wood Turns.
This project was inspired by Mark Hunter’s article in American Woodturner June 2023.
While the result was the interesting part. I did not like the process to cut the segments. It seemed extremely time-consuming and a significant risk element.
But, having recently acquired a 40 watt LED laser, I decided to try it out on a smaller scale. Only 16 rings with segments incrementing from 5 to 20 segments. BTW that is exactly 200 segments from six different woods: maple, hickory, sycamore, oak, walnut with a background of cherry. All rings were 1/2″ thick. The finish is wipe-on poly. I wanted to use bloodwood and heat treated ash for more contrast but I could not cut them. Both triggered the fire sensor on the laser. Bloodwood due to the number of passes required to get the cut and the cumulative power; Heat treated ash simply flamed up very quickly. I think due to the previous processing it was almost charcoal already.
All segments were prepared using Lightburn software then cut on an LED 40 watt laser with smoke enclosure and exhaust. Since I am still checking out the laser, I hesitate to give the manufacturer.
Some newer viewers may wonder why I insist on wearing a face shield for safety. Please check out this video:
Green Apricot Bowl Disaster
Enjoy.
p.s. If you would like a more in depth demonstration than my weekly videos, please contact me for an IRD (Zoom Demo) on this or other topics.
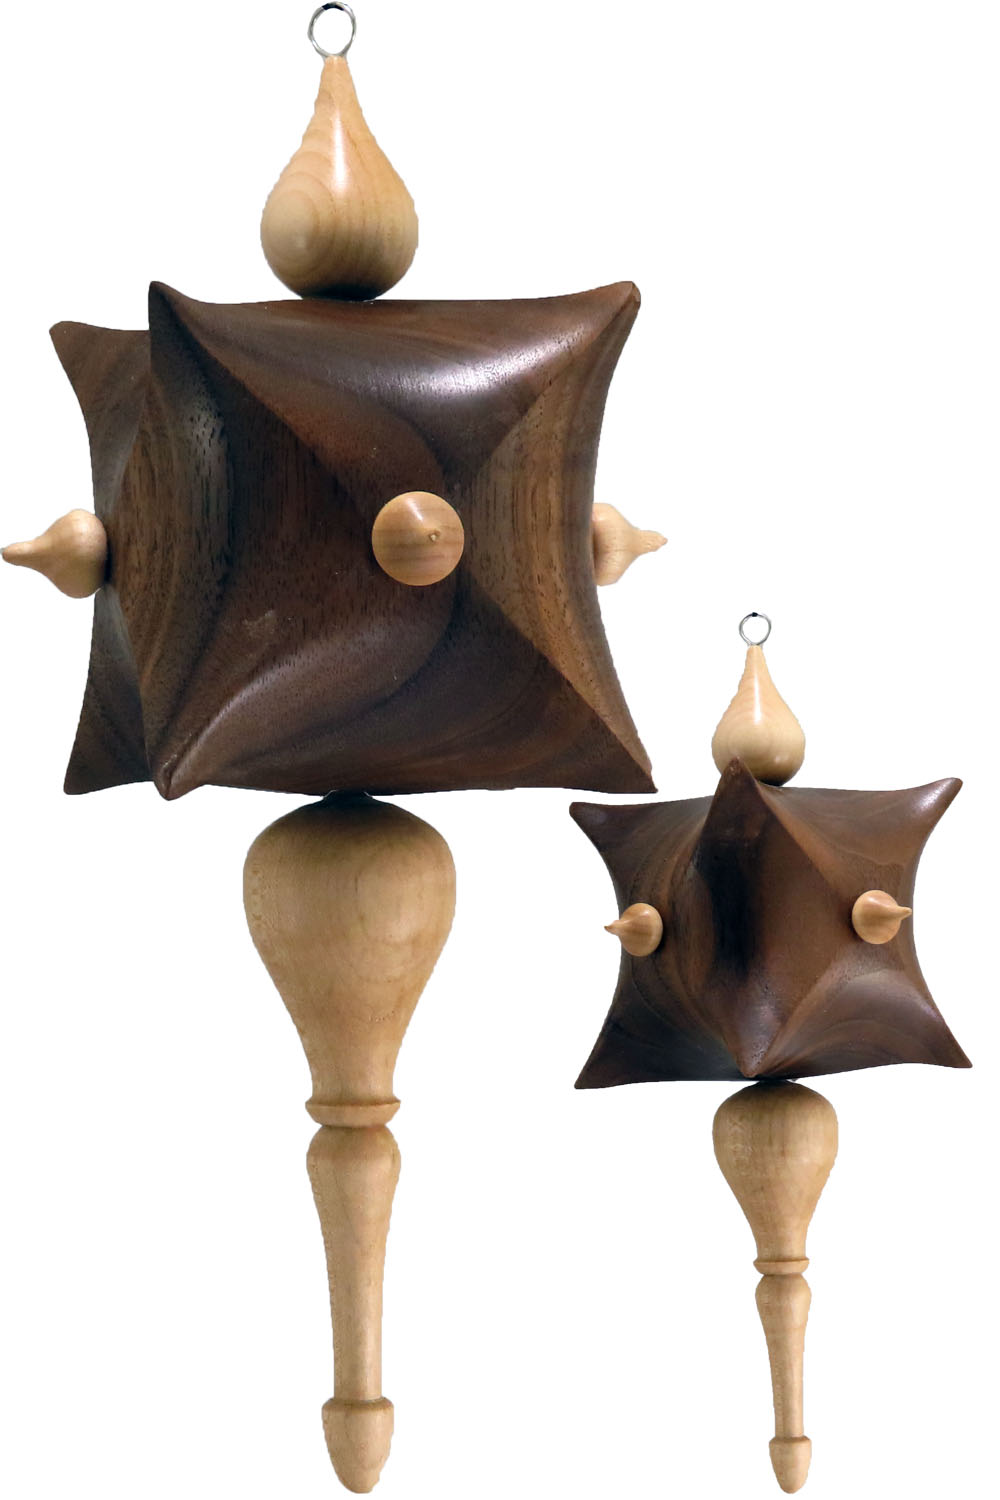
Turning 8 Point 3 Axis Star Ornament – No Jig Required
This video is best viewed here on this page. If there are technical glitches, it is also posted on YouTube and FaceBook.
Two months ago, I finally turned a star inspired by Theo Haralampo. That star was held up while I designed a jig to facilitate its turning.
I saw this star in the Christmas Ornament Challenge by Patrick Hoggard and wanted to try this style myself.
The starting blank was 2.75″ cube of walnut(butternut).
Holes were drilled to accomodate a pen mandrel.
Then turned.
The finials are maple.
No jig other than a common mandrel.
Enjoy.
Here’s a link to the other star ornament
A Tale Of Turning Two Bowls Same Trunk – Opposite Look – Part 2
In case of technical difficulty, this video is also posted on YouTube and FaceBook.
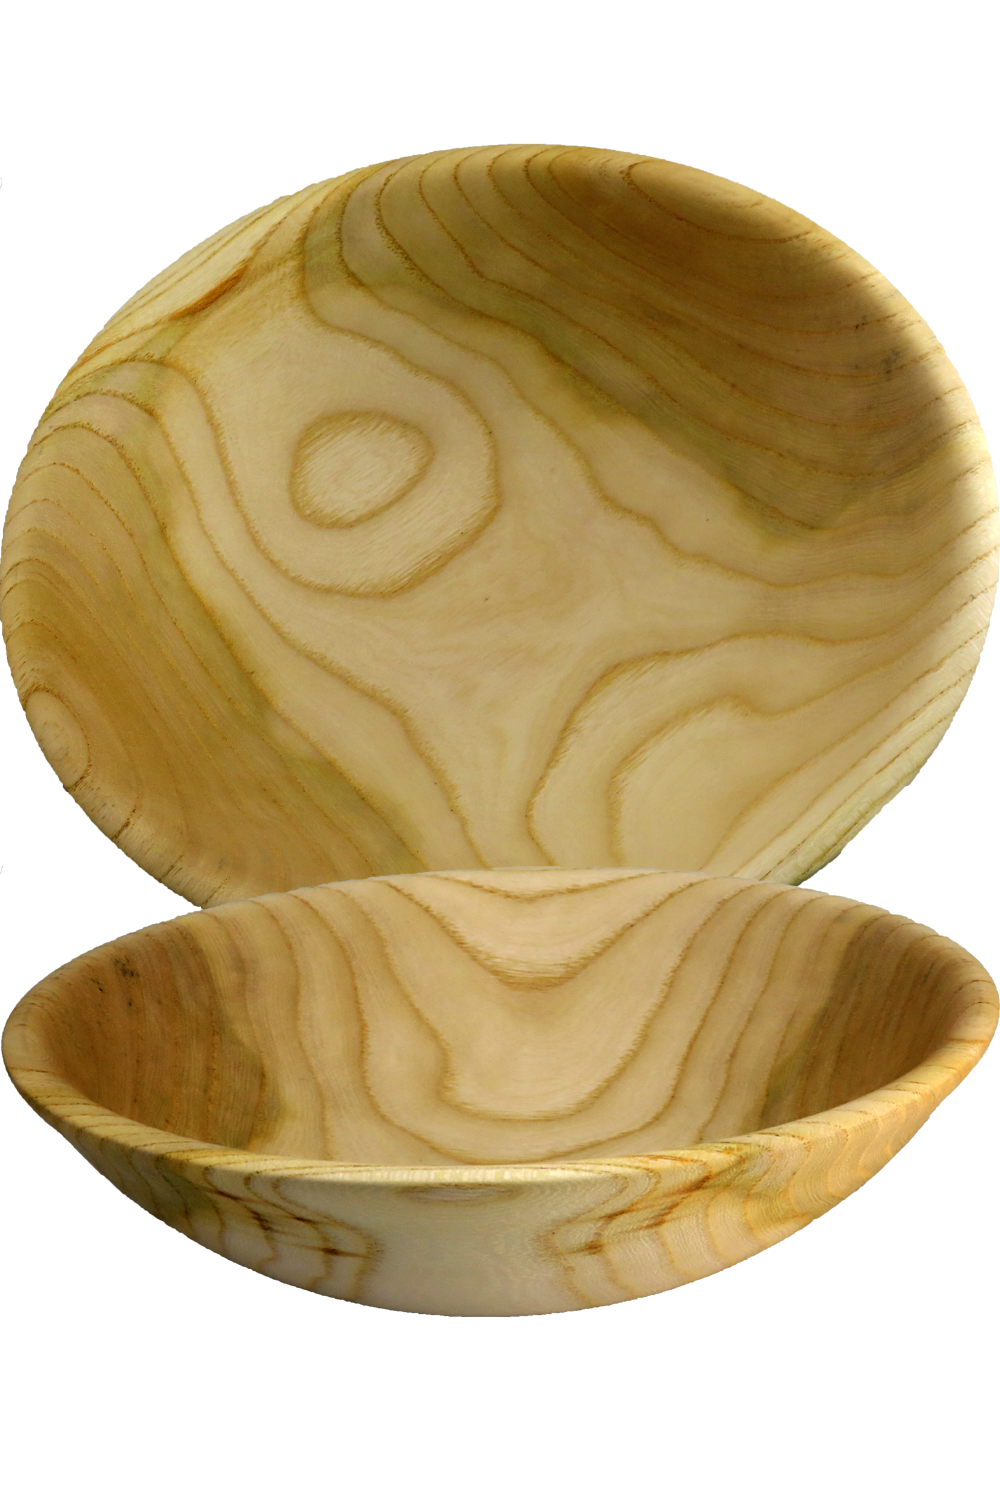
Last spring I was given a trunk section of Chinese elm. At that time, I decided to turn two bowls from the wood. However, the bowls would have dramatically different styles and turning techniques.
Part one is a natural edge or bark edge bowl turned all at once. It was finished and allowed to dry and potentially warp.
This is part two – a traditional bowl that is perfectly round with not distortion from drying and warping. One difference was reversing the vertical axis so that the top of the bowl comes from near the pith. Another difference is that this bowl was turned twice with over seven months between the two turning sessions. In the first turning session, the bowl was turned with a wall thickness between 3/4″ and 1″. After being coated with a moisture resistant sealer, it was allowed to dry. When dry, the bowl was again mounted to turn the wall thickness down to final width. This turning removed all distortion from drying and warping.
Both bowls are finished with walnut oil. This one is 9 inches diameter by 3 inches tall.
In this case the moisture resistant sealer was TiteBond 2 glue that I am experimenting with.
Part 1 Link
A Tale Of Turning Two Bowls – Same Trunk – Opposite Look – Part 1
Enjoy.
2023 Christmas Ornament Challenge Winners
In case of difficulty, this is also posted on YouTube and FaceBook. Best right here.
At last – The votes have been tallied and grand prizes allocated.
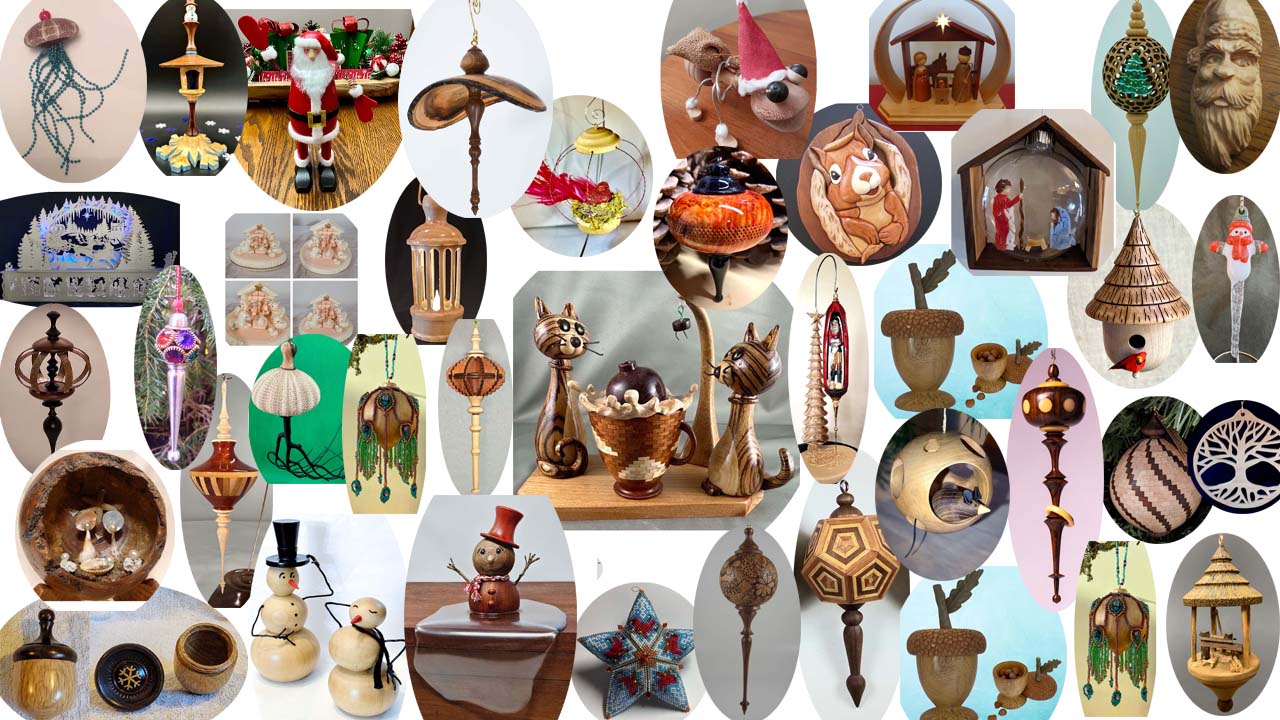
Wow! This is a fantastic challenge with 417 ornaments from twelve countries.
I cannot believe the wide range of talent and creativity. I can safely say that this is the best display or ornaments in the world. All because of your ornament contributions. Thanks to each participant and our sponsoring vendors.
2023 Finalists are:
Michael Lober
Tim Capraro
Myron Robinson
Sarah Slocum
Richard Nealis
Bill Bulkeley
Aubrey Schlappi
Bruce Jordan
Jack Boggio
Jose Esteban Cruz
Eric Rohel
James Norfleet
Paul Stagl
Club Winners are: (Free IRD)
Cape Cod Woodturners
Arizona Woodturners Association
Asociacion Torneros de Madera de Puerto Rico
Detroit Area Woodturners
Club Runner ups: (Thank you)
Woodworkers of Central New York
Front Range Woodturners
Vendor Sponsors – Grand Prizes:
Jacques Vesery
Craft Supplies
Hunter Tools
Air Brushing Wood
Turntex
Robust Tools
Vendor Sponsors – Bonus Prizes:
Alumilite
Air Brushing Wood
Woodturners Wonders
As Wood Turns
REMEMBER NOVEMBER is when the next ornament challenge will be open for your ornaments.
Enjoy!
Turning Multi-Axis Icicle Ornament – My Answer To Skew Challenge
In case of difficulty, this video is also posted on YouTube and FaceBook. Best right here!
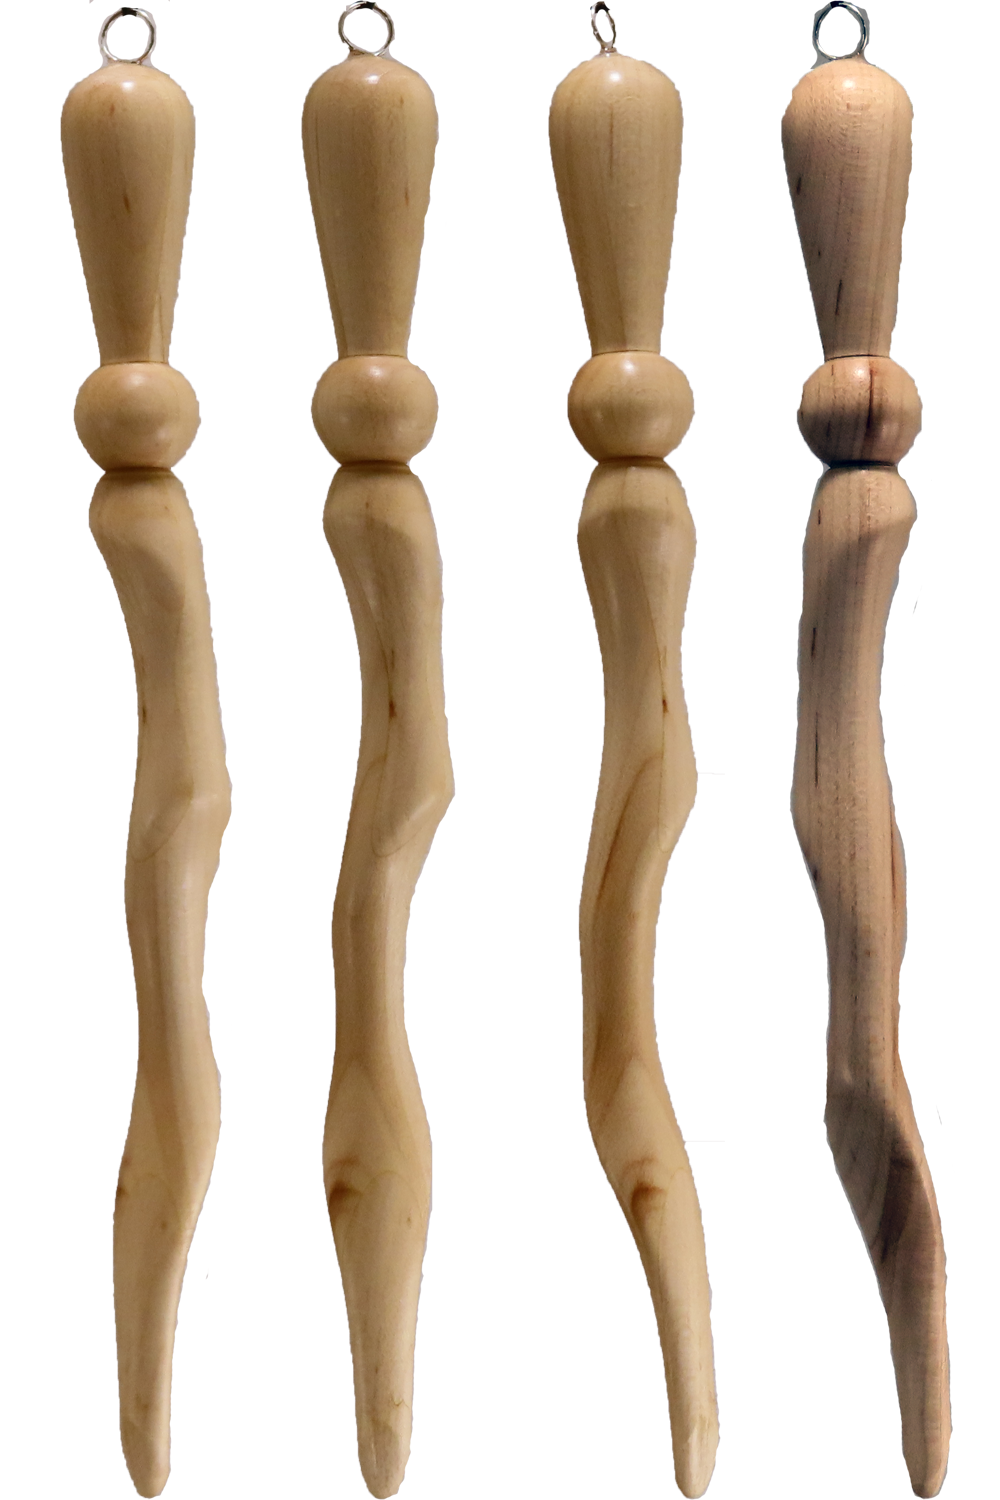
This project is my answer to Richard Findley’s skew icicle challenge. His request as for an icicle ornament turned only with a skew.
But, why not enhance it a little? Who has seen a perfectly round icicle. Multi-axis turning is the answer to give it a little more character. Still with skew only.
They key to a successful long eccentric project is a set of faceplates with the offsets as shallow holes. These faceplates enable positioning and power with a minimum of pressure from the live center. This minimizes the odds of the wood breaking under pressure. This is especially important for long, thin spindles.
On the spindle side, add 2 short (~.5″) brass pins: one goes to the eccentric axis position; one is a drive pin. On the live center, a single pin goes to the central axis or any of the offset holes. Of course, also drill a hole for the pin on the live center end of the project wood and two holes (center and 1 offset) on the spindle end.
For a project offsetting only the live center, move the pin to the appropriate hole in the faceplate. To offset the spindle end, move the project wood with the center pin to an offset hole and the other pin to provide rotation.
The icicle is 8″ long, finished with shellac.
Enjoy.
Turning Eccentric Dancer Ornament From Scrap
This video is best viewed here on this page. In case of technical glitches, it is also posted at YouTube and FaceBook.
While we are waiting for the voting period for the ornament challenge, I made another ornament from scrap.
But,Please vote for your five(5) favorites at www.OrnamentChallenge.com by 10 December (Sunday Night).
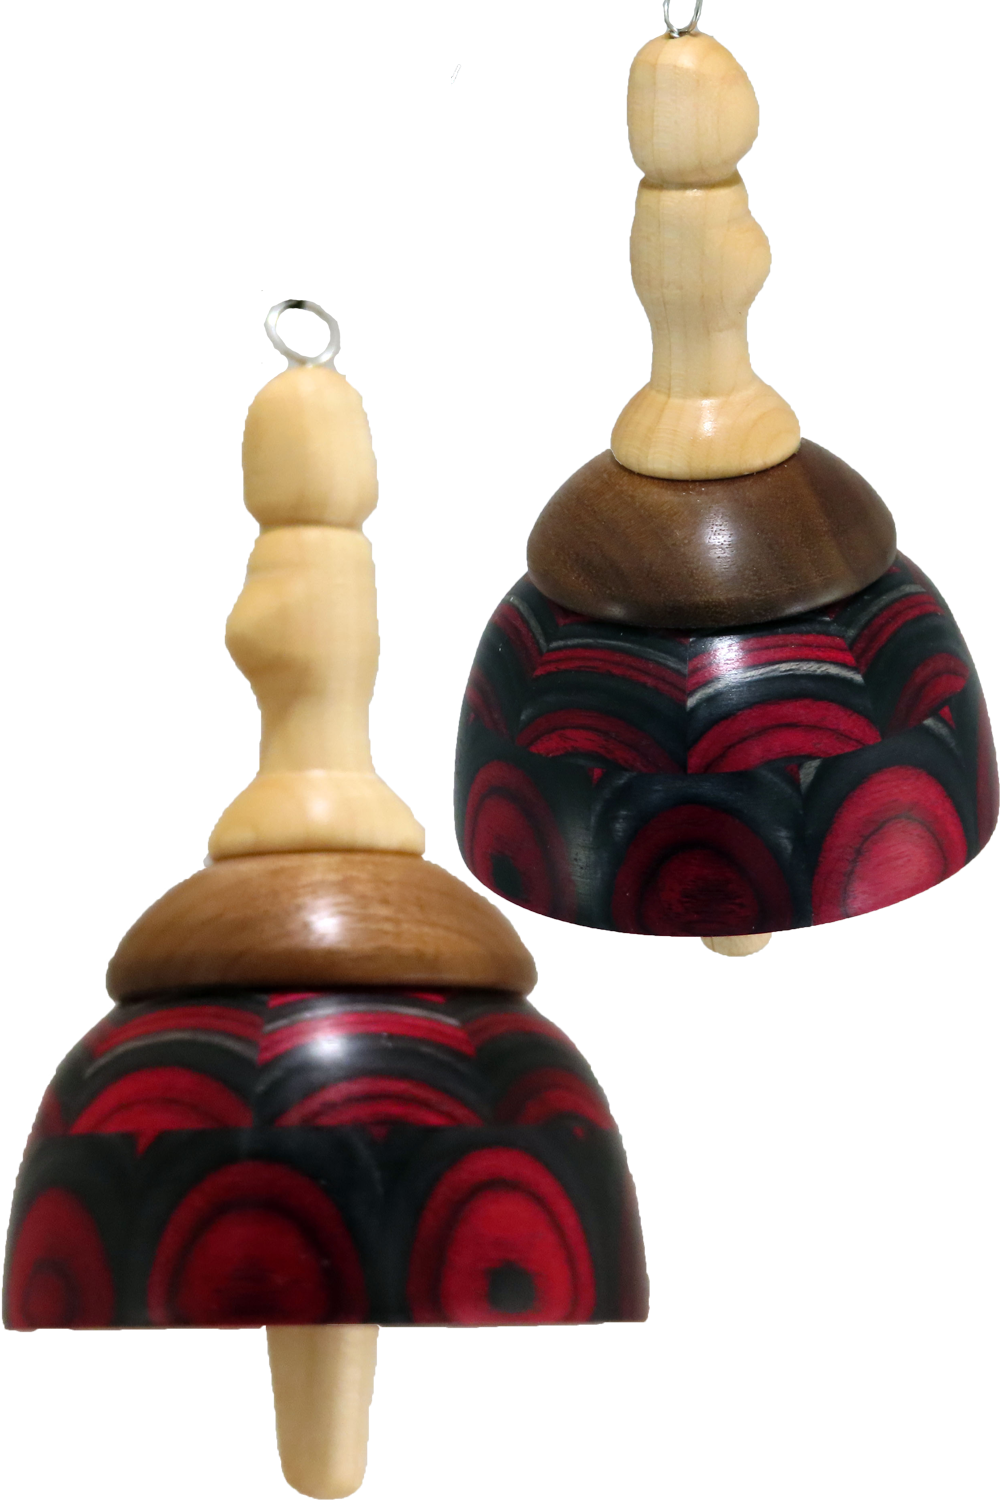
The skirt is dyed birch lamination left over from a failed project. But, it was too pretty to throw away. So, I have added a walnut disk to complete the dancer’s skirt and a maple spindle for her body.
The torso axis is shifted 1/8 inch in opposite directions. The feet axis is shifted 1/8 inch in opposite directions and 90 degrees from the torso axis shift.
All is finished with shellac.
The grippers were 3D printed in PLA. But, also easily turned on a lathe.
Some newer viewers may wonder why I insist on wearing a face shield for safety. Please check out this video:
Woodturning Disaster
While we are waiting for the voting period for the ornament challenge, I made another ornament from scrap.
But,Please vote for your five(5) favorites at www.OrnamentChallenge.com by 10 December (Sunday Night).
The skirt is dyed birch lamination left over from a failed project. But, it was too pretty to through away. So, I have added a walnut disk to complete the dancer’s skirt and a maple spindle for her body.
The torso axis is shifted 1/8 inch in opposite directions. The feet axis is shifted 1/8 inch in opposite directions and 90 degrees from the torso axis shift.
All is finished with shellac.
The grippers were 3D printed in PLA. But, also easily turned on a lathe.
Some newer viewers may wonder why I insist on wearing a face shield for safety. Please check out this video:
Woodturning Disaster
Enjoy
2023 Christmas Ornament Challenge Call For Votes
If you want to go directly to the web page to view and vote on your favorites, please use this link www.OrnamentChallenge.com. This is the only way to vote with our improved voting process.
If you preview the usual video and then go to the page to vote, then view this video.
To vote, note your five favorites and the click this link https://forms.gle/5A83gaDopPoArZvx7 to a google form to enter your favorites.
Thank you in advance for your votes and to all participants. This was the best yet.
We’ll announce results as soon as possible after the voting period ends December 10, 2023.
2023 Christmas Ornament Challenge Preview
in case of video difficulty, this post is also available on YouTube.
This video is a preview with ornaments submitted so far to the 2023 Ornament Challenge.
I cannot adequately express my amazement at the talent displayed. Each seems to show creative talent whether made by an expert or a novice.
Please do NOT vote for your favorites in this video. After the challenge completes, we will create a video with all ornaments and then ask for your vote. The voting process will be different this year. It will use a Google form for all votes.
Be ready.
If you have your ornament, please ensure you enter it to the challenge by EOD November 30, 2023.
Enjoy.