Woodturning, Burning, Coloring A Different Box Style
 This video is also loaded to YouTube, Vimeo, and FaceBook. Where best? Right here!
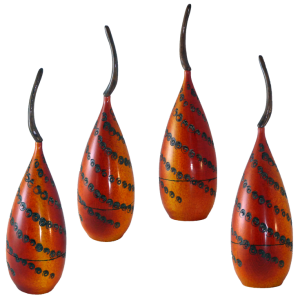
Our club challenged us to turn a box according to the style of Benoit Averly who demonstrated at the Utah Woodturning Symposium. His style included boxes with tall tapered lid textured and stained with a finial.
But I still like to put my own stamp on a project. Instead of texturing the entire surface with carving, I used my pyrography gear. Instead of staining the entire surface, I opted for a variegated red, orange, yellow surface.
My box is about 9 inches tall including the finial and about 2 1/2 inches in diameter. Colors are red, yellow, and black alcohol dyes. It is finished with rattle can lacquer. Red and yellow dyes were applied with a Richeson atomizer. Black dyes were applied with cotton Que-tips.
I built my pyrography power supply in a video:
The pyrography pen was built in a video:
Enjoy!
Handy Screw Chuck
 This video is also posted on YouTube. But you are already here.
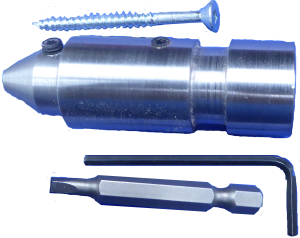
I used a screw chuck from Bert Delisle to make my apple. Several viewers asked for a closer view of the chuck. With Bert’s permission, here we are.
The screw chuck consists of
- The body which is designed to be held in a standard 4 jaw chuck,
- A square drive screw
- A square drive driver
- An Allen wrench to tighten the 2 set screws.
For more information, contact Bert Delisle via email at delislebert@gmail.com
Enjoy!
Woodturning Dye Practice – A Juicy Apple
 This video is also posted on YouTube, Vimeo, and FaceBook – Best right here at As Wood Turns!
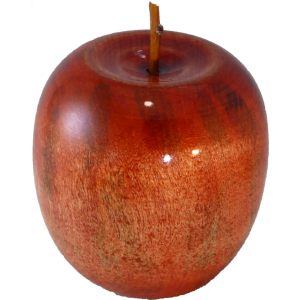
Part of my childhood was spent on a fruit farm. We grew a lot of apples – mostly red ones.
For this project, I decided to turn an apple. Too bad it is from maple wood. One tool that makes it easier is a screw chuck provided by Bert Desilse of Alberta, Canada. It is a metal piece that it held in place by standard chuck jaws. It contains a replaceable square drive screw that is held in place by a square drive bit. A very nice design.
For color, I used alcohol based red, green, and yellow dyes applied with cue tips and a Richeson atomizer. I sanded back much of the dye to blend it together and allow a mottled final color. When completed, I sprayed it with rattle can lacquer.
Enjoy!
Woodturning Wavy Flower Bowl Inspired By Ceramic Display
 This video is also posted on YouTube, Vimeo, and FaceBook. And, of course, right here at As Wood Turns.
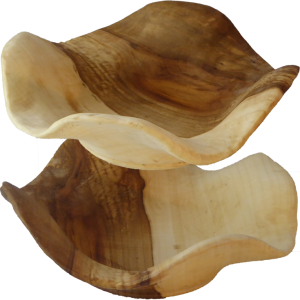
This project is inspired by a wall display at a hotel. The display looked like a field of flowers. My thought upon seeing the display – What can I do that is similar?
Here it is, a maple bowl with a wavy rim that makes a strong resemblance to a flower.
The major change is to leave a very thick rim that I could carve into a random wave.
My maple bowl is about seven inches diameter and about two inches thick.
Enjoy!
Your Woodturning Challenge – Turn A Sphere
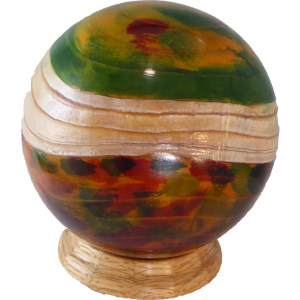 This video is also posted on YouTube.
I challenge every woodturner to turn a sphere by the end of July. Spheres are an essential skill. If you are a beginner, begin now. If you are experienced, get better now.
What kind of sphere? As long as it is or uses a sphere, anything goes. Between a challenge and a theme, I expect to see some great talent.
When finished, upload one still picture to www.AsWoodTurns.com/challenges by the end of July.
Resources for you to review: (click to follow link)
- Woodturning Essentials – Octagon Method For Perfect Spheres
- Woodturning A Perfect Sphere Into A Strata-Sphere
Enjoy!
Woodturning A Triple Loop Celtic Knot Pencil Cup
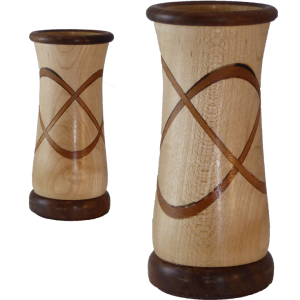 This video is also posted to YouTube, Vimeo, and FaceBook. Why go anywhere else but here!
This project video is a second pencil cup to answer this month’s club challenge. After I turned the first one, I felt a pencil cup would be perfect for a Celtic knot.
The process I follow does not restrict my knots to four loops. The process enables as many loops as could be desired. Eight loops is as easy as four except for the additional cutting and gluing.
After turning my wood down to a uniform cylinder, I measured the diameter. At my computer I drew a circle of the same diameter. Since I had decided on three loops, I drew a triangle to enclose the circle. I printed the diagram, glued it to scrap hardboard. After cutting out the triangles, I screwed them to the ends of my cylinder and applied a little hot melt glue to stop spinning.
After outlining my cylinder with triangles on my table saw sled, I hot melt glued blocks so that I could place it again with each turn.
After that the process gets repetitive. For each kerf, I hot melt glued a reinforcing board to the top of the cylinder in case the cut goes completely through the cylinder or enough to allow the cylinder to flex. Then make the cut, and glue in the accent strip. I used 5 minute epoxy for gap filling and setting time properties. With the glue hard, I cut away the excess accent wood and the reinforcing board.
With the knot complete, the rest is normal turning adding a top and a base.
Enjoy!
Woodturning A Stave Segmented Pencil Cup From Pen Blanks
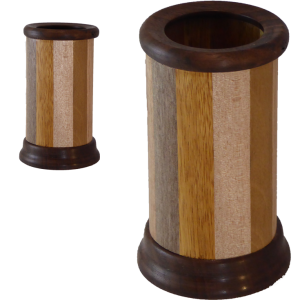 This video is also uploaded to YouTube, Vimeo, and FaceBook. Best right here.
This project video is a pencil cup to answer this month’s club challenge. While I could grab a chunk of solid wood, I want to do a segmented work. This time a stave segmentation.
My raw material is twelve pen blanks for the staves and some scrap walnut for a bottom and rim. My pencel cup is about five inches tall and almost three inches in diameter, finished with lacquer.
Each stave is cut to a trapezoid shape with 75 degree angles on each side. 75 is the complement of 15 degrees. 15 times 2 because it is cut on both sides, 12 staves is a complete circle.
I’m looking for a better stave cutting sled for my table saw. Please offer your suggestions. I used a Wixey digital angle finder to set my saw blade.
Enjoy!
Woodturning Essentials – Octagon Method For Perfect Spheres
 This video is also posted on YouTube, Vimeo, and FaceBook. Best right here!
My last video started with turning a perfect sphere then moving on to make it more artsy. However, I received many questions about how to turn a sphere. So, in this video, I’m slowing down and graphically illustrating the sphere turning process.
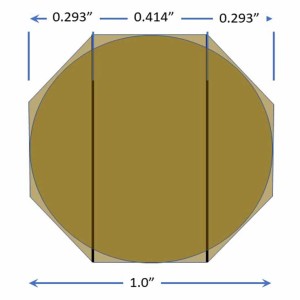
Three measures are critical:
1. Diameter – as measured on the work piece.
2. Octagon corners – 0.293 x the diameter
3. Octagon sides – 0.414 x the diameter.
Between the octagon method and simple cup center faceplates, anyone can easily master woodturning perfect spheres either as an end woodturning project or as a component to a more complex project.
After viewing this video go back one week to the previous video.
Enjoy!
Woodturning A Perfect Sphere Into A Strata-Sphere
This video is also available on YouTube, Vimeo, and FaceBook. Best right here.
I am inspired by the great work I saw at the Utah Woodturning Symposium. My way to praise some of the work is to emulate it. Such is the case with this sphere inspired by Vivien Grandoullier from the Instant Gallery. Essentially, I’m elevating a perfect sphere to a higher level.
But first I had to turn a perfect sphere from cedar using the octagon method. The octagon method helps to define the relative dimensions so that my eye is more easily guided to a perfect ball.
A little math yields two critical measures for the octagon. Starting with a cylinder, measure the diameter. Mark the diameter on the surface of the octagon, allowing for waste on the right end. Now two lines have defined the length of a cylinder equal to the diamter – the beginnings of s sphere.
Next mark a line in from each end mark a distance equal to 0.293 times the diamter. These two lines define the length of the side of the octagon and form its corners. Check this distance by multiplying 0.414 times the diameter. This is the length of one side.
Next waste off the wood outside the two outer lines down to a diameter equal to the length of one side (0.414 x diamter). At this point there is a tenon on both ends of your cylinder.
Remove the wood from each inner line at a 45 degree angle down to the corner formed by the spindle. This nearly completes the octagon except for the opposing spindles.
Now waste away as much of the spindle as possible while still supporting the work. If using a chuck, the entire right spindle can be removed.
Mark a line that divides each side of the octagon. If still mounted on a spindle, imagine the spot on the lathe’s axis in the center of the spindle.
Round off the wood between each of these new lines or end axis points. For the two ends, get as close as you can imagine.
Draw a line at the equator of the ball.
Remove from the lathe and cut away the remaining left and right spindles.
Remount the ball to a cup faceplate and the live center with a 90 degree turn. Pad the live center with a rubber stopper to avoid marring the surface. Gradually scrape to remove the ghost image at the top of the ball while leaving the equator line. Mark a new equator line.
Rotate the sphere another 90 degrees so that the new equator runs from headstock to tailstock. Gradually scrape to remove the ghost image at the top of the ball while leaving the equator line. Mark a new equator line.
Rotate the sphere another 90 degrees (3rd rotation) so that the new equator runs from headstock to tailstock. Gradually scrape to remove the ghost image at the top of the ball while leaving the equator line. At this point, the sphere may be perfect. If not, then repeat the equator, turn, scrap process as many times as needed.
For sanding, follow the same rotation process with each sanding grit.
For decoration, I soda blasted following the grain around my ball. Then applied paint, dye, and lacquer for a finish.
My sphere is just under 5 inches in diameter
Enjoy!
Dressing Up A Plain Small Mouth Bowl
 This same video is available on YouTube, Vimeo, and FaceBook. But you are already right here!
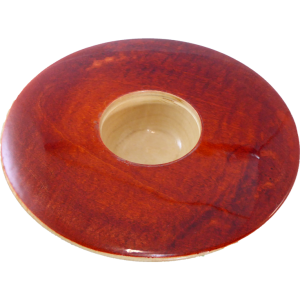
This project is a simple one. I had a block of wood laying around my shop. I think it came from the club wood raffle. It looked rather plain without a lot of figure. Perfect for a dyed bowl.
But why turn a normal bowl when I can turn one that is unique, totally useless, but pretty. So how about a small hollow, small base, very wide brim. The offset was to dye the wide brim surface.
The dye is alcohol based applied with a Richison Atomizer. My bowl is 7 inches by 2 inches finished with rattle can lacquer.
Enjoy!