What’s A Kuksa – Plus Lathe Mounted Belt Sander
 This video is also available on YouTube, Vimeo, and FaceBook. Best right here at As Wood Turns.
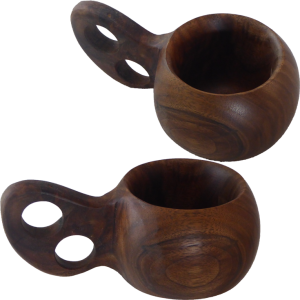
This month our club’s challenge was to turn a kuksa. What’s a kuksa? It is a drinking vessel from northern Scandinavia often carved from birch burl. However, I prefer woodturning over carving.
My kuksa is from walnut. Since my wood is less than three inches, I glued some pine to its top and bottom to give me room for tenons.
The process I followed was:
1. Glue waste wood (pine) to augment its thickness.
2. Mount between centers to rough turn and cut a tenon on the end opposite the sphere.
3. Remount with the tenon and turn the sphere using the octagon method to guide my eye.
4. Press the sphere end against the chuck jaws with the live center.
5. Cut a tenon on the sphere.
6. Remount using this new tenon and hollow the sphere into a cup.
7. Turn off the foot. There are alternative for this. I used my wooden chuck jaws.
8. Shape and sand the handle
9. Since this could be used as a drinking vessel, apply a food safe finish such as mineral oil and beeswax mix.
My kuksa is 3 inches by 6 inches and is 2 inches tall.
Enjoy!
Green Woodturning – Two Halves Turn To More Than A Whole
 This video is also posted on YouTube, Vimeo, and FaceBook. Best right here.
This bowl has been in process for seven months – more if you count time from harvest to when I started roughing the wood. When I started turning, my plan was to experiment with a project cut in half and reassembled. My wood was still very green or wet and needed to dry before final turning.
As I coated it with sealer, I did not think the profile looked very good and thought it might be better just to turn it into a typical bowl. However, as it dried, it also cracked in some end grain. Then the choice became firewood or go back to plan A and cut through the crack. It took seven months before I was sure it was dry.
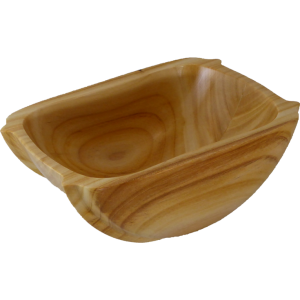
Now when dry, I approached it as I would another green turned bowl until it was time to turn the foot. Then I sawed it in half and glued the two halves back together but at the rim. Then after the glue dried, more sawing and a lot of sanding before finishing with lacquer.
Despite my early concerns with the shape, the bowl is a good profile and I would turn another the same way in the future. It is Cherry, 5x6x2.
Enjoy!
Woodturning Cottonwood Vase – No Last Word For The Worms
 This video is also posted on YouTube, Vimeo, and FaceBook. Best right here!
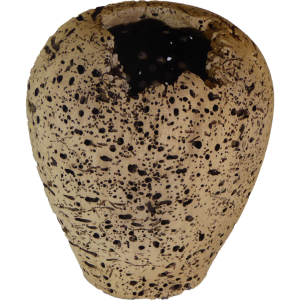
I was offered this wormy cottonwood at the club wood raffle. It looked pretty ugly and I could have swapped it for another piece of wood. But, I was curious whether I could turn something from it. It became a challenge piece for me.
In my shop, I could quickly see that it was going to be a problem. It was very light and fragile. Pieces had already broken off. How was I going to turn it? And turn it into what?
I knew that any pressure on the wood could shatter it, leaving me nothing at all. So, I glued it to a faceplate with wood glue hoping for enough adhesion to be able to turn it. As I began to rough round it, my gouge produced only brown powder – no shavings. This was going to be tricky.
As I roughed it, I decided to try for a hollow form, a vase. With the outer turning completed, I hollowed it with my DIY articulated hollowing tool. This tool is good up to about 12 inches in depth. More than that would require a different design.
When hollow, I sanded only with 80 grit sandpaper. I could tell that there was no firm surface to polish up. I tried to woodburn my signature but there was little wood that could take a signature. I applied walnut oil which this wood soaked up like a sponge.
As I turned it, I thought this must be like turning cork. When finished, I decided cork would be easier.
The worms did not get the last word – maybe the get the last laugh.
Enjoy!
Woodturning Bobbin For Wire Weaving Jewelry
 This video is also posted on YouTube, Vimeo, and FaceBook. Best place? – Right here!
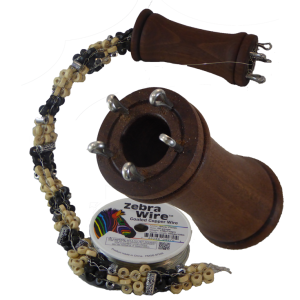
My wife asked me to make a bobbin for her wire weaving. Of course, a small 2×3 inch bobbin should be a piece of cake. However, the bobbin requires that 5 cotter pins be set in a circle around the hole that is through the bobbin.
The question became How do I drill five perfectly spaced holes. Often I resort to my computer to draw it. This time, I decided to try to use the indexing on my Vicmarc chuck. It is there – Why not use it? Except that I’ve never seen any way how the indexing is intended to be used.
I checked Vicmarc’s web site and did not find anything there. Hmmm.
I took a couple of pieces of scrap plywood and glued them into a right angle with a little bracing. Then drilled a small hole at spindle height. A ground blunt nail goes into the hole into the indexing holes. It worked.
But, I’d still like to know how Vicmarc intended these to be used.
My bobbin is 2″ by 3″ in walnut. The cotter pins are stainless steel.
Enjoy!
Woodturning Goblet With Captive Ring
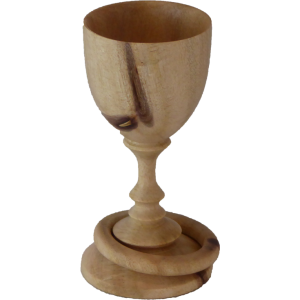 This video is also posted on YouTube, Vimeo, and FaceBook. But you’re already here.
I had yet to turn a captive ring. Similarly to any new dramatic technique, it seemed quite difficult and just a little impossible.
So, when I received this wood from Brent Ross, it screamed out “I’m a goblet”. I’m special; I can floresce. To complement the screaming, I added a captive ring.
When I can access a UV light, then I’ll test the florescence. Until then, it will be a nice goblet about 4″ tall and 2″ diameter finished with lacquer and having a captive ring to play with.
Enjoy!
Woodturning An Offset Slat Bowl – Round 2 – Not This Way!
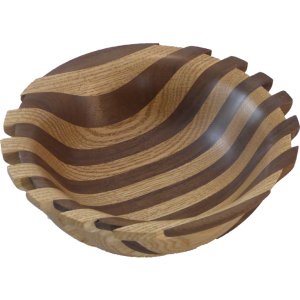 This video is also on YouTube, Vimeo, and FaceBook – but you’re already here so stick around.
In round 1, I only glued the slats for this bowl to top and bottom waste blocks. That did not work so well.
This time, I thought double stick tape would be just the thing to temporarily hold the slats together. Well, the tape did exactly that – held the slats together. However, it did not easily release its hold on the slats. I damaged some edges while separating the slats.
While I like this style of bowl, there has to be another way that will hold the slats together but also release them when necessary. I’m not there yet.
In the meantime, here’s another way NOT to turn this style of bowl. I like the result but not the process.
Enjoy!
Woodturning: This Slab Bowl Nailed It
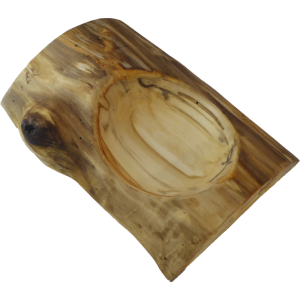 This video is also available on YouTube, Vimeo, and FaceBook. – Same video – best right here.
Wood raffles can yield strange wood. Such is the case with this project.
I received a slab of wood that I would usually throw away. This time, since it was already dry, I decided to attempt to turn it into something nice.
The bark was already gone and the end grain had been sealed. I trimmed the ends slightly and sanded especially the convex side to remove dirt and any remaining bark. I sanded first to see if there was any good color to the wood. I liked what I saw so I kept on.
I mounted the wood offset from center. This made it even more difficult because it never cam close to balancing. Even with a heavy lathe, I had to keep the speed low to avoid the lathe bouncing across the floor.
Double stick tape did not want to hold this piece. I think the flat surface was not as flat as I thought. Hot melt glue came to the rescue.
The piece is finished with walnut oil. It is 7 by 10 by 2 inches.
I’m pleased how it turned out.
Enjoy!
Woodturning A Vase In Style Of A Roman Canteen
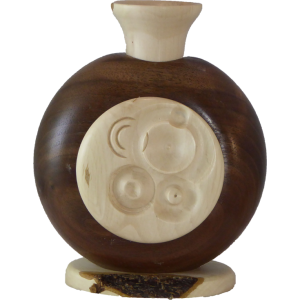 This video may also be viewed on YouTube, Vimeo, or FaceBook. But you are already here – stick around.
For some time now, my project to do list has included a Roman canteen since I like multi-axis turning. Still, I like to be practical. A Roman canteen is not practical compared to any modern canteen. However, a Roman canteen does present a multi-axis challenge.
As I considered these issues, I thought to convert the Roman canteen to a vase. It can be useful and still challenging. Then as I planned how to turn it, I realized I could, very simply, remove the most challenging features by having a separate base and neck. This is the best of both worlds plus omitting the significant sanding task required by a Roman canteen.
So, here’s my process for the canteen.
- Mount the wood and round off the perimeter.
- Cut a mounting mortise on the face.
- Mark the exact center top for the neck plus a center line across the face.
- Use the center line to align the wood to the drilling path of the drill press and drill for the neck.
- Remount using the mortise and cut a mortise opposide to the first.
- Drill out the center from both sides leaving a small flat inside the mortise for insurance when hollowing.
- Hollow the body. Having access from both sides was a significant advantage.
- Sand and finish the body.
- Turn decorative medallions to cover both mortise holes. I used the Infinite Axis chuck to turn unique medallions.
- Turn a neck. I used hazelnut – same as the medallions.
- Add a base. I used the edge of a hazelnut branch, preserving the bark edge.
Much easier than a Roman canteen but is useful as a vase, has unique medallions and different wood for accent.
Enjoy!
Links:
Woodturning An Offset Slat Bowl
 This post may also be viewed on YouTube, Vimeo, and FaceBook. Same video -Best right here.
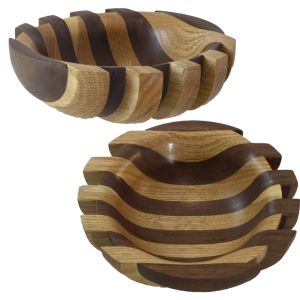
I was browsing turned wood images and saw a unique bowl made of slats that seemed to protrude from the brim. My first thought – How can I turn that bowl? After pondering several alternatives, I had to go for it. Now after making one, I have to change my process.
First, here’s what I did.
- Milled 11 slats 0.5″ thick, 2″ wide, and about 8″ long. 6 of walnut and 5 of oak.
- Alternated the slats and clamped them together.
- Prepared a waste block for the top and bottom. In this case, I sanded some scrap OSB since I needed a perfectly smooth surface.
- Applied white glue to the waste panels and clamped them to for a sandwich. Let dry overnight.
- Mounted the sandwich to a wood faceplate with double stick tape and live center pressure.
- Turned the exterior. Here’s where I had problems. Sanded and finished.
- Split apart the sandwich. It easily pulled apart.
- Reassembled the sandwich offsetting every other slat by about 1/2″ by eye looking to reform a visual curve.
- Glued the slats together. Let dry overnight.
- Glued to a wood faceplate to the bottom.
- Hollowed the interior and applied finish.
- Parted off the bowl from the faceplate. This was scary.
- Sanded a slight hollow to the underside and applied finish.
What I learned from this project is that the slats need more support side to side. In future projects, I will glue the slats together with a paper joint or double stick tape. Something that will come apart, be easily cleaned up and re assembled.
Enjoy.
Woodturning A Small Ash Bowl
 This video is also posted on YouTube, Vimeo, and FaceBook. But you are already here.
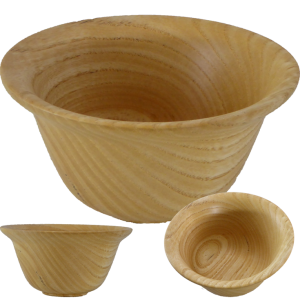
Last woodturning club meeting, I received another piece of ash from our wood raffle. It is even the same size as the first one. What to do? How about a similar bowl but with a different rim.
I always enjoy turning a bowl. This one was no exception and follows the same process: turn the exterior; hollow the interior; refine the foot.
Not much new, just a good turning experience.